Leaderboard

.thumb.png.f42da7287d0f269627e60f69c2f54ecc.png)

Popular Content
Showing content with the highest reputation since 04/23/2017 in all areas
-
I made a few changes to HeXEn 2017 to... well, update some of it. There's certainly a lot more that could be done, but I didn't feel like it was necessary to go all-out on it, since the disc is primarily just used for TSOP/modchip flashing and building new HDDs. But with flashing in mind, there were some issues that should have been addressed, which were 1) editing the EvoX M8+ BIOS files to disable the need for a DVD drive on boot up (because it makes no sense to keep that restriction enabled) and 2) removing the ability to flash iND-BiOS 5004.06 (F only), since it is apparently broken and just bricks the TSOP/modchip. Full changelog: - Changed the default.xbe's title to "HeXEn 2018". - New menu background image. - Main menu's network type is now set to DHCP. - Updated all EvoX M8+ .bin files (including sharp.bin) to remove the DVD drive check by default. - Removed iND-BiOS 5004.06 (F only) because it bricks the TSOP/modchip it is flashed to. - ind-bios.cfg now supports 480p by default. - Corrected an error which prevented the sharp.bin BIOS file from being copied to the HDD. - Partially rewrote the TSOP/modchip flash menus to make things more clear and to correct spelling/grammar. - Updated XBMC to include JCRocky5's 480p Game Loader scripts (useful if you have a 1.6 Xbox, otherwise it can be ignored). - Updated Chimp261812 to JCRocky5's latest release. - 1080i support is now disabled by default (because it slows the Xbox down if enabled). - UnleashX .xbe file replaced with a patched version that doesn't automatically create UDATA folders for all .xbe files it sees on the HDD. -Updated the main menu's skin.xml file to display more system information to the user (on the right-hand side of the screen), and changed the color scheme of the options menus, dialogue boxes, file explorer, keyboard, etc. to better match the background image (no more of UnleashX's default ugly blue scheme clashing with it). - Various other spelling and grammatical fixes. - Other general housekeeping. As for the rather bland new menu background, I had to go for a very minimalistic design, because I suck with Photoshop, lol. It gets the job done though. OGXbox download link. MEGA download link MediaFire download link32 points
-
OGXBox Installer 2021 THIS INSTALLER DISC ONLY WORKS FROM A BURNED DVD DISC, NOT MOUNTING THE DISC IMAGE SAVED TO THE HARD DRIVE Made because ... ! First of, you have the choice between two versions. 1) PBL which uses Phoenix Bios Loader and 2) NonPBL without the Phoenix Bios Loader. Both versions aim mainly for ModChip/TSOP users. So you don't have the options to softmod. If you want that, go with Rocky5's Softmodding Tool. Why using this this instead hof HeXEn/TruHeXEn or Slayers? Well, good question and here is the answer. It's faster as all of them. It dosn't has faulty bioses on it. It's up to date and it offers way, way more to install as any of them. So you have planty of Apps, Dashboards or Emulators to install and a huge amount of bug free bioses (ModChip and TSOP incl. Winbond). It's simple build without any fancy code or the need of copy stuff over and over again. It's clean by default which means no temp files will left behind. You have planty of live apps you can use or just test before you install them. Just give this installer a chance, test it and I think you don't use anything else again (except for softmodding which I don't plan to integrate at all.). NOTE: Use folder links below to download the latest OGXbox Installer 2021 - v1.5.4 archive or other supporting files. 1 ) OGXBox Installer 2021 UX PBL v1.0.0 MD5 for the v1.0.0 ISO: b844a24f31c0c8f41325e783d50f9d1a MD5 for the v1.0.0 RAR: 50ae7369f08a972601c4c75260965532 Download from 1fichier : https://1fichier.com/?44oryacyh292q6t7rbzd Folder link for updates : https://1fichier.com/dir/mX1kipIz Download from Mega : https://mega.nz/file/AZ9zESba#otk8Ckf5LlvkKkw1ty4GIsVyDRnxhuCfZu4M6YqLC4w Folder link for updates : https://mega.nz/folder/xUl13A4B#d_RMbhNrNA81QhgwoaUv4g 2) OGXBox Installer 2021 UX v1.0.0 MD5 for the v1.0.0 ISO: e82dacd9b36f496e85c98b3935462f52 MD5 for the v1.0.0 RAR: d463ac6e8ce9829469c962b790f8d8e0 Download from 1fichier : https://1fichier.com/?52xlot8c5ms9e1rb5n9e Folder link for updates : https://1fichier.com/dir/mX1kipIz Download from Mega : https://mega.nz/file/YA8lHQzJ#VOazKVrHL6oZ9qW0ezyEM3U3hs38_-w5OfOkLCMvX-0 Folder link for updates : https://mega.nz/folder/xUl13A4B#d_RMbhNrNA81QhgwoaUv4g Finaly, because i don't have the permissions to edit this topic later, I have included folder lins for Mega and fichier where you can find updates. Just bookmark them or this topic (I will do a post in case of an update, what ever suits you better. If you have a question or you need help, feel free to ask and i will respond asap. And if you find a bug (which i don't hope) or you have a suggestion, which could make this disc better, let me know, I'm always interested in making things better. PS. Using this DVD as a Frisbee is prohibited! Use other installer for that.22 points
-
Well the “Xbox artwork installer” is out, although it’s only on my downloader that comes with XBMC-Emustation and XBMC4Gamers. Currently prebuilt is 1072 Games with full artwork and synopsis information. There is more artwork done but that’s for specials and homebrew/emulators eg... these aren’t part of the installer. But you can download and manually install them from the github link below. Also a big thanks to everyone who scanned the disc and sleeves of all the Xbox games over at Emuxtras. If you want to make your own artwork or manually install the artwork you can get everything you need here. Link: XBMC4Gamers Artwork Github Full artwork source, 23.1GB worth so it’s big :eek: (removed, as to many downloads effect downloader and all files on this account) Link: Full Artwork Source Google Drive (23.1GB) Here is a preview of said artwork prebuilt ready for the Xbox. Link: 007 - From Russia With Love22 points
-
Intro Since the beginning of time (2004) it was known that the 1.6 was missing the unpopulated footprints for the extra 4 RAM chips and this made the upgrade impossible. I was thinking recently that if all the signals for the extra RAM chips are still available on the board, we can add RAM to the 1.6 by just connecting all the necessary signals. After the tutorial segment I'll go into why this mod works. I'll also post a video on YouTube at some point. Be warned: this is more difficult that a 1.0 - 1.5 RAM upgrade Tutorial Required items Everything mentioned in the 1.0 - 1.5 RAM upgrade tutorial: https://consolemods.org/wiki/Xbox:RAM_Upgrade 4x 90mm long mod-wire. I used enamelled wire from a transformer. ~8 hours spare time Step 1: flash the modified XBlast OS BIOS XBlast OS (as a BIOS) is super helpful in doing this install correctly. It will boot with any number of extra RAM chips and includes a test for the additional RAM. XBlast OS will not show the 128MB test option on a v1.6 Xbox, so I've gone ahead and rebuilt it from source with that check removed. xblast_os_v0.60.bin Alternative Download Link: https://mega.nz/file/eeAwTZKQ#aaFcbACj3htA6cEtKwoiy1L7uK93o4YwUSqkGBEsUz8 If you don't trust my build, this is the line of code that needs removing: At this point, I suggest booting it up and running the test. The test is under Settings > Tools > 128MB RAM test Step 2: Remove the motherboard from the Xbox Step 3: Place the new RAM chip on top of an existing chip You'll want to solder down the corner pins first to get a good mechanical bond and so that you can adjust the alignment. I do this by pushing down pins 30 and 31 and soldering them down to the chip below. Then I check the alignment of the rest of the pins. If it's bad, then the chip can be nudged into position while reflowing the two pins. Then solder the two pins opposite. Step 4: Push down the rest of the pins Except pin 28! That is the chip select pin and it is unique for each RAM chip. Leave this pin floating in the air and don't solder it yet. Pin 30 is marked on the PCB. The pins come in a kind of ‾‾\__ shape. When you push them down, the whole pin will rotate around this end -> ‾‾\__ . I like to also push down the tail ‾‾\__ <- of the pin to get more contact with the chip below. Step 5: Start soldering all the pins Very little extra solder is required. Use lots of flux. I like the tacky flux that usually comes in syringes. I also like the drag-soldering method. If there's any excess solder, you will get shorts between pins and this extra solder can be wicked away. The new pins won't naturally touch the pins below even after pushing them down. Step 6: Check for shorts and missing connections For the first pass, I like to go in with a microscope and nudge each pin (of the new chip) with a cold soldering iron tip. If the pin moves easily, it is not soldered. Also check for shorts at the same time. If you have the patience (and want it to work first try without frying your Xbox), check for shorts and continuity with a multimeter. I skipped this the first time and got bitten! Best to clean the pins and pads with IPA before checking with the multimeter. Step 7: Add the chip-select wire First, figure out which bank you are adding: Then, find the chip-select solder point: Bank 1 CS is left of the label for C4P10 Bank 2 CS is between the labels for C4R12 and C4R13 Bank 3 CS is left and above the label for C4P21 Bank 4 CS is between and above the labels C4R1 and C3R1 For banks 2 and 3, the chip-select wire can go through the hole to the left of the GPU. For bank 2, 90mm may be too short, so check the wire length and cut it as short as possible. I removed the GPU heatsink to access this hole. At this point, it should look something like this: Step 8: Reassemble and test in XBlast For a quick test, I don't bother with adding the fan, GPU heatsink, HDD, or DVD drive. The test in XBlast should look like what I first posted on reddit: If the Xbox reboots twice and FRAGs, check the bios selection (if you have one available). A normal BIOS will not accept between 1 and 3 extra RAM chips. If the Xbox reboots three of four times (and it's faster than a normal FRAG sequence) check for shorts. This happened to me. Step 9: Repeat for the other 3 chips The first one is the hardest. Step 10: Reflash with your favourite BIOS Some 1.6 BIOSs won't support 128MB. The X3 BIOS works just fine and it's the only one I tested so far. xblast_os_v0.60.bin19 points
-
UPDATE 24/08 The majority of the art in this thread is now included in the Official Artwork Installer available in the XBMC4GAmers/Emustation downloader. There are still some packs that are exclusive to this thread ANYTHING ADDED AFTER 01/09/24 IS NOT CURRENTLY IN THE OFFICIAL INSTALLER! I am also still working on the Homebrew games that still have no art. This thread contains all the custom _resource packs I have created for XBMC4Gamers. Each pack contains the various art needed for XBMC4Gamers, 3D covers etc along with a default.xml for the synopsis views. XMBC4Gamers Custom Art Download Here Update 11/09 Added Arcade Rips section, After Burner 1 & 2 and Space Harrier are the first to receive full art packs there. These are based on the Arcade Rip pack from Dominator over at EmuXtras. There is art for some of these games included in the official installer but they are missing certain pieces, my packs here will use the existing art (where available) and fill in the gaps. Where no existing art is available the packs will be fully custom art. These will also use the default.xml synopsis files provided by @NokSueCow. Update 25/09 @Rocky5 identified an issue with screenshot sizes in some of my packs, He kindly corrected them all on the Official Installer (Thanks ). I am going through and reupping the packs here with the corrected files, Apps are all done. The rest will follow over the next couple of days. Update 04/10 Added another BMX XXX alt artwork, this one uses the image found on the reverse of the official cover. Update 05/11 Added art for Sonic Nexus (Homebrew) and the next 2 games in the Arcade rips pack, Joust 1 & 2 and King of Dragons. Also added an art pack for the Prototype of Stargate SG-1 The Alliance. Credit to @Kracker642 on vgboxart.com who did the great work on the cover i based the pack around. Update 20/11 47 new packs added, most are for the Arcade Rips section (some are using the artwork from the officail installer but have had the missing screenshots, fanarts and preview videos added) but also packs added for Coinops 8 Lite/Massive/Tate Ed and Visionary 5 emulator sets. This means the Arcade rip set is almost complete. Only a handful left of that set left to do. Update 30/11 Art pack for Dead or Alive 3++ mod added to download link. Update 06/12 Art packs added for Street Fighter 2 - World Warrior, SF2 Champion Edition and SF2 Turbo - Hyper fighting in the Arcade Rips section. Also added a apck for Hydro thunder. This uses the art from the official installer but with the missing fanart, screenshots and preview video added. Update 07/12 Art pack added for the new homebrew port of SDLPoP (Prince of Persia) from Haguero over on the Xbox Scene discord. Update 10/12 Art packs added for 11 more Homebrew titles. I tried to use art from the homebrew game/dev wherever possible, this means that some art packs look a LOT better than others lol.... Depending on how much effort the game dev put in their games art Update 12/12 Art added for the Homebrew games, Chess Street Fighter, Dead Babies Xtreme and DefendguinX. Update 29/12 Art pack added for the new homebrew port "ClassiCube" Update 01/01 Art pack added for new homebrew release "Matterrun". Update 03/01 Art pack added for homebrew "Dodgin Diamond 2X" Update 06/02 Art pack added for the prototype Halo 2 E3 Multiplayer demo (Zanzibar). Credit to @Swagger for sourcing al the art used to build this set. Update 12/02 128mb Fanart folder added to download link. See post on page 11 for details. Also added art packs for the prototype games Starcraft Ghost and Shadowrun. 128mb fanart is also available for these in the 128mnb Fanart folder. Update 21/03 Art pack added for the Japanese retail release Zan Kabuki. Update 22/03 Zan Kabuki art has been updated, new art created from a much better source. Update 25/03 Added new section for Artwork made by DarkDestiny on Xbox-Scene. Main Cover image made by him, discs fanart made by me. Most also include preview videos. Update 2 25/03 Added previews videos to some of my older packs. The packs for Avalaunch, UnleashX/Alt, XblastOS and XCAT form the Apps section, the Atari Jag pack from the Emulators setcion and the Zsnexbox pack from the Xenon Xyanide section. Update 28/03 New art added... Homebrew - Duck Shoot, Fuel Crisis, Furby Kill 3D, Retail - Hyper Sports 2002 Winter (Japan), Apps - Xbox Online Dash. Update 08/04 New art added... Homebrew - Hannah, GladiatorX, GluttonX. More ALT packs made by @sweetdarkdestiny. These previews are small to keep the file size down on the thread. To use the art packs just copy the _resources folder to the game/app root folder, run XBMC4Gamers, go to the game/app, push the White button and select "Refresh All Info" Newest Packs (All include screenshots and a preview.mp4) Emulators Hypervision DosXbox Win3.x CoinOPS 8 Gems HyperVISION 5 Gems Coinops 8 Lite Coinops 8 Massive Coinops 8 Tate Ed. Visionary 5 Homebrew 2H4UX Aero Blasters 2 AmphetimineX Arcadian Tactics Divi-Dead Sonic Nexus SDLPoP AtomX/2 BakuBakuX2 Ballzy BarrageX Battle Pong X BattleBlocks X Biniax 2 Blasteroids X Borg Nukem Braxil 2014 Breakout X3D Chess Street Fighter Dead Babies Xtreme DefendguinX ClassiCube Matterrun Dodgin Diamond 2X Duck Shoot Fuel Crisis Furby Kill 3D GladiatorX GluttonX Hannah Arcade Standalones After Burner After Burner II Space Harrier 720° 1941 1942 1943 1943 Kai A.P.B Arch/Spy/Xeno Avenger Badlands Bionic Commando Black Tiger Blaster Block Block Capt Commando Champ Sprint Commando Cyberball 2072 Eco Fighters Exed Exes Final Fight Forgotten Worlds Gauntlet Gauntlet II Ghosts n Goblins Ghouls n Ghosts Gun Smoke Hard Drivin Joust 1 & 2 King of Dragons KLAX K.O.T.R Last Duel Legendary Wings Mad Dog McRee Magic Sword Marble Mad... Mega Twins NARC Arcade Offroad Thunder OutRun Paperboy Pit Fighter Pirate Ship Hige. Primal Rage Quiz/Dragons Race Drivin Rampage Rampart Rush 2049 Rush the Rock Section Z Side Arms Smash TV SON SON Street Fighter SF2 WW SF2 Champ Ed SF2 Turbo HF Strider STUN Runner Super GnG Super Off Road SOR Track Pak Super Sprint Super SF2 T.. Speed Rumbler Three Wonders Tiger Road Toobin Trojan Varth Vindicators Vulgus Wizard of Wor Xybots Hydro Thunder Retail/Unreleased - Specials V8 Supercars Australia 3 (also ALT available) The Vatz BMX XXX Alt2 Stargate SG-1 The Alliance DoA3++ Halo 2 E3 Multiplayer Demo Starcraft Ghost Shadowrun Japanese Retail Zan Kabuki Hyper Sports 2002 Winter DarkDestiny Artwork packs Avalaunch EvoX LithiumX MednafenX NES (2 Alts also available) MS Dash (1 Alt) XDK (1 Alt) MXM PrometheOS Tools tHc Lite UIX Lite UnleashX Virtual JaguarX XblastOS XCAT Zsnexbox XCAT XBox Online Dash Xbox Online Dash ALT (Yes I learnt that you could have a shortcut directly to this dash today as well) UAEX WinUAEX XBMC4Xbox XDON Folder Icons Project Deluge Prototypes These resources packs have been put together by @NokSueCow I will add a few examples below but the entire collection is available in the download links in this thread. And here is a short video of a selection of them in dash. The below is from NokSueCow- "There are 349 Prototypes available for the Xbox from Project Deluge. I only made resource sets for the ones I thought people would care about. If the game was released I didn't create synopsis for it, with the exception of World Champ Pool 2003. It's actually a localized version of Snooker, and is explained in its synopsis. I used Rocky's downloader artwork for the games that were released. I removed their screenshots and preview videos, as they wouldn't be genuine, and trimmed their synopsis to reflect the disc builds. There are 17 total games that I spent time on, and are displayed in Nikey's video preview of the pack. 8 cancelled, 3 E3 Demos, 1 ComicCon, and 5 XDK Recovery's. American Idol loads and plays, Cars plays, Freedom Fighters plays, Hail to the Chimp requires a debug bios, He Man only plays in 480p, Made Man requires debug, Pacman Rally plays but only the hud is visible, Street Hoops plays, I couldn't get Marvel Nemesis, The Red Star, The Vatz, or US Open to play, possible debug requirement, and only 1 of the 5 XDK's would play, build 5028. Freedom Fighters doesn't have a preview video, the game files just don't have any. I couldn't get some of these to extract, either. I tried Repackinator, Mulleter, Extract-Xiso, CXbox, Qwix, nothing worked. The xiso to hdd script didn't work as well. Most of the game folders had to be trimmed for FatX, so you won't be able to just drop these into F/Protos and install easily, unfortunately. On pc, the whole set with resources take 838GB. And some of the pics of the physical game discs were taken at a weird angle, so it was hard to make it look perfect in photoshop." Anything above this text has been added AFTER 01/09/24 and are NOT yet included the Official Artwork Installer I'm slowly working through ALL the missing art for Homebrew games/ports (except standalone BOR games - Too many of them and BOR is better as a pack anyway ) Xenon Xyanide Emu Pack Art Apps Avalaunch Bios Checker BoXplorer Cerbios Flasher Disc Config Magic Controller Tester DVD2Xbox Enigmah Insignia Setup Insignia Setup Evolution X Chimp HDTV Test App Mouse Test Unleash X Xblast OS Xbox Version Detector Xbox HD+ Xbox Watch XBpartitioner XCAT XBcommander Xenium Tools XBMC4Xbox Xored Trainer Launcher XToolBox PrometheOS Tools UnleashX ALT Emulators Amiga CD32 Coinops 6 Coinops 6 Adult Coinops 6 Adult Alt Coinops 8 Adult Coinops 8 Adult Alt Capcom CPS3 DosboX Killer Instinct 1/2 Vectrex Mortal Kombat Arcade PC98 Ninja Atari Jaguar Final Burn Consoles SAM Coupe Big Ass Emulator Discs BAED (Spicy) TI-99 Unreleased Games Lamborghini Re-Volt Dinosaur Hunting (ENG) The Fast and the Furious Project Velocity Storm Riders KoF '96 Re-Bout Halo 2 Alpha Halo 2 Beta Retail (Alts) EXChaser (JPN) Tenchu 3 (JPN) DOA 2 Ultimate Bad Boys 2 PAL DOA XBV Nude Edition Playboy The Mansion Playboy The Mansion ALT BMX XXX BMX XXX ALT Larry MCL Alt Larry MCL Alt2 Homebrew Games and Ports Mario 64 The Griffon Legend Hydra Castle Labyrinth Sonic CD StepmaniaX ExUltX Jump and Bump PowermangaX CcelesteX LOZ-Navi's Quest Zelda 3 Tomb Raider 2 Tomb Raider 3 Blobwars Bubble Trouble Catacombs 3D Divi-Dead Doom Legacy Legend of Edgar Giddy 3 Kobo X Me & My Shadow Nam 98 Noiz2sa Doom Odamex Open TTD RawX Reminiscence RoadFighterX RockbotX RuXia 2018 Secret Maryo Chronicles Spear of Destiny 1 Spear of Destiny 2 Spear of Destiny 3 XDink Maze of Galious XUrQuan XVVVVX Hexen 2 Portal Of Praevus Xbox Exhibition Discs Xbox Demo Discs (56 discs in total) Root Source Thumbnails (these are used in the Root menu) Can make others of these on request Icons for Alphabetised Games Folders # A-Z in full set, each one must be renamed to folder.jpg and dropped into correct lettered folder. The above two sets go really well with the OGXBOX theme available from the XBMC4Gamers downloader. Here's a quick peek at how it all looks. XMBC4Gamers Custom Art Download Here Open to requests for any art you might be missing from your setup if it is not already in the official Art Installer. Credit due to @sweetdarkdestiny for art used in a LOT of the App packs and @RoofTop for his pack over at Emuxtras for the Emulator artwork and some of the art used for some Homebrew games/ports. (I presume its the same Rooftop here lol). Also credit goes to @Bomb Bloke for some great work providing me with a great starting point on a few of those homebrew covers. @NokSueCow Has been working on the default.xml files for a lot of homebrew and emulators, making sure they are up to date and correct. I will update the art packs with his files as and when he completes them. The exhibition discs and Xenon Xyanide emu packs are already done. Huge thanks to @Rocky5 for doing all the hard work in creating the Photoshop templates used in creating these _resource packs and for the absolute best modern Xbox dashboard available today, XBMC4Gamers. The next step in my project will be going through all this art and the art in the official installer and adding screenshots and preview videos where missing. I now have a capture setup ready to go16 points
-
Thanks guys Will post a full tutorial shortly and a writeup on the technical side of course.16 points
-
Long awaited update is now here, a lots changed. Grab it from the downloader or my GitHub. Changelog Download prebuilt version16 points
-
I don't like that the Startech SATA-IDE adapter doesn't have a case, so I designed one for it, and thought I'd share it. It's printed in two halves and snaps together (if all goes well). sata-adapter-case.stl16 points
-
Here is a step by step tutorial for making a high quality component cable using an Xbox 360 component cable and a standard original Xbox Composite AV cable that pretty much everyone will have. I was looking for an original Xbox component cable recently and my options were a cheap Chinese non brand component cable, a monster cable or an official HD kit. The latter being crazy expensive nowadays. Since I have a background in electronics I thought why not make one from a 360 cable if a standard AV cable has all the pins present but not wired. I did a quick Google and I am not the first to have done this but thought I'd throw up this step by step for anyone who isn't afraid of some small soldering. You could just splice a 360 component cable onto a Chinese component cable but this way you have a pretty much official cable that is very high quality.. Here goes. Get yourself a 360 component cable and a standard AV cable with the 3 RCA plugs, red, white and yellow. . Cut the head off your original Xbox AV cable. Take a hair dryer to it now to make the plastic sleeve malleable and remove the sleeve from around the socket. Use a screwdriver to help pry it off if needs be. It should come pretty easy but don't be too rough as we want to get it back on at the end. Now loosen off the clasps around the cable by prying them out with a screwdriver and then with a long nose pliers if needed. Again don't go too mad as we will need to squeeze these back on at the end. Now you should be able to remove half this casing. The socket itself with the pins will still be secured inside. Update: before opening the metal casing as per the following instructions and image you can actually remove the pin connector without opening it, you can push the pin connector out. This is the preferred method but I am leaving the previous instructions here. Now take a long nose pliers and carefully separate the remaining casing. Do this carefully and slowly just enough so you can remove the pin housing. The less you bend this the nicer it will look at the end. Take note of the way the two sides lock into each other. The little tabs click in from the top. So grab the side with the tab and pull up. So pull up the right hand side then turn it around and again pull up the right hand side. Patience, remember this has to go back together. Try to open this up less than I have here if you can. Don't worry about the black shield cables soldered on to the casing. We will be removing these anyway. Once you get the pins out if you're lucky you'll just have a piece of black tape over the pins. If you're unlucky you'll have a blob of hot glue over them both sides. Don't despair....you can get this off with some small effort. If you are met with the glue you can again soften it with a hair dryer and get a screwdriver and gouge the majority of it off carefully. I would then get some sticky stuff remover and spray it on and leave it for 5 minutes. Then carefully scrape lengthways down along each pin with the corner of your small flathead screwdriver until it is all gone. Take your time and make sure it's all off. This is the stuff I use for that. Here is the pins that the lucky people will get with the tape. Lovely clean pins straight from the factory. Now take your 360 component cable and cut the head off this just below it's socket and get the sleeve off your original Xbox socket and put it onto your 360 cable. Just keep turning it until it goes on. It's pretty much the exact fit. And a second time...PUT THE SLEEVE ON YOUR 360 CABLE BEFORE YOU START TO SOLDER!!! You do not want that sinking feeling when you've just done lots of tedious work to find you've to de-solder everything because you forgot to put the sleeve on. Now take a sharp knife and about 2 inches back from the end score a ring around the insulation. Take your time and bend it a bit and let the sharp knife do the work. Don't go mad here. You want all of the shields inside to be intact. Again. Patience. You'll be met with a load of cables with a braided shield around them. The cable with the colour is the signal every time and the shield wrapped around it is that signals ground. It is possible you could find two cables, a signal and ground both insulated and not braided shields. Either way it's the same thing and actually easier if you don't have the braided ones because the braids are trickier to solder because they are bigger. You will also have some white fibres up the middle. Cut these off. And an overall screen, the one that's on it's own. Don't cut this off. For each cable push the braid down a bit to loosen it and make a hole as near the base as you can by separating the braid and pull the coloured cable through. Then pull the braid and twist it nice and tight without breaking it. The idea is to get it as thin as you can. When you've separated each signal from it's screen measure it against the length of cable already soldered onto the original Xbox pins and give yourself a bit extra and cut them all. Strip the ends of each signal. Only about 3 or 4mm and be careful not to pull out strands while stripping the insulation. Make sure there are on stray strands by giving the ends a little twist and tin the ends and also tin about a half inch or so of each braided screen. Try keep them tight with no loose strands. To tin put a small bit of solder on your iron and use this to heat up the wire and flow the solder with the transferred heat of the wire, not the iron. This makes the strands basically into a solid cable. Now desolder all on the cables from your original Xbox pins. Also I highly recommend you use Weller solder or similar decent quality solder as it will make life easier than using cheap stuff. Now to the good stuff. I have taken this diagram from an online search and did not create it myself. It is the best diagram out there and credit to the Creator. I will find the name of the guy on YouTube that has done this and credit him. So you have already tinned your cable ends and braided screens. Now you want to go and tin each pin you will be using. Just a tiny bit of solder and heat the pin for a second. Do not stay on the pins with your iron for anything over 2 seconds or you'll melt plastic. Take your time. Everything one by one. When you've tinned all the pins all you need to do for every solder joint is put a tiny bit on your iron and press down gently and the tinned cable will marry into the tinned pin. Do not use extra solder, no need. The tiny bit I suggest for your iron is simply to transfer the heat. Go ahead and tin pins 1, 2, 6, 7, 9, 10, 11, 12, 14, 15, 18, 19, 21 and 22. That is for audio right and left signals and grounds, two jumpers for the mode and red, green and blue signal and grounds. To note the connector I've used here is one that was covered in hot glue so it looks a bit bashed up but is electrically sound. Audio right - red to pin 1 and it's ground to pin 2. Also make 2 small jumper wires and tin them as previously. Solder these as shown to pins 6 and 7. Bend the jumper wires around to the other side and solder pin 6 jumper to pin 18 and pin 7 jumper to pin 19. Ignore that strand to the right, that is the overall screen and it's not soldered to a pin, just a bad picture. Blue signal to 9 and it's ground to 10. Green signal to 11 and it's ground to 12. Audio left - white signal to 14 and it's ground to 15. Be careful that you don't mix up the pink with the white, they look very very similar. Last but not least the pink signal wire to 22 and it's ground to 21. Careful with this one. All the rest were 'signal, ground' and this one is 'ground, signal'. Tape up the yellow cable. Nice to have a spare socket at the end of your cable so you can fix this in years to come if one of the rca plugs every gets broken you can solder the yellow up instead. Take the yellows ground and twist the thin overall ground wire around it. Bend it as shown and then tin them together with some solder. We will use this to ground the metal housing on the plug. Scratch up this part on the plug housing with a screwdriver. Now turn your iron up a touch if needed and flow solder onto the part you just scratched up. Solder the screen from the yellow that we tinned together with the overall screen to this part of the case. Cut a strip of electrical tape. The width of standard electrical tape is perfect to cover the pins. I recommend you do this instead of hot glue to insulate the pins. At this point plug it in to your OGXbox and see does it all look good. (Troubleshooting tips at the bottom of this post if it doesn't look quite right) Put this guy back into the other part on the plugs housing and carefully crimp back on the cable grips after around the outer insulation. If you were careful taking apart your plug top earlier you will be happy right about now. If you weren't don't worry, just get a long nose pliers and carefully form it all back together. Remember these tabs click in from the top. They won't sit right if you try click them in from the under side so you'll have to do a touch of light convincing with a long nose pliers again. Be careful of the pins inside now. Don't want to break it now after all of that. Don't lose the cool once they are almost snug you can put a bit of pressure on the tabs with a screwdriver to secure the housing. Once it is fairly solid slide your sleeve back down to cover it up. Now what you have is a top quality fully Microsoft component cable for your OGXbox. In my opinion it's better quality by a mile than the old HD kit and and the monster cable. It's also two fingers up to the cretins that want 70 quid for a cable. You'll get a brand new 360 component cable for around the price of one of those horrendous terribly shielded Chinese component cables and everyone has an AV composite 3 plug standard cable lying around. Also the 360 cable is about 2 metres long. Hope this is of some use to someone. I originally threw a few of them pictures up on the Facebook group but thought I'd post it up here as a reference for anyone who is interested. TROUBLESHOOTING: When you have finished soldering all of the pins do a continuity test with your multi-meter between each pin that are next to each other, You may have one strand from the shield bridging the pin next to it. If this is the case you can try run a sharp knife between the pins to separate any stray strands. A quick multi-meter test is to test between each tip of each RCA plug to the pin you soldered for that signal on the plug. Also check the tip of each against ground (outer ring or barrel the of RCA) make sure there is nothing bridged out. Note that all ground will be connected together. If you plug it in to your OGXbox and it doesn't look right, go back and check each cable you soldered against the diagram again and if needs be reflow any dodgy joints. If you plug it in to your OGXbox and you are missing a colour again go back and check your wiring/soldering. The colours are RGB (Red = Pink cable, Green = Green cable, Blue = Blue cable) For example if you see only Greens and Blues when you load up a game the issue is with your Red colour (Pink cable) and you may have mixed up the ground and signal. The same is true for any colour you seem to be missing. Also do a test of the Audio Right and Left by plugging one out at a time and see do you still have sound. Any issues, the fix will be as above, re-check your wiring against the diagram and re-flow if necessary. Try the cable with a game you know well so you know how it should look colour wise. If it all looks and sounds good close it all back up and enjoy!! Note also that there is a perfectly good optical audio pcb inside the Xbox 360 head, maybe someone could have a go getting that usable. You can also connect the yellow to pin 24 and it's ground to 23 instead of connecting ground to the overall screen and leaving yellow spare. I rather keep it as a spare, means your cable will last long into the future and I don't ever plan on using it as a regular yellow, red and white composite.16 points
-
Cerbios Bios Mirror (Updated) Current: 2.4.2 The Dogs Are Back From Their Vacation (Fixed Splash Screen) Improved Dual HDD Support. (DriveSetup = 3) Updated UDMA Settings In INI To Support Both HDDS. Please Ensure You are Running Latest Cerbios.INI New UDMA Settings: ; Set Master Drive UDMA mode 0-6 on cold-boot UdmaModeMaster = 2 ; Set Slave Drive UDMA mode 0-6 on cold-boot (Enable DriveSetup = 3) UdmaModeSlave = 2 Released Updated Version Of LithiumX Which Allows Browsing Of 2nd HDD Additional System Stability Improvements. .........................:Dual HDD Support Info?:........................... This Is A First For The Original Xbox And You May Encounter Some Bugs. Please Report Your Test Results In Our Discord Room For Future Improvements. To Custom Format Your 2nd HDD You Will Require FATXplorer 3.0 beta 32 or Higher. This Can Be Downloaded From The Below Link. https://fatxplorer.eaton-works.com/3-0-beta/ Existing Partitions Are Supported With Dual HDD Configuration. This Includes Stock HDD or Cerbios Formated Extended HDDS * ....................:Dashboard & Software Updates:........................ Existing Open Source Dashboards Will Need To Be Updated To Support Secondary HDD "\Device\Harddisk1\Partition(#)\" -------------------------------------------------------------------------------------------------------------------------------------- Since Cerbios now uses the ini for setting UDMA speeds, there is only one bios file present. ModXO uf2 file is included as well, in case you don't want to use PrometheOS for some odd reason. And the dogs are back. Cerbios Tool, updated for version 2.4.2, has been included in this package. Happy flashing! ----------------------------------------------------------------------------------------- https://drive.google.com/file/d/1ulkZnZxlBJzvK5QIKWeKFTJ-ftWRY_ZJ/view?usp=sharing https://mega.nz/file/ZDwh0SxI#Z1ybirEsf55dCVZBNQ5xlkusrijNsrYvB9QxMiySTKY15 points
-
Hi guys. Happy to see people are interested in this. The basic situation as of now is: I'm looking to producing and selling these, but I'm seeing that people are buying up loads of these chips so might give up on that If MakeMHz sells this hardware, I will see if my software works for it too The current state is that I haven't been able to get the memory running at full speed, so performance suffers 256MB is the absolute maximum as far as I know I'm going to release all the design files, software, patchers, etc. shortly Yeah I know this is useless but it's just for fun15 points
-
Updated some things since this video a day or 2 ago from this post going live. Life’s been hard the last year, but am still here plodding away. Hope everyone enjoys the new features15 points
-
Hi all, Long time modder and lurker, first time poster but I wanted to share a project I have been working on the last couple months. It is a small PCB which allows you to use Wireless Xbox 360 controllers (via the Xbox 360 USB Wireless Receiver) on an OG Xbox console. The design is loosely based on another similar project I did for the Nintendo 64 console https://imgur.com/gallery/HVLea3d Following the release of this board another forum user sent me an email asking if this device could be adapted for the OG Xbox, and funnily enough that was the next thing I was going to attempt! I wanted to support the following features atleast: Up to four players with rumble support. 100% USB Bus Powered so no external power supply needed. Fast bootup time, so it's up and running in time for the OG Xbox. Low input lag. As always, this is a hard thing to measure, however I can say that an OG Xbox controller is polled by the console every 4ms or so. My software gathers all the Xbox 360 wireless controller data, collates it and generates all the HID reports every 4 ms aswell. It's possible an input may miss this 4ms window, so would happen in the next 4ms window. As you probably know, an OG Xbox controller is basically a USB HID device, however it has some custom requests and other slight differences, meaning that it doesn't work on a Windows machine without a custom driver, and conversely a generic HID controller will not work in an OG Xbox so there was some work in getting a reliable and compatible solution working. To support four controllers, it is necessary to have 4x Full USB device controllers. However I imagine most people would rarely play with 4 people at once so my design is modular meaning you can support anywhere from one up to 4 players as required to keep cost down. This is a link to the github repo with what I came up with https://github.com/Ryzee119/ogx360 A link to my etsy store where you can buy one pre-assembled https://www.etsy.com/au/listing/672315615/ogx360-add-wireless-xbox-360-controller Cheers!15 points
-
Hi all, Over the past few months I have painstakely reverse engineered the Team Xodus Xenium modchip's CPLD and written a complete open source replacement. I call it OpenXenium. https://github.com/Ryzee119/OpenXenium It has full support for XeniumOS and its features. Repo will list them. The Xenium CPLD is normally read protected to prevent clones. This project did not attempt to break that protection, instead I determined the behavioral properties of the CPLD to write my own VHDL source code. Check the repo out! there is a few xenium related tools that may even help people with a genuine Xenium! Hopefully this will help with LPC related CPLD projects people may have in mind too. Enjoy! Ryan15 points
-
It has long been thought that the Xyclops chip, which contains the BIOS on a v1.6 motherboard, is not flashable. However I recently discovered it has a serial port with a variety of interesting commands. It supports dumping the BIOS as well as the Intel 8051 code that runs the SMC functions of the chip. And just like the other Xbox versions that have the TSOP flash, we can reprogram the BIOS on the v1.6. In one way this mod is better than your typical TSOP flash because it's easy to recover from if you screw it up. The serial port will still be available. Tutorial Required items: 3.3V USB to UART adapter. You can find many of these available online at very low prices. See if you can get one that has a TX resistor value lower than 1k because the Xbox's RX has a 1k pulldown. v1.6 Xbox with Xyclops marked A-A02. A-B01 is not supported. Soldering iron Either the GUI for Windows or the command-line script: GUI Download XycloModGUI by OGXLABS https://www.ogxlabs.com/xyclomodgui Script Python installed on your PC Download the script https://github.com/Prehistoricman/Xbox_SMC/blob/master/Xyclops/xyclops_flasher.py A 256KiB BIOS bin file Steps: Connect your USB to UART adapter to the Xbox. This can be done either by connecting to the AV port, or by opening the Xbox and using internal connections. Internal connections Xyclops pin 29 is DEBUG. Wire it to the 3.3V standby voltage. Xyclops pin 64 is TXD. Wire it to the adapter's RX pin. Either: Near Xyclops: OR under the AV port: Xyclops pin 63 is RXD. Wire it to the adapter's TX pin. Either: Top side, near AV port: OR under the AV port: Connect ground to the adapter's GND pin. You can use the xbox metal case, any screw holding the motherboard down, or pin 2 of the LPC header (see pin layout here). AV cable - not advisable! See AV plug diagram here https://xboxdevwiki.net/AV_Cables Pin 5 is DEBUG. Wire this to 3.3V. Pin 18 is TXD. Wire this to the adapter's RX pin. Pin 6 is RXD. Wire this to the adapter's TX pin. Remove resistors below the AV port: R5M3, R4M10. This will affect the video mode recognition and can prevent normal display, so they should be replaced after the mod is complete. Connect any ground pin (such as pin 6, 7, or to the adapter's GND pin. If you cut LFRAME to do a modchip install, you will have to reconnect it. Plug in the USB. It's better to do this before powering on the Xbox Plug in the Xbox. It can be left in standby. Identify what serial port your adapter has. On Windows you can expect it to something like COM5. GUI method: Run the XycloModGUI exe Select the COM port if you know it Click the Connect to Xyclops button Click Browse... to select the BIOS to flash Click Start Selected Operation to flash the BIOS to your Xbox. It should take about 6 minutes Script method: Install Python 3 if you haven't got it already Open cmd, powershell, bash, or whatever the terminal is on your PC. Execute the script by writing python xyclops_flasher.py your_bios.bin COM5 to the terminal, replacing your_bios.bin with the path to your BIOS file, and COM5 with your serial port. Press enter Follow the on-screen text. It should say Xyclops communication established and ask if you want to erase the flash. Once the connection has been made, or even attempted, you may be unable to turn on or off the Xbox. That's normal. The SMC gets frozen while the serial is active. The Xyclops can get upset and stop responding sometimes. If you can't get communication, try unplugging the Xbox for 10 seconds. If you get erase timeout, make sure you made the GND connection. If you can't get communication, then your serial adapter might have too much internal resistance. Identify its TX resistor and reduce it to ~500 ohms. The flashing process takes about 2 minutes, and the verification (if you want to do it) takes another 2 minutes. If you want to verify again, use the -v option: python xyclops_flasher.py your_bios.bin COM5 -v The Xbox power button should work again, so try turning it on. If you get video issues (like greyscale video) and you removed two resistors in step 1.2.5, you will need to place the resistors back. Disconnect the DEBUG wire for enhanced stability. The Xyclops will freeze whenever it sees any activity on the RX pin. FAQ Can we use a BIOS bigger than 256KiB? Not on a retail xbox. Some rare devkits may be able to do 512KiB but I have not confirmed that. I ran the script and my Xbox won't turn on! Yes, the SMC will freeze when it receives serial communication. The script should resolve that if it exits successfully, so I must assume it failed. You can unplug your Xbox for 10 seconds and plug it back in to reset and try again. Can this be done via a software method? Not to my knowledge, but it is rumoured to have been discovered. Technically the answer is yes, but it involves using the serial first and then reprogramming the SMC (advanced). What else can it do? The Xyclops serial port is able to do a lot of low-level actions on the SMC. For example, it can 'press' the front panel buttons, change fan speed, change LED colours. It can also potentially do some hacky things such as spoofing the video cable mode, or bypassing the boot challenge (FRAG). We are also able to re-program the SMC which could lead to some more advanced mods for specific and niche purposes. Through the AV port??? Yeah I know right? We can't be sure why Microsoft made it this way. It's too slow for factory programming AND there's those resistors preventing it on retail units. It could definitely have expedited the development process of Xyclops, but that doesn't explain why it was left present in the retail motherboard.14 points
-
Heres the link guys, dont know how long it will last in onedrive if you all start grabbing it lol. I suggest grab and reupload elsewhere for others. EJW Standalone 212 pack14 points
-
I've been asked about hot to internally install my HDMI mod into an Xbox. Well i finally found the time and did such an install properly! As i don't like soldering wires all over the place i went a different route and made it a permanent install replacing the original Video Connector. Cause who would use an old composite cable if you have an hdmi out right? Audio is provided through the HDMI signal of course and it supports 5.1. And with the 3D printed plate to cover the rest off the opening it looks perfect in my eyes. And the best part it does almost not need any modification to the Case! Well except trimming a tiny bit off the DVD caddy so it doesn't touch the PCB. The PCB itself does fit into any revision console and is relatively easy to install. Any thoughts about the install?14 points
-
I have been working very, very hard over the last 5 months. I have wanted to create a modchip ever since the days of the Xecuter 3. This does not match that level of mod... However, I have tried to do the best job I can at creating something unique and special. This is the BSX Nova. It encompasses pretty much the entire ModXO pinout and I don't think anything is missing. It should lay a pretty good foundation for what is currently supported and what is planned for the future. There is the Display and Expansion I2C/SPI ports, Motherboard I2C (for things like plugging in HDMI mods and programming with ElpisHD/Cerbios), RGB, UART, and the USB header for the front panel ad future add-ons, whichever works for you. I have a few other mods that are all basically finished and will officially announce them when I plan to go to production with them. I realized that people may not want to spend so much on a flagship modchip, so I thought maybe a cut down version would be a good idea for those not wanting to spend so much. This is the BSX Mini. Please forgive the flux mess; It's stuck in a console right now and I don't wanna remove it. I removed the SD-Card, I2C expansion (still has the Display port) and onboard USB and bootsel button. This allowed me to cut it down to an INCREDIBLY small size and will allow me to sell it at a cheaper price than the Nova. I did give it the Amber eyes though, so I could replace those features with something cool. Both chips feature a dupont docket D0 wire, which will allow for simple install and removal, and especially if you need to remove and install the chip several times before finishing your build you won't have to solder and de-solder multiple times. You just unplug, and pull it out. Then when you wanna put it back, you just pop it on the pin header and plug D0 back in. No soldering ever necessary in that respect. However, there is still a D0 solder pad for when you need or want it. There are no power incompatibilities with 1.6 motherboards. You just rebuild the LPC, hook up D0 to the chip and you're good. The chip will not remain powered by the 5V standby pin when the console is off. The Nova has the entire pinout currently proposed by Team Resurgent. The Mini has about 80%, but has most of the features that anybody could ever want, once those things have fully developed. I have been hesitant to make an announcement for a while now because of concerns about the pinout changing or whatever else may happen. But I really didn't want to keep it to myself for any longer. I am going to go into production soon and am making sure I do everything I can to make it ready to go. I have been working on my mods non-stop for several months now (There is more than just the chips) and have done nothing else with my free time. I've worked VERY hard to try to make these things look polished and professional (Will be ENIG treated) as well as having a robust design and several small considerations that should help rule out bugs or malfunctions. I am going to do a run of the Nova and Mini, small at first and if they end up being popular, I will continue to invest in them over and over until I gain a full head of steam! Let me know if you have questions about features or how things work. The front panel PCB has a Bootsel button, Status LED and USB port for firmware updating the chip from outside the console. The status LED can have its color chosen in PrometheOS and indicates status from the outside of the console, not stuck on the chip. I'm happy with that feature. I would like to credit !!!thexkey for giving me the original template of the schematic with symbols. He asked, "Can you make a modchip with this?" I said, "I have no friggin' idea... but I'll try!" I had never heard of kiCAD or anything before then and this is my first hardware development project. I have fallen in love with hardware design and I am never going to stop! I would like to thank both him and Harcroft for sitting with me for a week or two at night and helping me understand the basics and everything I would need to know in order to get a basic modxo chip to function. It has definitely come a long way since then, as you can see here. Special thanks go out to Team Resurgent and Shalx. This project would not be possible without their work and I am so incredibly, infinitely grateful for what their work has enabled me to accomplish. I cannot thank them enough. Seriously. The status LED up front is a bit bright in these photos, but i have already dimmed it to an appropriate level since these were taken. It is no longer blinding. This can be seen in the last video, which also shows that the status LED is able to have the idle color changed in PrometheOS. I have a Discord server where people can hop in and see what's going on with the project. Feel free to stop by and get in contact. https://discord.gg/kFRKK77dEk13 points
-
I wasted a good portion of the last 3 or 4 years, lots of time and money on this idea. I've created then thrown away at least 6 full prototype xbox case prints that I was not happy with, redesigned several times etc. Here is a link to all versions from start to finish. It's not perfected still, but I am happy enough with mine that I'm not willing to pursue this anymore. I've shared them on cults3d and thingiverse but it's hard to put all the data there. To be clear, anyone can do anything they want with any files I've shared.. print and sell, edit, etc etc. Includes x3cp stl, xtender stl, stock face stl, power button stl, and prototype stl or obj files. I even tried to make a theme based on prototype. It should all be found here. https://drive.google.com/drive/folders/1jPioe3_N8f_HiEhmXxccLfFvJ9h86N6K13 points
-
Just finished designing my SATA adaptor prototype... The idea was to have a similar layout to the generic 3.5" adaptors, while using the Marvell IC found on StarTech adaptors. The majority of the SMD components are on the rear side of the PCB. Full size Molex connector with reversed orientation to better suit HDD caddy/power cable. Switch for master/slave/cable select, instead of just a pin header and jumper. PHD connector to use DVD cable as alternative power source (experimental) PHD connector also eliminates the DVDrom (no dvd-check bios required) Power and HDD activity LEDs... I'll still make some changes, but I'll get a couple prototypes made up as they are. So, I can test fitment and the performance of the device before I continue any further. Any feedback would be much appreciated, Nem13 points
-
Oh yeah the default is blue not green. How about True MsDash 2 Green by Peter PL vs Athloni Green MSDash Both of these are in my Top 10 UnleashX Skins pack available here in the ogXbox downloads section13 points
-
TruHeXEn 2021 To all those wanting a proper update to my release of TruHeXEn 2020, you've finally got one Massive thanks to user "sweetdarkdestiny" here on ogxbox forums for the very strong push to getting a proper release out. Without their effort at attempting to clean HeXEn's old code, this update would have taken much longer. This update mainly consists of general housekeeping changes to how HeXEn traditionally got tasks accomplished. Just about every aspect of the scripts has had some level of optimizations done to them to make this the fastest booting/cleanest HeXEn disc to date. All of the original features of TruHeXEn 2020 have been maintained as well as having a few outdated systems replaced. Winbond/Sharp tsop flashing is now handled by Xblast OS instead of Resctoox for example. *noDvd m8 Bios added back to the flashing menu *IND-5003 replaced with the Xiso patched version *Updated Eeprom Nulling tool added. One specific to each system (Tsop/Modchip and Softmod Systems) The biggest change any long time user of HeXEn will notice right off the bat is the massively improved boot times. This was accomplished by splitting up HeXEn into two parts. Upon booting HeXEn will by default load into the menu specifically for Tsop/Modchip systems. There is a new option first in the list to reboot into the Softmod specific menu. Aside from that most all of the features you expect are still present. Love it or Hate it, TruHeXEn is here to stay Google Drive Link: https://drive.google.com/file/d/165tikChvIc8q7HqfLxxACBOMGvNqQL3e/view?usp=sharing12 points
-
I'll add my url collection of ogxbox 3d print files MattySudz legendary 3d prints MattySudz ogxbox 3d print files: https://www.mediafire.com/file/e09xzobmrnba83j/MattySudz_XBOX_STLs.zip/file Virus Total test result: https://www.virustotal.com/gui/file/ac398e5d0cd313bba9a13b8fe44bcf81518be965a3586a0cecdd51fc1fb41167?nocache=1 3D print fan brackets 3d prints Noctua 60mm fan bracket (A): https://www.thingiverse.com/thing:4617648 Noctua 60mm fan bracket (B): https://www.thingiverse.com/thing:5460707 Noctua 60mm fan bracket (C): https://www.thingiverse.com/thing:5369322 Nexxus 70mm fan bracket: https://www.printables.com/model/79247-original-xbox-70mm-nexus-fan-adapter-and-mount Xbox v1.0 gpu 40mm fan bracket: https://www.printables.com/en/model/79249-original-xbox-10-gpu-40mm-fan-adapter Fan hole fill: https://cults3d.com/en/3d-model/various/original-xbox-fan-hole-fill-1-0 OGX360 3d prints OGX360 T4.1 case: https://cults3d.com/en/3d-model/gadget/ogx360-t4-1 Xbox controller & thumbsticks 3d prints Xbox One to OGXbox Duke/S thumbstick adapter (works on 360 controllers too): https://www.printables.com/en/model/139382-thumbstick-adaptor-for-original-xbox-duke-s-contro Xbox Duke/S thumbstick: https://www.thingiverse.com/thing:2474639 Xbox Duke/S USB to memory unit adapter: https://www.thingiverse.com/thing:4077036 Xbox Duke cable strain relief adapter: https://www.thingiverse.com/thing:5423476 Modchip 3d prints OpenXenium support holder: https://www.printables.com/en/model/313758-xbox-original-openxenium-holder HDD ide to sata adapters, hdd caddy adapters 3d prints HDD adapter for stock dvd drive caddy: https://www.thingiverse.com/thing:4461734 2.5 to 3.5 inch hdd adapter for stock hdd caddy (A): https://www.printables.com/model/351702-xbox-25-inch-to-35-inch-adapter 2.5 to 3.5 inch hdd adapter for stock hdd caddy (B): https://www.thingiverse.com/thing:5596972 Tool-less 2.5 to 3.5 hdd caddy adapter: https://www.thingiverse.com/thing:4970131 Generic sata to ide hdd : https://www.thingiverse.com/thing:3791879 Startech sata to ide hdd bracket: Xbox console outer shell 3d prints Xbox feet with o'rings: https://www.thingiverse.com/thing:4725922 Xbox dvd drive blanking plate: https://www.thingiverse.com/thing:5394953 Vertical console stand: https://www.printables.com/en/model/466979-original-xbox-vertical-stand Xbox v1.0-1.4 to v1.6 conversion: https://www.thingiverse.com/thing:5732958 Xbox v1.0-1.6 front faceplate: https://www.thingiverse.com/thing:5415785 Xecuter X3CP control panel scan: https://www.thingiverse.com/thing:5152786 X3CP control panel round buttons: https://www.thingiverse.com/thing:4854287 X3CP control panel wide buttons: https://www.thingiverse.com/thing:373181912 points
-
As the title suggests, this is a collection of mods for the Xbox version of GTA: Vice City. The aim of this mod was to fix a couple of bugs, to make what I feel are improvements to the game's overall presentation, and to provide a fresh, new visual experience for the same Vice City you know and love, while still maintaining what made the atmopshere and feel of the 1980s American beach city setting so enjoyable. Retaining immersion was also important. If it couldn't have existed in 1986, you won't find it here. Performance was also a key focus. While the Xbox version of Vice City is capable of displaying larger textures just fine, the texture work here was (mostly with very few exceptions) kept at the same resolution with the same compression method as the original textures, because you will run into performance issues, namely regarding pop-in, textures failing to load properly, and frame rate hiccups if you do decide to go with larger textures. In my testing, this wasn't something immediately noticeable in the early stages of the game. It only really becomes an issue when you're driving back and forth between the two islands, particularly late game when you own a lot of properties. This modification performs just as well as the original release from beginning to end. It is recommended that you play this mod in WIDESCREEN with TRAILS OFF. New Roads: Original textures replaced with textures made from real images of Miami roads. This solves the issue of the blurry roads in the original release and generally looks better all around. Sidewalks replaced as well. New particle effects: Particle effects replaced with more realistic representations. GTA III's Liberty City holdover leaves that once scattered the ground have been replaced with palm leaves, much like they appear in the PS2 version. This one small change in particular has a surprisingly large effect on the atmosphere of the world. New Duds: New Miami Vice inspired suits for Tommy and Lance. Most outfits have been changed. From pallette swaps to complete replacements, the new outfits fit the game's world while simultaneously referencing various films, TV shows, and video games along the way. Each outfit functions in cutscenes as well. New timecycle: More colorful days and darker nights. Nights actually feel like night time now. Make the neon of Vice City shine brighter than ever against these blackened night skies, and enjoy beautiful sunsets and sunrises. Fits the beach weather perfectly and looks great with the Xbox version's unique lighting system. New foliage: Fuller and more colorful foliage textures make Vice City come alive. The Xbox version has always had inferior foliage to the PS2 version, this fixes that issue. Bug fixes: PS2 animations, including idle animations missing from the Xbox release, have been restored. Tommy now gives an "up yours" gesture with his arms instead of flipping a nonexistent finger (another GTA III holdover) when standing in front of traffic. A bug preventing the acquisition of the Havana outfit after completing certain missions has been fixed, it is always accessible after having been unlocked now. The brass knuckles have been resized to not look so outlandishly large. Aiming sites for weapons like assault and sniper rifles have been adjusted to display correctly in widescreen mode. This means they display incorrectly in 4:3 mode, however. New animations: A few improved animation replacements for Tommy. He runs with single handed and two handed weapons in a more believable way now. Walking, idles, sprinting, and just about everything else has been kept vanilla for the sake of familiar game feel. Tommy still sprints as fast as he always has - something that's typically changed for the worse with animation mods. Female character models no longer dislocate their hips as they walk. Peds overall have new animation. They all walk a little slower now than before, but their animations look less rubbery. New pedestrians: About 85% of peds replaced with their VCS counterparts. These pedestrians are higher quality than the ones found in the original release of Vice City. Better quality texture work, more colorful outfits, and more diverse models. New surprises: I've thrown in a number of retextured areas and objects throughout the game. From small world objects to interiors, there's a number of new things to see for returning veterans. New weapon: The Ruger has been replaced with an AK-47. New HUD: The radar ring has been replaced with a new, original ring. Icons on the main HUD, map icons, and weapon icons have been replaced with their 10th Anniversary counterparts. The pause screen map has been replaced with the 10th Anniversary map. New text: A few lines in the game's american.gxt file have been modified to reflect some of the changes this modification brings. Mostly in terms of outfit and weapon names. Download INSTALLATION: 1. Extract folders to any directory of your choosing 2. FTP all folders from the archive into your GTA: Vice City root folder on your Xbox, choose to overwrite files in the process. 3. IMPORTANT: Delete GTA_VC.CAP.Final file from your GTA: Vice City root folder if it exists 4. Clear your Xbox's cache and start the game 5. Have fun There shouldn't be any issues with running this mod on existing save files. Feel free to report any bugs you see. What I'd like to change in the future: Improve widescreen mode from the existing pan 'n scan implementation Fix the alpha render state for the target lock and sniper dot12 points
-
Going for a complete North American library. 448 and counting!12 points
-
https://github.com/Ryzee119/hawk11 points
-
>>> OGXBox 2021 XBlastOS 8MB MC TSOP Flasher <<< I finaly managed to get the (for me) perfect TSOP flasher done. It makes use of the known save game exploids for SC, MA, 007 & TH4 and uses XBlastOS to flash any TSOP right away. As base it will load up UnleashX where you can choose the bios you like to flash (See list below). After you have selected the bios UnleashX will unrar all necessary files and copy them to the needed places and after that XBlastOS will start. Also a pretty bare bone UnleashX will be installed in which you boot after the TSOP flash from which you can launch an installer like the OGXBox Installer 2021 to set up your HDD. So no more softmodding before TSOP'ing or using EvoX, Raincoat or Resctoox to flash a TSOP. All bios files and configs are pre-configured to boot up the evoxdash.xbe of the C drive. Here is a list of provided bioses: XBox v1.0 - 1.1 ONLY! - x2 5035.67 (512kb) XBox v1.0 - 1.3 ONLY ATM! - Cerbios v1.02 ALPHA (256kb) (Will be updated when newer version come out) XBox v1.0 - 1.4 - EvoX m8 plus noDVD (256kb)* - EvoX m8 plus yesDVD (256kb)* - iND 5003.67 (256kb) - iND 5003.67 XISO (256kb) - iND 5004.67 (256kb) - x2 4983.67 (256kb) And since this version is only 6.2MB in size (Incl. all save games!), you could add your own bios files beside the others. Screenshot : https://imgur.com/a/nBwAIIY Pre release version video (The final is slightly different but you get the idea) : https://www.youtube.com/watch?v=Zam2SXG1WI8 All credits go to these guys and teams: pysko_chewbacca, Rocky5, Team Cerbios, Team iND, Team Xecuter, Team EvoX and Team Unleash. Download sites (Pal and NTSC version): https://1fichier.com/dir/dyFJYcXu https://mega.nz/folder/cJ8XRAYZ#cCK8TgW1RsPWPkGvGSiUmA Have fun.11 points
-
I try to stay in the background because the site is really about you all and I would never want to have much if any focus on me. With that said... I have always loved Xbox modding. I was really into it back in 2002-2004. I learned all I could and modded lots of Xboxs back then. I changed careers in 2014 and that took me to a new state and somehow all of that change rekindled my love for Xbox. I looked around for people who were still into it and they were scattered everywhere. Xbox-scene was dying/dead. I created the FB group and it took off relatively quickly. I did a lot of things wrong there by choosing the wrong admins and commenting on topics unrelated to Xbox.... moderating in a way that was frankly unprofessional. (I still do from time to time if I'm in a weird mood.) Once the FB group membership got around 10k, we started having content just disappear from the FB group. I became aware that the group could quite literally vanish in the blink of an eye. My skillset is in the world of IT, so spinning up a web server was really no trouble. So I fired up a VM on my server at home, set it up and allowed it through my firewall and announced the site. Once the site grew, I went ahead and moved it to a VPS cloud host so it doesn't depend on my home's power and internet reliability. Hopefully I covered whatever you were looking for. If not let me know and I'll answer almost anything.11 points
-
I've written some firmware for the RP2040, thanks to a bunch of TinyUSB drivers created by Ryzee119 and the OpenStickCommunity, that supports pretty much anything the original OGX360 supports, apart from the 360 keyboard for Steel Battalion. On top of those I've added Sony Dualshock 4 and Dualsense support, and will be working on Switch Pro/Dualshock 3 once I get my hands on those. By default it's setup for the Adafruit Feather RP2040 USB Host board, but it can be compiled for the normal Pico as well, though that doesn't have a second USB port for your controller so you'll have to solder one to GPIO 0/1 (data +/-). The firmware can be compiled and used for - Original Xbox - Nintendo Switch - Xinput (not 360, due to the security chip) These are all the devices that are supported currently: - Original Xbox Duke and S controllers - Wired Xbox 360 controllers - Xbox 360 wireless PC adapter (clone and Microsoft, syncs 1 controller) - Xbox One/Series/Elite controllers - Dualshock 4 (PS4) - Dualsense (PS5) - 8bitdo v1 and v2 wireless adapters I've posted source code and compiled .uf2 files on Github: https://github.com/wiredopposite/OGX-Mini I'd also add that Playstation controllers are recognized by USB vendor and device ID, I'm not positive if there's a better way to do that, but those need to be manually added to the program to work. I need more of these IDs so if you're aware of some list somewhere, or your aftermarket Playstation 4/5 controller isn't working, just give me the VID/PID and I'll add them. I also need these for Playstation 3 controllers once I get around to adding support for those. This is the Adafruit board, no soldering is required for this, you just need a way to connect USB-C to your Xbox's controller port:10 points
-
The following content was taken from the Xbox scene discord. Courtesy of Haguero. Its only been 20+ Years but did you know you could flash the xyclops on 1.6 consoles? If not you do now thanks to our good friend @Prehistoricman you can load Cerbios onto your 1.6 & no modchip or softmod is required. More info will be released soon but until then enjoy this video. The scene still delivering after 20+ years 20250502_022211_1.mp4 My 2 cents... This is big news for 1.6 consoles, no more will you need to softmod or modchip your 1.6 to get Cerbios running. No more LPC rebuilds This is akin to TSOP flashing an earlier revision console. Imo a modchip with PrometheOS installed is still the best way to hack an xbox, simply becasue of the extra features it brings but either way @Prehistoricman has smashed it outta the park with this discovery. Great work yet again mate10 points
-
A couple of weeks ago I decided to do a removable LCD screen mod that plugs into the controller ports. I'm thinking of raffling this to help support the website. What are your thoughts?10 points
-
Team Cerbios and Team Resurgent are excited to introduce the Official Trailer for PrometheOS, a new open-source operating system designed for all Xenium-based mod chips in the original Xbox. **Key current Features of PrometheOS:** - **Multi-Bank Functions:** Effortlessly switch between different bios images. - **LED Support:** Assign custom colors to each bios bank for enhanced visual feedback. - **Web UI:** Access a user-friendly interface from any web-enabled device for simplified bios management. - **FTP Support:** Facilitate easy file transfers between the Xbox and other devices. - **Skin Support:** Customize the OS interface to reflect your personal style. - **HDD Lock/Unlock Support:** Gain the ability to lock or unlock the hard drive, tethering it to a specific console. - **EEPROM Backup/Restore Feature:** Ability to backup and restore your EEPROM. **A Community-Driven Initiative:** PrometheOS is a collaborative achievement between Team Resurgent, Team Cerbios, and the dedicated Xbox modding community. **Availability:** PrometheOS will be available for download, ensuring compatibility with all versions of the original Xbox equipped with a Xenium-based mod chip. **For Those Interested in Getting Started:** If you're eager to try out PrometheOS and are in need of an affordable chip or external programmer, you can purchase a Xenium-ICE v3.0 & Programmer directly from NeMesiS/XeniumMods. Visit their eBay store at https://www.ebay.com.au/str/xeniummods for more information. **Special Thanks:** Our gratitude goes to NeMesiS / XeniumMods for providing prototype Xeniums, programming hardware, and essential feedback and testing which helped greatly in making PrometheOS a reality. A shoutout to Ryzee119 for the invaluable Xenium-Tools, facilitating the flashing of the new OS via your xbox. (https://github.com/Ryzee119/Xenium-Tools) and the work towards making the original OpenXenium. Stay tuned for ETA & more updates on this exciting development by the Xbox scene community! Please watch the official trailer and show some to all those who contributed and worked towards making this a reality. Source: https://www.xbox-scene.info/articles.html/announcing-prometheos-a-replacement-open-source-os-for-xenium-based-mods-r26/10 points
-
Your in luck... I've just finished a prototype design for a SATA adaptor. It's based on the Marvell IC similar to StarTech. I added a PHD connector to eliminate the DVDrom and to use the DVD cable as an alternative power source which should complement HDDs that have been relocated to the left had side of the console. I'm about to do a second prototype order to finalize the PCB design.10 points
-
I've been sitting on this for a few weeks now, But I think it's perfect timing to announce the Stellar Elimination Module. Above is a minimalistic 3.3v version that I retro fitted to my XeniumICE modchip, there's also a 5v version. These will be OpenSource along with the ST-Link adaptor, including Gerbers, BOM and Schematics within the next week or so. I would say that the MakeMHz XboxHD+ Legacy addon has already become obsolete within 24 hours of its release.10 points
-
As there might be a couple people out there who want to own an Xbox Alpha Development kit but don’t want to spend the Cash they cost I thought I just write up a guide how to build one yourself with off the shelf parts! This is not the first guide about this topic out there but hopefully the most detailed and helpfull! I’m going to do this as a picture supported step-by-step guide so it should be easy to follow for anybody. Let’s start with the parts used in the Alpha2 Console: -Intel VC820 Desktop Board -128MB RD Ram (Kingston KVR800X 18-8/128) -733Mhz Slot 1 CPU (Part number SL3XN) -250Watt ATX PSU (ATNG Model: PS-250S) -20GB IDE HDD (Fujitsu MPF3204AT) -3,5” FDD (Sony MPF920-C) -DVD Drive (Hitachi GD-7000) -64MB Geforce3 (180-P0050-0000-A05) -Network Card (Intel Pro/100) -Soundcard (Wolfson Micronics WM9707_AMR_EV1_Rev2) -USB Card (Xircom Portgear PGPCI2 ) Now on to the parts you need to buy for a basic bootable setup: -Intel VC820 Desktop Board (CC820 should also work!) -128MB RD Ram -733Mhz Slot1 CPU -Any ATX PSU 250Watt or more -IDE HDD 20GB or bigger -Any DVD Drive that reads self-burned CD-r -64mb Geforce 3 NV20 Video Card ->more details a bit later! -Intel Pro/100 Network Card That’s the minimum that is needed to get the alpha to boot the recovery CD. If you want to be able to do anything except looking at the Recovery Screen you need some more parts: -2 Port USB Card that uses an Opti Firelink 82C861 Chipset -Xbox Controller to USB Adapter +Xbox Controller -Wolfson Micronics Soundcard (or the recreated Version) -Any Case to install it all to. (The original case for the alphas is the GlobalWin YCC-802) That’s how my stack off parts for the alpha looks like: Once you have all the parts together let’s start by putting it together! Guess I don’t have to cover how to install the CPU, Ram, Video Card, PSU, Network card, Audio Card and the Drives. The end result should look like this. It’s not important in which pci port the usb and lan card are installed. BUT it is important that the lan card is installed as the Alpha won’t boot otherwise!!! When it’s all put together turn it on and check that it properly posts and there are no errors or whatever before continuing! Now on to burning a recovery CD! (Thanks to Borman for releasing the May2001 Alpha2 recovery! All credit goes to him for the release!) You can find the files in the download section and can simply download them. Here's a direct link to the files on an external Server: Alpha Recoveries and VGA Bios Once downloaded just use ImgBurn (or any other iso burning software) to write the May2001 recovery to a cd-r disc. Pop that disc into the DVD drive off your alpha and you should see the Xbox animation and should be greated by this recovery Screen afterwards: Now (if you haven’t done it earlier) plug in the Controller using the matching adapter and Press any button to start the recovery. The progress bar should show how far the progress is. It shouldn’t take any longer than 5 Minutes to finish and you will see this screen. Then remove the recovery disc from the drive and reboot. You should then be greeted by the following screen where you can set a name for your alpha console. Congratulations your Alpha Development kit is now fully working and ready to be used! Soundcard: I recreated the Soundcard to build a completely working alpha kit for myself as the original Alpha soundcards are as rare as the original alphas. If you need one for your build just drop me a message and I can build a couple more! Graphics Card: The video card is an important part of this build so here’s a little extra information about that part. The Card needs to be an NV20 Core Card with 64mb. 32MB cards might also work but we want to be as close as possible so buy a 64mb card to not get into trouble! I successfully tested 2 card from 2 different vendors: -Medion MS-8838 Geforce3 200ti -MVGA-NVG3T2A 64MB Many other NV20 core cards should work and I gladly extend that list if you used another card on your build! J Flashing the engineering Bios is NOT needed it is only a cosmeticall detail you might enjoy. The motherboard does also not need to be on a special Bios version or anything. Troubleshooting: You Get a blinking black cursor and no Xbox boot animation? ->You might have forgotten to install the Lan card, got a wrong one or your Nvidia Card is not supported! Your DVD-drive doesn’t spin up and you end up with an intel Network card boot/bios Screen? ->Something might have gone wrong with the CD you burned or your drive can’t read the cd-r! Could also be a problem with the boot order! Check that in the Bios the dvd drive should be the first boot device! If you have any questions about the build or anything just drop me a PM!10 points
-
Hello everyone! Just joined and will be upfront that I do own a business around case modding and deal with the original Xbox as well! I just wanted to share for some of you who are considering case mods since that is much less common than some of the hard/soft mods. I made a 4 part series that teaches how to build and complete an entire case mod for the original Xbox console..from scratch! Hopefully this isn't seen as spammy or anything since I am technically a business, but I do try to make a lot of tutorials so people can learn how to cut window mods and install LED lights, etc. The four part series can be found on my website here (videos inside are also available on youtube) : http://www.tinker-mods.com/modding-tutorials/original-xbox-case-modding-tutorials.php10 points
-
You missed the point. Your post was made under the premise that we exist to provide you with downloads. We don't. Nobody owes anybody else anything, and we certainly do not owe you or anyone else downloads. We exist to build a community and preserve the knowledge. The files exist NUMEROUS places. The knowledge is actually more scarce than the files since Xbox-Scene went under. So that's our purpose and that's why this rule isn't "f*cking dumb". The fact that this was spelled out in the OP and you STILL didn't get it means you are though.10 points
-
Been a bit bored as of late and wanted to see how low temps I could get. Microsoft in their infinite wisdom gave the CPU farrrr too much voltage: 1.7V! Nuts! Well the CPU itself runs perfectly fine at 1.3V (lowest the voltage reg will go without messing with the feedback loop). 1.0: Remove the 0ohm resistor on R2E4 1.6: Remove the 2 0ohm resistors on R2E7 & R2E3 The only drawback of doing this, is you'll no longer be able to push the CPU frequency over ~950MHz. The temperature screenshot is from my 1.6, I'm aware that the 1.6 does not have entirely accurate monitoring, but you can see a clear difference. Both were taken at a ~73F ambient with fan running at 20%. Enjoy.9 points
-
I think its a good idea to have a thread with all of the 3d printable parts listed here so that others can find them easily. I'll start by adding my own creations, here is a replacement CPU/GPU bracket. Made in Fusion 360: Original Xbox CPU/GPU bracket by ShinGoutetsu | Download free STL model | Printables.com Feel free to add links to your own!9 points
-
PCB files and BIOS patcher can be found on github: https://github.com/Prehistoricman/Xbox256MB/tree/master Upgraded Xblast OS can be found on bitbucket: README and Downloads The new Xblast OS comes with a RAMTESTER variant that lets you test the stock set of 4 chips. This can be useful even for a typical 128MB mod when things go wrong and the Xbox won't boot normal Xblast. MachoNacho already did a tutorial on installing this upgrade: https://www.youtube.com/watch?v=R2hvSL30Rlg So here's a brief tutorial for installation. Tutorial Be aware this is an advanced mod and while it does grant quadruple the memory, there is a performance disadvantage. The memory clock speed must be reduced to make this memory stable (this is handled in my BIOS patcher). Tools required: Hot air station (recommended for removing stock chips) Precision soldering station Microscope suitable for soldering Flux Solder Solder wick IPA Multimeter Hardmodded Xbox Spare Xbox to be able to reflash your modchip if necessary Steps: Flash the Xblast OS 0.63 RAMTESTER 256Mbit BIOS to your modchip If your modchip has only one bank, you can still access the normal Xblast menus by pressing eject to power on the Xbox. If your modchip runs an OS BIOS (like PrometheOS, Xenium or Xblast), patch it and flash it first Remove the stock memory chips. Use hot air to desolder it - I like to place tinfoil on the board to protect the other components and plastic from the heat. Or just cut the pins if you don't care about the stock memory chips. Solder in the new memory modules Start with bank 1 in the stock memory layout. See this diagram Precisely align the module on the motherboard Solder 1 pin in a corner to anchor the module Make sure you get the orientation right. There is an arrow in the corner of the module that should align with a dot on the motherboard. That's pin 1. Solder the opposite pin Check the orientation again! I got this wrong twice :((( Solder the rest of the pins on the module Power on the Xbox to test it with the BIOS If you got it right, the LED code will indicate that bank 2 has failed. See README for LED codes. If the LED code shows bank 1 failed, there may be a short circuit or open circuit. Check your soldering. If the Xbox powers off very quickly and doesn't reboot, you have a short circuit. Check your soldering. If the Xbox reboots 3x and FRAGs, there may be a short circuit or open circuit. Check your soldering. Repeat for banks 2, 3, 4 in order. Try booting Xblast using the eject button, or any other 256MB compatible BIOS. Install the rest of the banks, using the memory test in Xblast OS's Tools menu to check if they are working. Flash a 256MB compatible BIOS X2 and X3 BIOSes are known to work and have the full 256MB usable Cerbios support is not good yet, but they are working on it. EvoX will boot, but needs additional patches to be able to use the extra memory. Do nothing with the additional memory Interposer assembly One way to do this upgrade is to buy the loose memory chips and interposer PCBs and assemble them. You need to be confident with BGA soldering. The memory chip is HY5DU573222F-28 which you can find on Alibaba and maybe other places too. The -28 is the speed bin and I don't recommend going any slower such as -33. The interposer PCB designs are on Github and I've included gerbers in the release suitable for ordering from PCBWay.9 points
-
Here you get a shit load of pre patched EvoX files. 144 EvoX bios'es in total. These files are for 128MB XBox'es version 1.0-1.4 and 1.6/1.6b. You get these in many different versions in many flavors like: EvoX 128MB (256kb/512kb/1024kb) (noDVD/yesDVD) EvoX 128MB 1.6 (256kb/512kb/1024kb) (noDVD/yesDVD) EvoX 128MB HDplus (256kb/512kb/1024kb) (noDVD/yesDVD) EvoX 128MB HDplus 1.6 (256kb/512kb/1024kb) (noDVD/yesDVD) EvoX 128MB XBoxHDMI (256kb/512kb/1024kb) (noDVD/yesDVD) EvoX 128MB XBoxHDMI 1.6 (256kb/512kb/1024kb) (noDVD/yesDVD) EvoX Titan 128MB UDMA2 (256kb/512kb/1024kb) (noDVD/yesDVD) EvoX Titan 128MB UDMA2 1.6 (256kb/512kb/1024kb) (noDVD/yesDVD) EvoX Titan 128MB UDMA4 (256kb/512kb/1024kb) (noDVD/yesDVD) EvoX Titan 128MB UDMA4 1.6 (256kb/512kb/1024kb) (noDVD/yesDVD) EvoX Titan 128MB UDMA5 (256kb/512kb/1024kb) (noDVD/yesDVD) EvoX Titan 128MB UDMA5 1.6 (256kb/512kb/1024kb) (noDVD/yesDVD) EvoX Titan 128MB HDPlus UDMA2 (256kb/512kb/1024kb) (noDVD/yesDVD) EvoX Titan 128MB HDPlus UDMA2 1.6 (256kb/512kb/1024kb) (noDVD/yesDVD) EvoX Titan 128MB HDPlus UDMA4 (256kb/512kb/1024kb) (noDVD/yesDVD) EvoX Titan 128MB HDPlus UDMA4 1.6 (256kb/512kb/1024kb) (noDVD/yesDVD) EvoX Titan 128MB HDPlus UDMA5 (256kb/512kb/1024kb) (noDVD/yesDVD) EvoX Titan 128MB HDPlus UDMA5 1.6 (256kb/512kb/1024kb) (noDVD/yesDVD) EvoX Titan 128MB XBoxHDMI UDMA2 (256kb/512kb/1024kb) (noDVD/yesDVD) EvoX Titan 128MB XBoxHDMI UDMA2 1.6 (256kb/512kb/1024kb) (noDVD/yesDVD) EvoX Titan 128MB XBoxHDMI UDMA4 (256kb/512kb/1024kb) (noDVD/yesDVD) EvoX Titan 128MB XBoxHDMI UDMA4 1.6 (256kb/512kb/1024kb) (noDVD/yesDVD) EvoX Titan 128MB XBoxHDMI UDMA5 (256kb/512kb/1024kb) (noDVD/yesDVD) EvoX Titan 128MB XBoxHDMI UDMA5 1.6 (256kb/512kb/1024kb) (noDVD/yesDVD) ******************************************************************************* Some infos about the patches I used: Titan Patch Version: 1.1.0 MakeMHz XBoxHDMI Patch Version: 1.4.3 MakeMHz HDplus Patch Version: 1.0.2 MakeMHz EvoX 128MB Ram Patch Version: 1.0.0* *Could also be v1.0.1 how ever, it's the latest m8plus_true_128MB_fixed.ips. ******************************************************************************* All these bios'es are sorted* and ready to use with XBlastOS or any other flasher which requires that the bios is named bios.bin which has to be in C:\bios (C:\bios\bios.bin). Note: YD = yesDVD and ND = noDVD*. (*Yes you can still boot/cold boot any DVD you like with it!) All these files are also packed as bios.rar files using winrar 3.0. So you could unpack these with UnleashX etc.. (Only of interest if you go to use these of an installer). That lead me to one thing. If you are one of the last ones who creates installer, feel free to use these files on your disc. ******************************************************************************* Credits and a HUGE thanks for the patches fly out to: MakeMHz and Gaasedelen. And also a HUGE thanks to Donnie-Burger for testing. ******************************************************************************* And don't forget to suppport the Devs! Buy'em some coffee because nothing works without coffee! Visit : https://github.com/gaasedelen/titan https://github.com/MakeMHz ******************************************************************************* Download Folders: Mega : https://mega.nz/folder/JFlR2Q5C#lxK9TfF_sgGxl2gPI4uqIw 1fichier : https://1fichier.com/dir/cdrhapgD ******************************************************************************* PEACE! EDIT: How to update your ram on a XBox 1.6/1.6b :9 points
-
XCAT v1.00 is now out and just waiting for you to start archiving your lost Xbox Live content and updates. I could do a whole writeup but why would I when it's all covered on Consolemods and RetroRGB. https://www.retrorgb.com/xcat-a-huge-win-for-xbox-preservation.html https://consolemods.org/wiki/Xbox:XCAT We have a support channel on the Xbox Scene discord where you can ask you have any questions or list any concerns. https://discord.gg/xbox-scene Download is available on Digiex.net or Xbins. Please check out the Unarchived DLC/TU list to see the simple list of what's missing. https://consolemods.org/wiki/Xbox:Unarchived_DLC Please go forth and Archive your content!9 points
-
New splash screen. Several colors. splash.7z9 points
-
So finally got the case for the HDMI cable finished! The cable itself does work good and is finally in the last steps off testing. Decided to add the OGX logo to the case to make it look even better. So a little more detail about the hardware now! It is basically a Component to HDMI converter that does reencode the Component signal to a HDMI signal. The Xbox will recognize the cable as a component cable and it is plug and play without the need for an extra psu or anything. The HDMI signal does provide stereo audio and there is an optical out on the pcb for digital audio. Can print the case in different colors once the cables are for sale! Before a lot off people ask about them now they will be for sale in around 4 weeks and i will post the add here in the Forums. Will offer them as finished cable and as an internal install kit without the cable and avip plug for those who want to do an internal install on there Xbox. So keep checking the forums not just facebook And without further talking that's how the final product looks like:9 points


.thumb.jpg.926686e935310eae9234f93588b0e1f4.jpg)


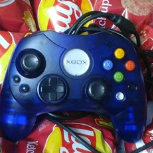

Board Life Status
Board startup date: April 23, 2017 12:45:48