Search the Community
Showing results for tags 'mod' or ''.
-
Hi All, I found many different informations about the CheapLPC MOD (CheapMOD) and I try to install it to v1.4 and v1.6 versions. But I think I made a mistake or something else the problem, that is why I have questions. This was the first step. eurasia.nu cheapmod (web archive). I used it to create the PCB. SST 49LF020A in it. Flashed with evox.m8.v16.bin (256KB). The question, is there any REAL and usable diagram to soldering and wiring it in any version of xbox? Can I use the mentioned bios version? I would like to use the PCB version of CheapMOD, not the wired one. Thanks for any help!
-
Im try to soft mod old xbox v1.6
-
i am trying to figure out how do i change the models and stages in soulcalibur 2 xbox if anyone knows how to do it please help me Example: https://www.youtube.com/watch?v=1UAFxYAU5-Y
-
Zachwsays on Reddit made this nice and pretty simple little mod to turn the Xbox on and off using the controller and a memory card. Now I have to do this.... grrr!
-
Hi, As the title says im looking fro a decent tut for the internal dvd dongle mod. Preferably one with pictures that still exist I have been on the wayback machine and found a couple from the xbox scene site but i was wondering if anyone knows of any better ones out there?
-
Can anyone help me so I have this much chip installed I will post pictures if it helps, I didn't do the installation but I have no video out any ideas it sounds like it's working fine but I just don't have any video out if anyone has any ideas please let me know
-
Hi All, I need your help to identify my mod chip, i purchased this Original xbox and unable to find any information as to what mod chip it is or even what Bios it is using. I have tried to use the Hexen DVD to try Flash the Bios with the EvoX but none of the bios's i tried worked, it came back with drive ID error and unable to flash blue screen. Not sure if i am flashing it with correct Bios or not or if i have to manually put the Bios.bin files into the xbox itself via FTP ? My xbox is 1.6 version, can anyone please help to identify the chip installed ? and what Bios i can use or how to go about it if i cant do it with the Hexen DVD. I even tried Bios checker but it gives MD5 hash info without any chip information. It currently runs on the Evolution Dashboard however when booting up the xbox it has a custom logo on top left that appears was flashed with a custom bios. please see my image attached of the Mod Chip.
-
As the title suggests, this is a collection of mods for the Xbox version of GTA: Vice City. The aim of this mod was to fix a couple of bugs, to make what I feel are improvements to the game's overall presentation, and to provide a fresh, new visual experience for the same Vice City you know and love, while still maintaining what made the atmopshere and feel of the 1980s American beach city setting so enjoyable. Retaining immersion was also important. If it couldn't have existed in 1986, you won't find it here. Performance was also a key focus. While the Xbox version of Vice City is capable of displaying larger textures just fine, the texture work here was (mostly with very few exceptions) kept at the same resolution with the same compression method as the original textures, because you will run into performance issues, namely regarding pop-in, textures failing to load properly, and frame rate hiccups if you do decide to go with larger textures. In my testing, this wasn't something immediately noticeable in the early stages of the game. It only really becomes an issue when you're driving back and forth between the two islands, particularly late game when you own a lot of properties. This modification performs just as well as the original release from beginning to end. It is recommended that you play this mod in WIDESCREEN with TRAILS OFF. New Roads: Original textures replaced with textures made from real images of Miami roads. This solves the issue of the blurry roads in the original release and generally looks better all around. Sidewalks replaced as well. New particle effects: Particle effects replaced with more realistic representations. GTA III's Liberty City holdover leaves that once scattered the ground have been replaced with palm leaves, much like they appear in the PS2 version. This one small change in particular has a surprisingly large effect on the atmosphere of the world. New Duds: New Miami Vice inspired suits for Tommy and Lance. Most outfits have been changed. From pallette swaps to complete replacements, the new outfits fit the game's world while simultaneously referencing various films, TV shows, and video games along the way. Each outfit functions in cutscenes as well. New timecycle: More colorful days and darker nights. Nights actually feel like night time now. Make the neon of Vice City shine brighter than ever against these blackened night skies, and enjoy beautiful sunsets and sunrises. Fits the beach weather perfectly and looks great with the Xbox version's unique lighting system. New foliage: Fuller and more colorful foliage textures make Vice City come alive. The Xbox version has always had inferior foliage to the PS2 version, this fixes that issue. Bug fixes: PS2 animations, including idle animations missing from the Xbox release, have been restored. Tommy now gives an "up yours" gesture with his arms instead of flipping a nonexistent finger (another GTA III holdover) when standing in front of traffic. A bug preventing the acquisition of the Havana outfit after completing certain missions has been fixed, it is always accessible after having been unlocked now. The brass knuckles have been resized to not look so outlandishly large. Aiming sites for weapons like assault and sniper rifles have been adjusted to display correctly in widescreen mode. This means they display incorrectly in 4:3 mode, however. New animations: A few improved animation replacements for Tommy. He runs with single handed and two handed weapons in a more believable way now. Walking, idles, sprinting, and just about everything else has been kept vanilla for the sake of familiar game feel. Tommy still sprints as fast as he always has - something that's typically changed for the worse with animation mods. Female character models no longer dislocate their hips as they walk. Peds overall have new animation. They all walk a little slower now than before, but their animations look less rubbery. New pedestrians: About 85% of peds replaced with their VCS counterparts. These pedestrians are higher quality than the ones found in the original release of Vice City. Better quality texture work, more colorful outfits, and more diverse models. New surprises: I've thrown in a number of retextured areas and objects throughout the game. From small world objects to interiors, there's a number of new things to see for returning veterans. New weapon: The Ruger has been replaced with an AK-47. New HUD: The radar ring has been replaced with a new, original ring. Icons on the main HUD, map icons, and weapon icons have been replaced with their 10th Anniversary counterparts. The pause screen map has been replaced with the 10th Anniversary map. New text: A few lines in the game's american.gxt file have been modified to reflect some of the changes this modification brings. Mostly in terms of outfit and weapon names. Download INSTALLATION: 1. Extract folders to any directory of your choosing 2. FTP all folders from the archive into your GTA: Vice City root folder on your Xbox, choose to overwrite files in the process. 3. IMPORTANT: Delete GTA_VC.CAP.Final file from your GTA: Vice City root folder if it exists 4. Clear your Xbox's cache and start the game 5. Have fun There shouldn't be any issues with running this mod on existing save files. Feel free to report any bugs you see. What I'd like to change in the future: Improve widescreen mode from the existing pan 'n scan implementation Fix the alpha render state for the target lock and sniper dot
- 52 replies
-
- 12
-

-

-
I picked up this crystal Xbox with what looks like a coax spdif mod and I'm wondering if there's any point to using it when I have some modded 360 component cables lying around? Are there any advantages? Thank you
-
 Hey all this is my first post on this forum. Thought I should share the schematics for the old AussieChip Dual Mod and Cheapmod mod chips. From what I understand this company went under in 2003 when the Australian government started to try and outlaw mod chips; the same time when many other governments were trying to do the same. AussieChip decided to give back to the community and release the build entirely for free. The files are for an old program called Protel though it is now called Altium Designer. Altium is very very VERY expensive (7k+ a year) though they have a free trial if you want to take a gander at the design files. I was trying to convert it for use in KiCad and Eagle though I'm not very familiar with these programs yet and the implications exports cause on schematic data. I started to do some research into seeing if any major developers such as Team Exodus released their schematics. (I really wish they would) That's how I came across this. Do you have schematics for mod chips? I encourage you to share them. In today's age we should be open sourcing old technology such as this instead of letting it die into a forgotten history. Happy modding, nerds. -iRuinLunches The contents of the zip: AussieChipModChips.zip
 -

When You Have Damaged Your Pcb While Trying To Mod It.
SS_Dave posted a topic in Tutorial Submission
When your tring to solder to a circuit board and you damage it don't despair most stuff up's can be fixed If you have ripped the trace off the Xbox circuit board you need to STOP and try to relax, Walk away from the job for a minute or ten or more if neaded This is the trace that is damaged and need's to be repaired. This is a pic of a undamaged PCB same location. The red wire is what was suposed to happen 1st step Clean off the paint. I cheated and used a Glass fiber pen to do that but gentley scraping the track is ok you only nead to remove the paint. 2nd Step Add flux to the board 3rd Tin the trace 4th Prep the wire you are going to use. I use wirewrap wire for a repair like this one as it's a single strand. 5th Tin and trim the wire. I should have trimed it a bit shorter 6th Lay the wire on the tinned trace and apply heat. 7th Clean up the PCB Now rince and repeat for the other end. Once you have tested it and your happy a small dob of hot melt glue or even a dob(pin head sise) of super glue to stop the wire moving. Not on the solder joint say 5 to 10mm(1/4 inch) from the solder joint. -
Hi everyone. What Xecuter MOD Chip is this? I tried browsing the stickies but couldn't find a matching picture. The only thing I remember is that this was solderless. Also, is there a diagram somewhere that I can solder it into the XBOX instead? Thanks in advance.
-
Hello, I have a V 1.0 Xbox that i bought modded back in 2003. around 2004 i updated the harddrive to a larger, and i did an update with Slayers disk(v2.4?) I cannot seem to be able to identify how the xbox was modded initialy. i have a "unknown" bios version. i cannot see a installed modchip. and rocky5 softmod disk does not give me any options to update the softmod. Would it seem that this could be an tsop fixed unit? from what i can remember, i do not think the unit was opened, so im unsure it its a tsop or softmod.
-
Hey guys please contact me if you have any old original xbox mod chips that you would be willing to sell i may be intrested in some xenium chips and smartxx but just contact me if you do thanks
-
I have the parts to do either a TSOP flash or a DUO X2 GS modship install. Not sure which one is the most beneficial. Also have a 2TB HDD I'll be putting in it for storing my disc images. Just trying to figure out if I should softmod and then flash the TSOP and have the chip as a backup or just go straight for the chip install. Thoughts?
-
140 shipped both work fine no issues
-
Selling x3 chips and xlcd brand new mod chips are used
-
I have a xenium chip with led board for sale $100 dollars shipped I have to already not planning I using this one
-
 These past few weeks have been a real voyage of rediscovery as I hadn't softmodded an xbox in years and the scene has changed so much - Rocky 5 was completely new to me. I was wondering how to go about installing XBMC on startup - which version is the best etc... Sorry for sounding like such a noob but this is all new to me again. I have coin ops, games and emulators like the Megadrive and Snes already installed. Any help greatly appreciated.
 -
Hi - I recently updated my hard drive using HDM v 1.9 and it is now ready to mod - I have two options 1. Since I have all the files from back in the day to use Splinter Cell the SID I could mod it easily then I can use put Rocky 5 over it using the Rocky 5 disk. OR 2. Go to the trouble of setting up Rocky 5 Memory card mod -using a flash drive and Splinter Cell - have all the leads from back in the day and recently downloaded all the files and software needed. My question is does it matter if I choose the lazy option (number 1 above) or since I'm starting afresh with a new drive should I take the Option 2 route? Thanks in advance
-
Any one can identify this chip it has no marking and at startup it sais xecuter 2 but cant find an identical one
-
This HDMI mod replaces the AV port completely and offers an HDMI port instead for convenience. The Installed HDMI mod does look like this: The HDMI mod does offer 5.1 sound through the HDMI port. If you don't need 5.1 (or your TV might not support it) you can simply disable 5.1 audio and get digital stereo audio instead. For those who want to add an optical output to there Xbox the HDMI mod does offer 3 solder points to add a TOTX178 optical transmitter. To get the HDMI mod installed you first need to get the AV-port removed. To get it removed you could either use a hot-air station or a heat-gun to remove it at once. But that would put a lot of thermal stress on the board! The better and recommended alternative is to disassemble the Port and remove it one part at a time. First desolder the Metal Tab holding it in place by heating them and prying the metal tab up to pull it out. When the metal tab is removed take a sidecutter and clip off all the pins from the video port as they are what keeps the Port in place. When they are clipped off you can take the port cover off by simply pulling it upwards. Next step is to remove the remaining plastic piece and desolder the rest of the pins and clean up the area a little. Position the first Adapter exactly as show in the photo. The red arrow marks the PTH that has to be alligned centered. Once Positioned solder all the marked points down and make sure they are properly connected before continuing with the second adapter! After soldering all the necessary points insulate the 2 soler points shown in green. A piece of kapton tape works well. You should do this to be sure there's no unwanted connection occuring between the 2 adapter pcbs. Next up is the second adapter. Just position it above the first adapter using the 2 big holes to allign them and solder down the marked points. Again check continuity before continuing with the next PCB! Last PCB is the HDMI mod itself. You need to position it slightly off centered on the second PCB. The HDMI ports pins will be position it correctly. Just solder down the points that are marked with the red arrows and the install is almos done! Last up is setting the Video mode. You need to add 2 small bridges on the bottom side of the PCB. Just solder in the 2 bridges and the video mode is set correctly! If you want to use the optical out you can easily add a toslink port to the HDMI mod by simply soldering a Transmitter to the 3 marked pins.
-
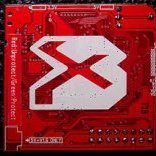
$550CAD plus shipping Payment through PayPal. Selling a unique system to a new owner, I put together a great console with unique installed custom parts with a stealth switch to choose between empowering a lighted display or a dark environment while gaming. This console is carrying an Xecuter 3 signature mixed with XCM's fitted 3x hard drive bay module which allows you to switch between 3 different hard drives which contains three different dashboards. On the primary dashboard running UnleashX is themed with my signature advanced new age dynamic themes that I personally created and only available to valued supporters. In the inside of the console has dual custom LED heat sinks on the GPU and CPU branded by Vantec's rare out-of-production IceBerq 4 Pros. HardWare: v1.2 Xbox Dashboard TSOP X2 Bios Samsung DVD Drive (Rare)Xecuter 3 Jewel (Mad Modders Edition) - only one I have... (Rare)x2 Vantec IceBerq 4 Pro (CPU & GPU) - re-pasted with Arctic MX4 (Rare)Xecuter 3 (Christmas Edition) Chip - Includes bank selector on front (Rare) Xecuter solderless Xapt3r V1.0-1.5 Custom LED Rocker Switch (Powers LEDs On/Off) (Rare)XCM Xtender - Extends the Xbox hard drive capacity to 3 drives total. Custom Blue LED PCB face plate under glow bars - hooked up to rocker switch Custom Blue/Red front eject/power LED Custom Blue LED jewel PCB - hooked up to rocker switch Custom Blue LED controller ports x3 Stock 8GB Seagate Hard Drives. Software: Drive 1: UnleashX Dashboard Emulators Homebrew Applications Drive 2: User Interface Dashboard Emulators Homebrew Applications Drive 3: XDK Lancher Dashboard Console Applications Pros: Has rare hardware Custom colored boot animation Config Live 3294 with recovery (flashed to work with v1.6 xbox as well) Ability to boot 3 different drives on the same Xbox Turn LEDs on and off with a switch Cons: Some scratches or nicks on the console Xapt3r has a wire soldered to the D0 (pin broke off) - works better than before. XCM IDE cable cannot be removed from Hard Drives(will result in damage to the IDE cable) IceBerq 4 Pros are fans noisy (due to age) FYI: If console fails to boot on arrival means the pin from the Xapt3r has fallen out, the bank select button was switched in transfer or chip has come loose (you can still access the inside). Keep in mind when taking the console apart or modifying it by any means do not remove IDE cables from the hard drives, they're basically plugged in permanently. I like to keep customers up to date to know what they are buying if you have any questions please ask. Selling as is.
-
Got 2 Ram upgraded motherboards for sale. Both have the clock caps removed, have no signs of trace rot and have the IND5004 flashed to the TSOP. Both have the Ram cleanly upgraded to 128mb and are a drop in replacement for your current motherboard. International shipping does cost 20€ including tracking and insurace. Price: 70€ each (around 80US$) +shipping costs. Also attached a shot of the solder work so you see what you get.
-
Hello All, new to the og Xbox modding. i found this one for 15 bucks with intention to mod but already had a chip and an upgraded 250gb hard drive. Curious if i should leave it be or upgrade it....


Board Life Status
Board startup date: April 23, 2017 12:45:48