
van0014
-
Posts
30 -
Joined
-
Last visited
-
Days Won
1
Everything posted by van0014
-
XBox Works but No Light Around Eject Button
van0014 replied to psnap777's topic in General Xbox Discussion
There's a trick I like to use to repair PCB traces. It doesn't always work, but might be worth a try. If you're steady with a little knife, you could scrape off the PCB insulation for each trace. Making sure to scrape enough so the solder gets a good grip, and to use thin wires that won't tear up the trace. If you accidentally cut more than one trace right next to each other, you might need to abandon that area and start again, moving further up the trace. Ideally, you would expose traces in a staggered way, so the solder won't bridge to other traces The other way is to follow the traces till they reach a component, and solder from the components -
MX-4 should be better than stock. The layer thickness is critical to efficiency. I believe the stock paste is thicker than we would apply, which would make it awful. there should ideally be areas of direct contact between the die and heatsink, with the paste only filling gaps Can you get any temps under load? Some LCDs will tell you in game, if they read sensors directly. There's a reason computer overclockers run stress tests to compare temps. The temperature difference between pastes gets much bigger the hotter they're tested at, since the paste influence is relatively linear (W/mK) Pastes are never seriously compared at idle. A small improvement at idle indicates a huge improvement at full temp
-
To my knowledge, noone has properly compared stock paste to a replacement. They think looking at the idle temperature is drawing a conclusion. The temp must be checked while a demanding game is running. Since OG xbox is single thread, the xbox won't tell you the temp. You could have an accessory read the serial data the sensor sends. Until then, noone has accurately concluded paste effectiveness
-
Here's a list of programs to help with the drive passwords. They can apparently get around the password. I haven't tried any of them, but they looked promising. This might also help. It's a list of some master passwords, including some XBox ones. They suggest using Ultimate Boot CD. You could instead burn a disk that only had the MHDD program on it
-
It's possible to get around the hard drive password, but you'd need access to vendor specific hard drive programs. Or a way of sending commands to the drive. I believe the data is not encrypted, but there's disc specific info on the board attached to the drive. Replacing the PCB alone won't work. I thought about reading it's EEPROM. That's possibly encrypted
-
No worries. That EEPROM was tailored for Australia. I'm glad you had a way to get back to NTSC. It's surprising that SS_Dave's EEPROM didn't fix it. I'm guessing the difference might have been in the last 64 bytes? I know they are different in the version I posted
-
You came here to troll?
-
CPU temps at idle doesn't draw any conclusions. Small temp changes at idle indicate the potential for larger differences under load.The thermal dissipation efficiency can only be seen under load
-
Sorry about that, that version was an attempt to recover my original EEPROM. It was corrupt in the RC encrypted area. This one works: https://drive.google.com/file/d/1SIe6tm1KkU-O4OSD4M2WEJSl57-DwzeS/view?usp=sharing It has a different set of those last 64 bytes, different to SS_Dave's. I slightly modified all numbers except the confounder, so it's safe to use without being identical to my xbox
-
It's not a placebo effect, but of course for you, the cement is adequate. You have a biased viewpoint
-
Without thermal dissipation figures for the original paste, it's best to use known good paste. This is good practice, as long as the heatsink mounting clamps haven't deteriorated too much through age. Their pressure is important. The video didn't support it being pointless, instead noted a slower fan speed and reduced CPU temp. The GPU temp increase was probably from poor application. We didn't get to see how he applied the paste, the video was cut at that point. It might not have had any paste. A few degrees matters, and the reduced fan speed confirms this.
-
It's a good place for this topic. I'm new to XBox modding, but found a page that explains the LED errors: https://www.xbox-hq.com/html/xbox-tutorials-163.html#xboxerrorcodes5 Also, I know it's unlikely since the cable works and you get the flubber, but the orange light can point to a fault in the AV cable. This is one of the EEPROMs I made, and it has slight differences in the last 64 bytes. I recovered those from a corrupt EEPROM backup I made (I wrote my own Arduino EEPROM backup software, which left out a nibble when it copied any zero bytes) https://drive.google.com/file/d/17W6QdWoxXxd6Ghtwt7zlzWIIGoZ7W_fK/view?usp=sharing
-
What happened to the EEPROM, is the IC cleared but still working?
-
Aah, I was jumping to conclusions. Ethanol in a cleaning solution is a good choice. I'm thinking for any non-consumable, the manufacturer only needs to mention active ingredients and/or toxic ingredients. And for anything food grade, ingredients that make 5% or less can be unlisted
-
You used 38% Ethanol, what was the other 62%? 38% sounds like whiskey. The best to use is isopropyl alcohol, since it leaves no residue. I heard that traces of sugar can deteriorate a pcb.
-
I had a similar thing happen, but never fixed it. My theory is, the original MS dash file can't be found in the place the softmod expects it in (it might not be included with the softmod). Try to get hold of the MS dash from a backup. I'm thinking the file needs to be copied to shadowC, or on the root drive. Not sure where, but it's not getting found in the expected folder. hopefully this helps a little
-
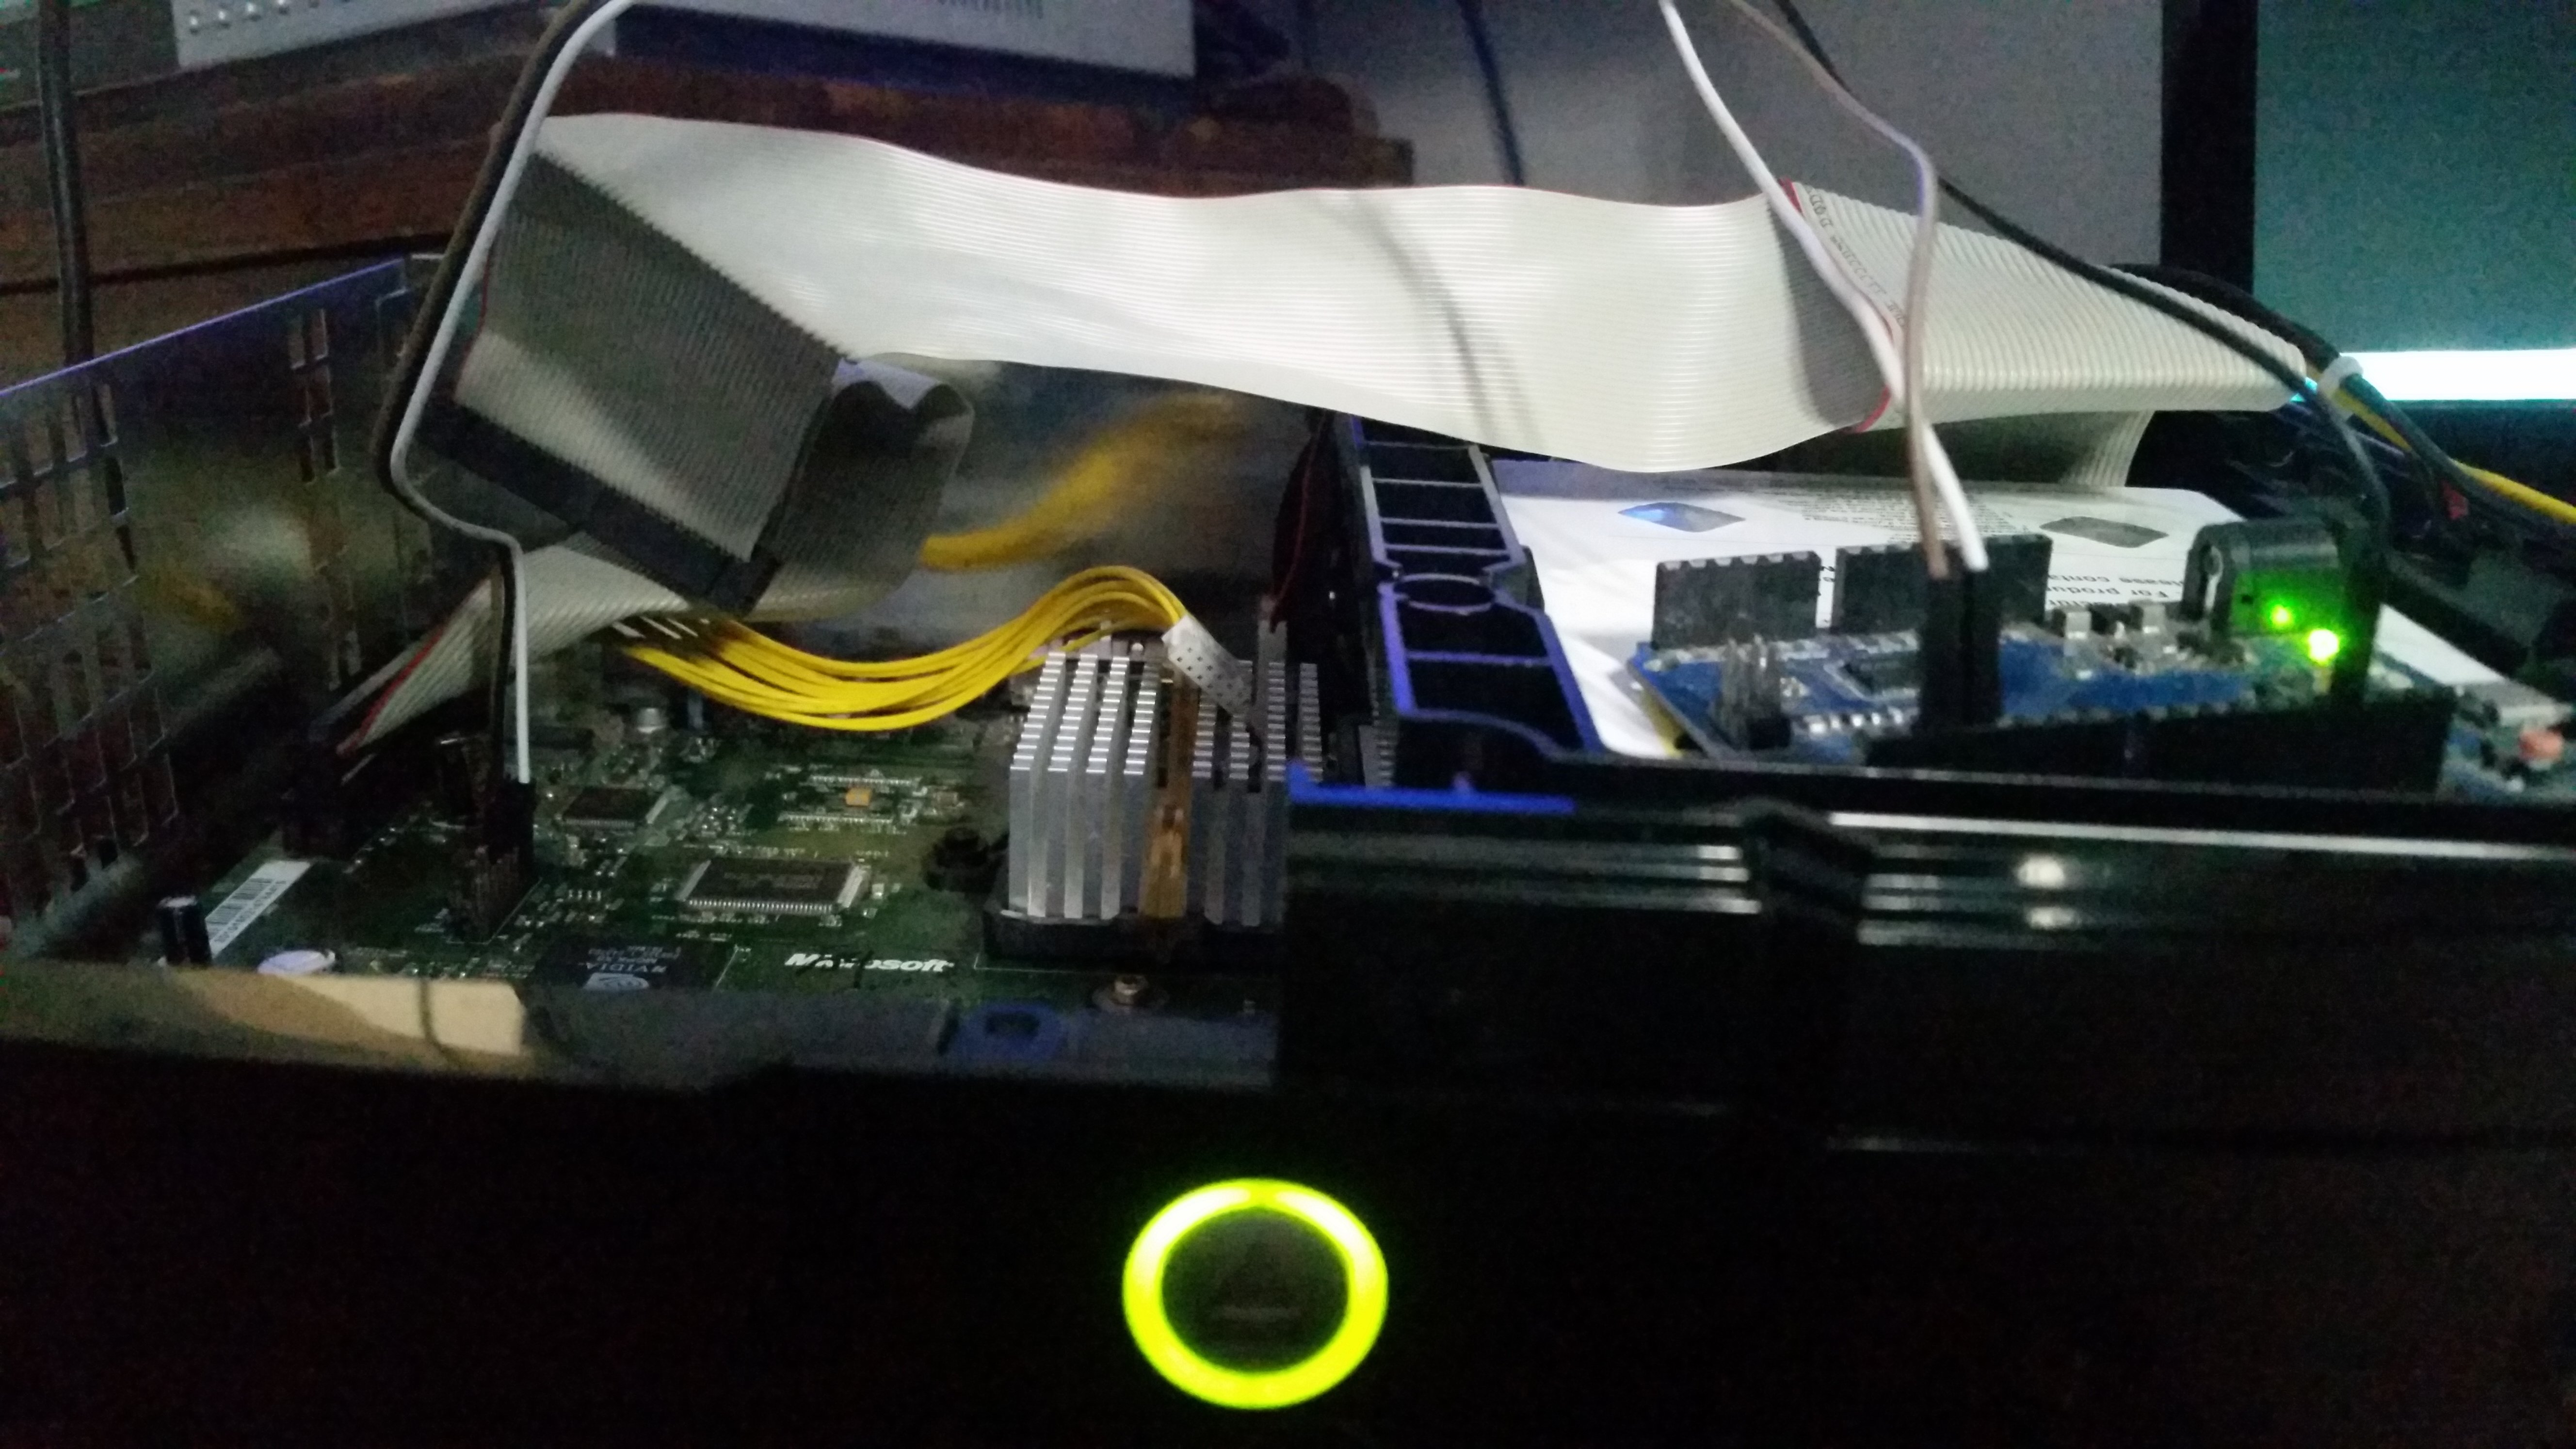
There's another way to repair the board, by tracing the vias (explained below *). Soldering such thick wires is challenging. It takes a lot of heat to get them holding on there. The strength of that wire makes it prone to lifting the thin traces. If you have any old, broken electronics, take them apart and look for thinner wires. Enameled magnet wire would work great here, because it's so thin and flexible. You can buy enameled wire, I had some 26 AWG that worked ok. I think as thin as 32 AWG has been used or recommended. The heat of the iron is the other factor that makes it tricky, and it might even have a large tip. You can regulate it manually, turn it on and off at the wall to keep it slightly hotter than the temperature needed to melt your solder. It should hold temperature long enough to work with, you should have at least 5 seconds before needing to turn it on again. * Alternate repair option: Follow the vias (holes in the PCB that link to the other side of the board). You could solder wires on the top of the board, where you can get to larger PCB pads. It's possible to solder to the tiny resistors, but that's very risky. They easily lift off and move around. The lowest via circled in the second image is close to one. I'd try to solder a thin wire to the via. You could even get a thin wire to poke through the via, and that might be easier to solder to. The shorter the excess wire, the better. That also applies to wire insulation length. I found a large photo of a v1.6 board, and tried my best to follow the vias. The one closest to the LPC was the hardest. You can't see the via in the photo. Not sure if it's a via or just a pad. I've drawn the red circles accurately, and anything outside of them is not part of the trace your trying to repair. The solder on that LPC connector should be more cone shaped to give the best mechanical strength (so it lasts a long time, and you can plug/unplug a modchip heaps of times without it breaking). The solder naturally clings to the metal, and forms a good shape when there's not too much of it, and the surfaces are clean. Isopropyl alcohol is perfect for prepping the board to solder. Quality flux also helps.
-
I found out my eeprom backup has all the original information, except whenever the Arduino code read 0x00, it only saved as 0x0. And whenever there was a single 0 anywhere, it probably didn't copy it. Data got accidentally compressed in this way, and is difficult but possible to recover. After a quick edit, only 12 zero nibbles are missing from unknown areas of the .bin I found out by noticing the last 64 bytes from your eeprom match mine closely. I'm trying to recover this only since it reminds me of reverse engineering game saves. There were some great indie games that i'd make save editors for. And that's an irresistible programming challenge OGEEPROM_Verbatim.bin
-
With a v1.6, I don't have the luxury of the TSOP chip. I'm thinking I need it locked, until fitting the modchip. The strangest thing I discovered, the actual drive security key was longer than 32 bits. The key that gets zeroed in eeprom is used to generate a slightly longer key that the drive is unlocked with. I wanted to unlock my stock drive, but don't have the eeprom key for it. Now I just lock a replacement drive, and can manually lock/unlock with xboxHDM
-
Thanks for all your help. I'm finally softmodded. The locked drive was the original, which now has no key. I'll need to format it if the master password is known, or dump the data on it's board to recover the key. Error 21 in my case was corrupt softmod files. xboxHDM fixed it. I probably pulled the power cord on the drive at the wrong time
-
Yea, it boots to either error 21 or error 6. Not sure what's causing 21, but probably bad files on a replacement drive that I locked with the new eeprom. Not sure if NDure files alone give the necessary stock files
-
A total success! It boots! Thankyou so much! I'll probably now need to edit it so it at least has a different live IP, mac address and serial number. I'll even try just copying the last 64 bytes, and using the generated eeprom
-
I had a look at the site, but it doesn't go into detail about the last 64 bytes. They seem very important. I'll quote my findings from earlier, 0xF8: 0x80 this bit gives a solid green light. Still no video for me 0xC0: 0x0F - Flashing red and green 0XDC: 0X5C000800 - Gives flashing red
-
That was worth a try. It had the 64 bytes as blank, though. At least it takes the serial number. It flashed the green light a few times then went solid. If I knew how to handle RC4 encryption (do all XBoxes all use the same key?), I'd make a program that decodes it all and saves it. Though my language is Game Maker, it's definitely up to that task. Thanks for your knowledge on the bios. I now have realistic expectations that the mod chip won't help booting without the right config data.
-
That would be incredibly helpful! Should I change any of the data if it works, so it's not a clone of yours? I've tried using the RC4 encryption key (https://xboxdevwiki.net/Kernel/XboxEEPROMKey) to edit region info, but had no success there. Perhaps it's not a universal key. I'm hoping even just getting the last 64 bytes from you could help. More findings on the last 64 bytes, 0xF8: 0x80 this bit gives a solid green light. Still no video for me 0xC0: 0x0F - Flashing red and green 0XDC: 0X5C000800 - Gives flashing red

Board Life Status
Board startup date: April 23, 2017 12:45:48