wikati
-
Posts
303 -
Joined
-
Last visited
-
Days Won
23
Content Type
Profiles
Forums
Calendar
Store
Everything posted by wikati
-
this is why i need to use the recommended software...... forever lost....
-
a big portion of your success will come from timing on the cable swap. i believe in 261812 you want to swap cable before loading chimp. but the tutorial by rocky 5 mentioned in kaosengineer post will enlighten you to those details.
-
im never the most correct guy, so my advice needs to be treated that way. but my process looks like this. install softmod open case bridge pads and/or solder wires in place (1.2-1.5 is hands down the easiest) boot hexen in the tsop/modchip section i start by running the "non-winbond flash' this one boots a modded evo-x menu where you can choose your bios, just before flash it shows which tsop you have you cannot brick your console from this screen, it just wont erase the bios if you try to flash a winbond tsop (i cannot guarantee this although i have done it several times with no effect and this is also re-iterated in the instructions in hexen) if you've entered this menu "cleanup failed flash files" is recommended after leaving if it is winbond i leave the menu back to hexen and go to winbond/sharp flash menu and flash from there... the only trick with winbond is when it boots to gentoox loader you scroll to right to find advanced and choose flash menu/hdd flash and choose bios.bin.... caution: if you try to flash the wrong chip using the winbond menu you will have a bad result. potential brick. thats it. the winbond i did lastnight failed 2 times before it worked correctly and i think it was because i hadnt cleaned up the files from entering the evo-x menu the first time. would be better practice to arm yourself with knowledge of the TSOP prior to booting hexen (analyze the chip on the board, reference numbers that are on the chip... etc..) i think the reason i had no worries is because 1.2-1.5 is same tsop unlock process (soldering) no matter which tsop is on board. EDIT, i have only ever used stranded copper wire, cant remember the gauge (rather small) also, at first i was pullling off the insulator and taking about half the strands, twisting them up, tinning them and using that to bridge the pads that need bridging for tsop unlock. now i just use solder and it works fine. patience. and if you're confident in your soldering and the install fails just try again. i was so close to ripping it all apart last night.... bad dvd drive, another bad dvd drive, 2 failed installs on the good drive and then the third after cleaning install files.... bingo.
-
you just witnessed the clash of titans. now put a sock in it and go mod one you little stinker.
-
How do you run iptv? ive never seen that on xbox. these are sweet benny, im trying to stock pile enough cash for an xbox related endeavour.... keep me in mind. your units are very nice. message me what you have/what you wanna get paid.
-
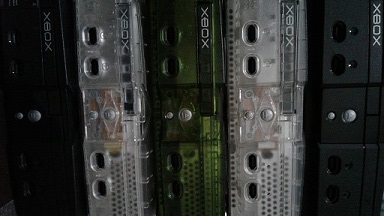
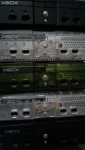
congrats on the sale. the buyer got a great deal IMHO. nice corner windows on the dvd drive. great idea, curious what the round piece screwed to the blue consoles drive is for? is it added?
-
every time this is revived i freak out
-
on a 1.6 softmod i get the video crashing (stops displaying and remains broken until reboot) in the games folder the odd time. if i watch too many for too long. less than desirable but keeping the game count down is likely a solution but not definitely. will experiment. this sort of resonates for me with a mentioned issue of 'too many titles' but i thought the number to be over 200... ive got about 40 games. this isnt a huge problem because its only now and then. and typically you can stilll launch your game (although ive had the console reboot) still a slick interface. would be neat to try build a few of the missing XMV files. coinops/ninja come to mind almost immediately.
-
ive used this non D0 method with that alddin chip. with success AND failure. when i cut lframe and didnt ground d0 for the second time the xbox did not boot.... i fixed l frame and then grounded D0. much to my surprise the console booted and chip worked. not sure of the differences but i just tried it.... i didnt seek to understand. i could have fixed a bad solder point while going back to ground D0, tough to say. just thought id say that..... not sure if im being help or hindrance.
-
nice find. its really nice it was released that way. (finished product and the building blocks) top shelf stuff.
-
Honestly KE, I am in shock the scarcity of information that surrounds this piece of work. i've never directly created this type of content for front ends but i cant imagine it was easy... the word tedious comes to mind! monotonous? i can feel the pain in the back of my neck and my shoulder burning staring at the pc hour after hour. the installation isnt a big deal. especially if you've setup cover art manually before. this is actually really simple. beyond that, all the work has been done for separate folders inside of emulators, breaking them up into manageable categories. I personally have no business with things outside of the "standard north american" wheelhouse. To think id sit down and play through an x68000 title is just absurd. so my set up is going to be easy. but it is neat to have this working.
-
OK, So the moment i joined i quickly rapid fired 10 posts so that i could download XVGM I quickly realized i had 0 idea what i was doing. After a bit of fiddling today i got the .xmv's to display. the insight came after buggering with adding xmv to menu items. once i allowed myself to get past the menu items and try a game it worked..... because. Simply having the preview in the game folder as preview.xmv will display the preview.... now i understand what cbgames talks about when "tricking the video" its like having an image with the video embedded..... so much brain power!! Anyways. Getting back to the menu items. In the unleashX settings\system i found "allow menu edit" this is typically turned off sort of like a safe guard for users that shouldnt be tampering. so you turn it on and then you are able to manually select the preview video for that menu item it adds to the context menu that appears when you press start on a menu item.... COOL. So now all the XMV are working.... and hot damn. unleashx transformed. silly thing. the skin wont stay as default.? it resets on reboot. any ideas for me?
-
Each controller has its own separate issue. Wireless has power issue, buggered solder job. no breakaways majority are chewed wiring issues. Top right is 360 with cord issue 30 CAD + shipping.
-
thank you alpha mendes, now that i've re-installed ram on the board i robbed the chips from i've found this procedure alot more straight forward. with; new chips, lots of flux, some desoldering braid, a copy of xblast, and a couple hour i could likely have one complete. barring any surprises of course. and they are bound to happen.
-
so if you're gonna use m8plus (easiest way to get started with your next step) installing unleash x, im assuming you dont have an absolute requirement to format C? I recently changed dash boards and this is what i did figure out which shortcut on C is booting the dash. i actually made a mistake on my first shortcut and used hexen to get the ftp back so i could swap back the good shortcut XBE MAKER http://www.theisozone.com/downloads/xbox/tools/xbe-shortcut-maker/ i put my unleashx folder in root of E: (just a preference) then I...... IN XBE MAKER Target Path: your path would be "E:\unleashx\default.xbe then touch nothing else. if you change other stuff it doesnt work. i dont know why, this program may be outdated.... I DONT KNOW save the XBE file as the same name as the shortcut in C: thats booting your current dash..... (reccomended you back up the original shortcut in C: before doing this next step.... just copy your whole C: to a safe spot) So, for instance. my last one was named evoxdash.xbe i renamed the new shortcut built with shortcut maker evoxdash.xbe and ftp'd it to the xbox replacing the old one in C:... the way i understand it is; once you've told the shortcut what to point to (the executable file of unleashx) then it is able to show the xbox on boot which executable to boot the old one was pointing to your old dash, and the new one points to unleashx just be careful about backing things up and dont panic if you make a mistake. with the chip and the hexen disc you are usually in good shape.
-
interesting. i wont advise you do anything until we dissect this a little further. at work. will follow-up if noone has later on.
-
im pretty sure that the flash menu in hexen lists the current bios (top right corner). i cant help with pros/cons of newer bios. ive ever tried any other than evoxm8+ on 1.6
-
the method using a pin and a soldering iron that floats around the net is unsustainable. i recently acquired a couple dead boards and one of them has samsung ram which my 1.2 had stolen from the bottom when i upgraded my 1.1 and ran out of new parts. so i said screw it im gonna put the 2 i need on this board. this is a way better homebrew than the pin. i made a small 'puller' out of a very thin piece of wire (the type thats inside of cheap cheap twist ties you get for the garbage bags. twisting the loop over top adds a subtle tension to keep hold of the chip. lots of flux applied to pins (not applied in this pic) each end is bent over and tucked under the row of pins, use a small enough gauge wire you arent jamming it in. heated slowly on low setting with a cheap heat gun (the econo brand heat gun) then one good blast at high once warmed up and it pulled right off. lots of movement of the gun and very delicate pressure when pulling. beautiful. they laid down on the other board with ease tack the corner on X & Yaxis, then line up pins and do another x & y. then just apply slight pressure with finger on chip and hit each pin with the iron. the unit fired right up. this solution originally came from removing a botched install.... removing i didnt want to accidentally scrape one of those small caps/resistors off. and i had already made a decision that hot air had to be the solution to removing these. handling the chip becomes most important once the solder goes molten. 20180318_183738.mp4
-
it worked! i had a drive sitting on the shelf locked to this board too, it fired right up. amazing!!
-
exciting. would be great to save this board.
-
i thought you'd painted that drive!!! madladdery. where is the power source for led coming from? nice mod
-
Curious about this PSU. Obviously by samsung Looks like foxlink v1.2-1.5 but wire color is slightly different according to these pics My supply pin-out below: the white smear on the red wire second from top right column is a second white wire alongside the red leading into pin X@ on black beside purple is 2 blacks crimped in pin bottom right pin is brown on mine instead of gray.... looks like its a similar supply? anyone know about this?
-
OK Here is the situation. Just had a 1.6 PSU open up. I've got a 1.6 board from my first ever softmod. it has been rendered useless after i ended up unlocking the drive... not knowing what was going on. So its sitting there. i have an aladdin xt2 chip. if i install that chip on this board will it just boot? curious on this procedure because anytime you hear about this type of situation (no eeprom) the answer always seems to be "need a mod chip or a tsop) just curious of some thoughts on this. and how it might work.
-
http://surreal64ce.wikidot.com/open:wiki-links wasn't immediately aware of these note: they work out of the box, but need to be turned on in surreal settings.


Board Life Status
Board startup date: April 23, 2017 12:45:48