

Wouter A
-
Posts
53 -
Joined
-
Last visited
-
Days Won
3
Posts posted by Wouter A
-
-
Try to measure the resistance of the path from chip to chip at first, no experience with this chip.
-
Next weekend I will see what mine gives internal and external..
Just to see if there is a difference, i will open one up and take a picture from where it is build in and how it it connected.
-
Ther are 3 75ohm resitors on the board in the y-pb-pr lines,
They are also in the xbox itself, if i solder them inside the xbox i let the there and solder before the resistors from the xbox itself.
You can try to brodge them, normally an output has 75ohm, with these resitors together with the ones inside it is 150...
They are the 3 black components marked 750 on the board, please reply the result.
-
I am not 100% sure but when i plug it in to a smaller set it works fine, with the large i have black screens.
This only occurs with games that are in 480 and are 4:3.
Have no other solutions to test yet.
Will receive a converter from n64 to conduct tests.
-
Does anyone know how the bios is changed?
Force 480P works great, vht still a problem, need it to force widescreen 480P to work on all tv sets.
-
Force 480p bios does not solve the black screen on large tv's.
The real problem is that larger tv sets do not understand 480p in a 4:3 screen size.
I am trying to get a login for assemblergames, mr nova over there created the 480p bios.
I would like to know how, so i can create a force 480P widescreen bios.
Dies anyone here have a account on assemblergames?
-
I live in the netherlands.
I would like to test one as well, to compare this to the mod i do right now.

I use a wii2hdmi converter, the problem i have is that larger screens have problems with 480p in 4:3 ratio.
-
I do not know the exact nature of this line, but i know that when the line for the power button is broken te xbox will switch on and off when you do not expect it.
I would repair it just to be sure.
-
At first you need to repair te trace, this can be done with a single strand of a wire.
Second you can use the via on the end of the trace for the connection of d0.
Please make sure your soldering iron is not to hot, this is mostly the cause of lifting pads.
Make sure to use a good flux, less heat is needed for soldering then.
-
I have noticed a little problem with using the converter...
When using on a smaller tv al is fine.
When i use the larger tv in the living room lots of black screens.
The xbox resolution with a lot of games is 480i, this gives problems with lots of tv sets.
Have found alternate bios files to force 480p on all games, this takes complete care of the problem.
Downside is that you can not use the original cables anymore, they do not support 480i.
Will supply the force 480P bioses soon.
-
Is there anyone who is in possesion of the force 480P files?
they where shared by mr. Nova at assemblergames.
I am in desperate need for these files for the hdmi mod, most larger tv's do not support 480I over HDMI.
thank you for sharing already, i will post a tutorial for adding a WII2HDMI inside an xbox soon, have 4 of them running already ;-).
-
1 hour ago, ludwig187 said:
Very nice writeup and pictures. I did the same some weeks ago with mixed results. There seem to be several revisions and versions of the wii2hdmi board. Some will do 1080i, some 720p and some only 480p like mine (came in a black housing).
Did you set your xbox to ntsc and enable the higher resolutions in the system settings?
I used the cheapest converters i could find on aliexpress. They did the job fine.
-
My brother has a few 3tb sata drives with some smart errors.
I would like to use them in some xboxes.
The drives work fine in the pc, but not for data centers anymore.
How would a xbox react to these?
As the are not running full days, will it go?
-
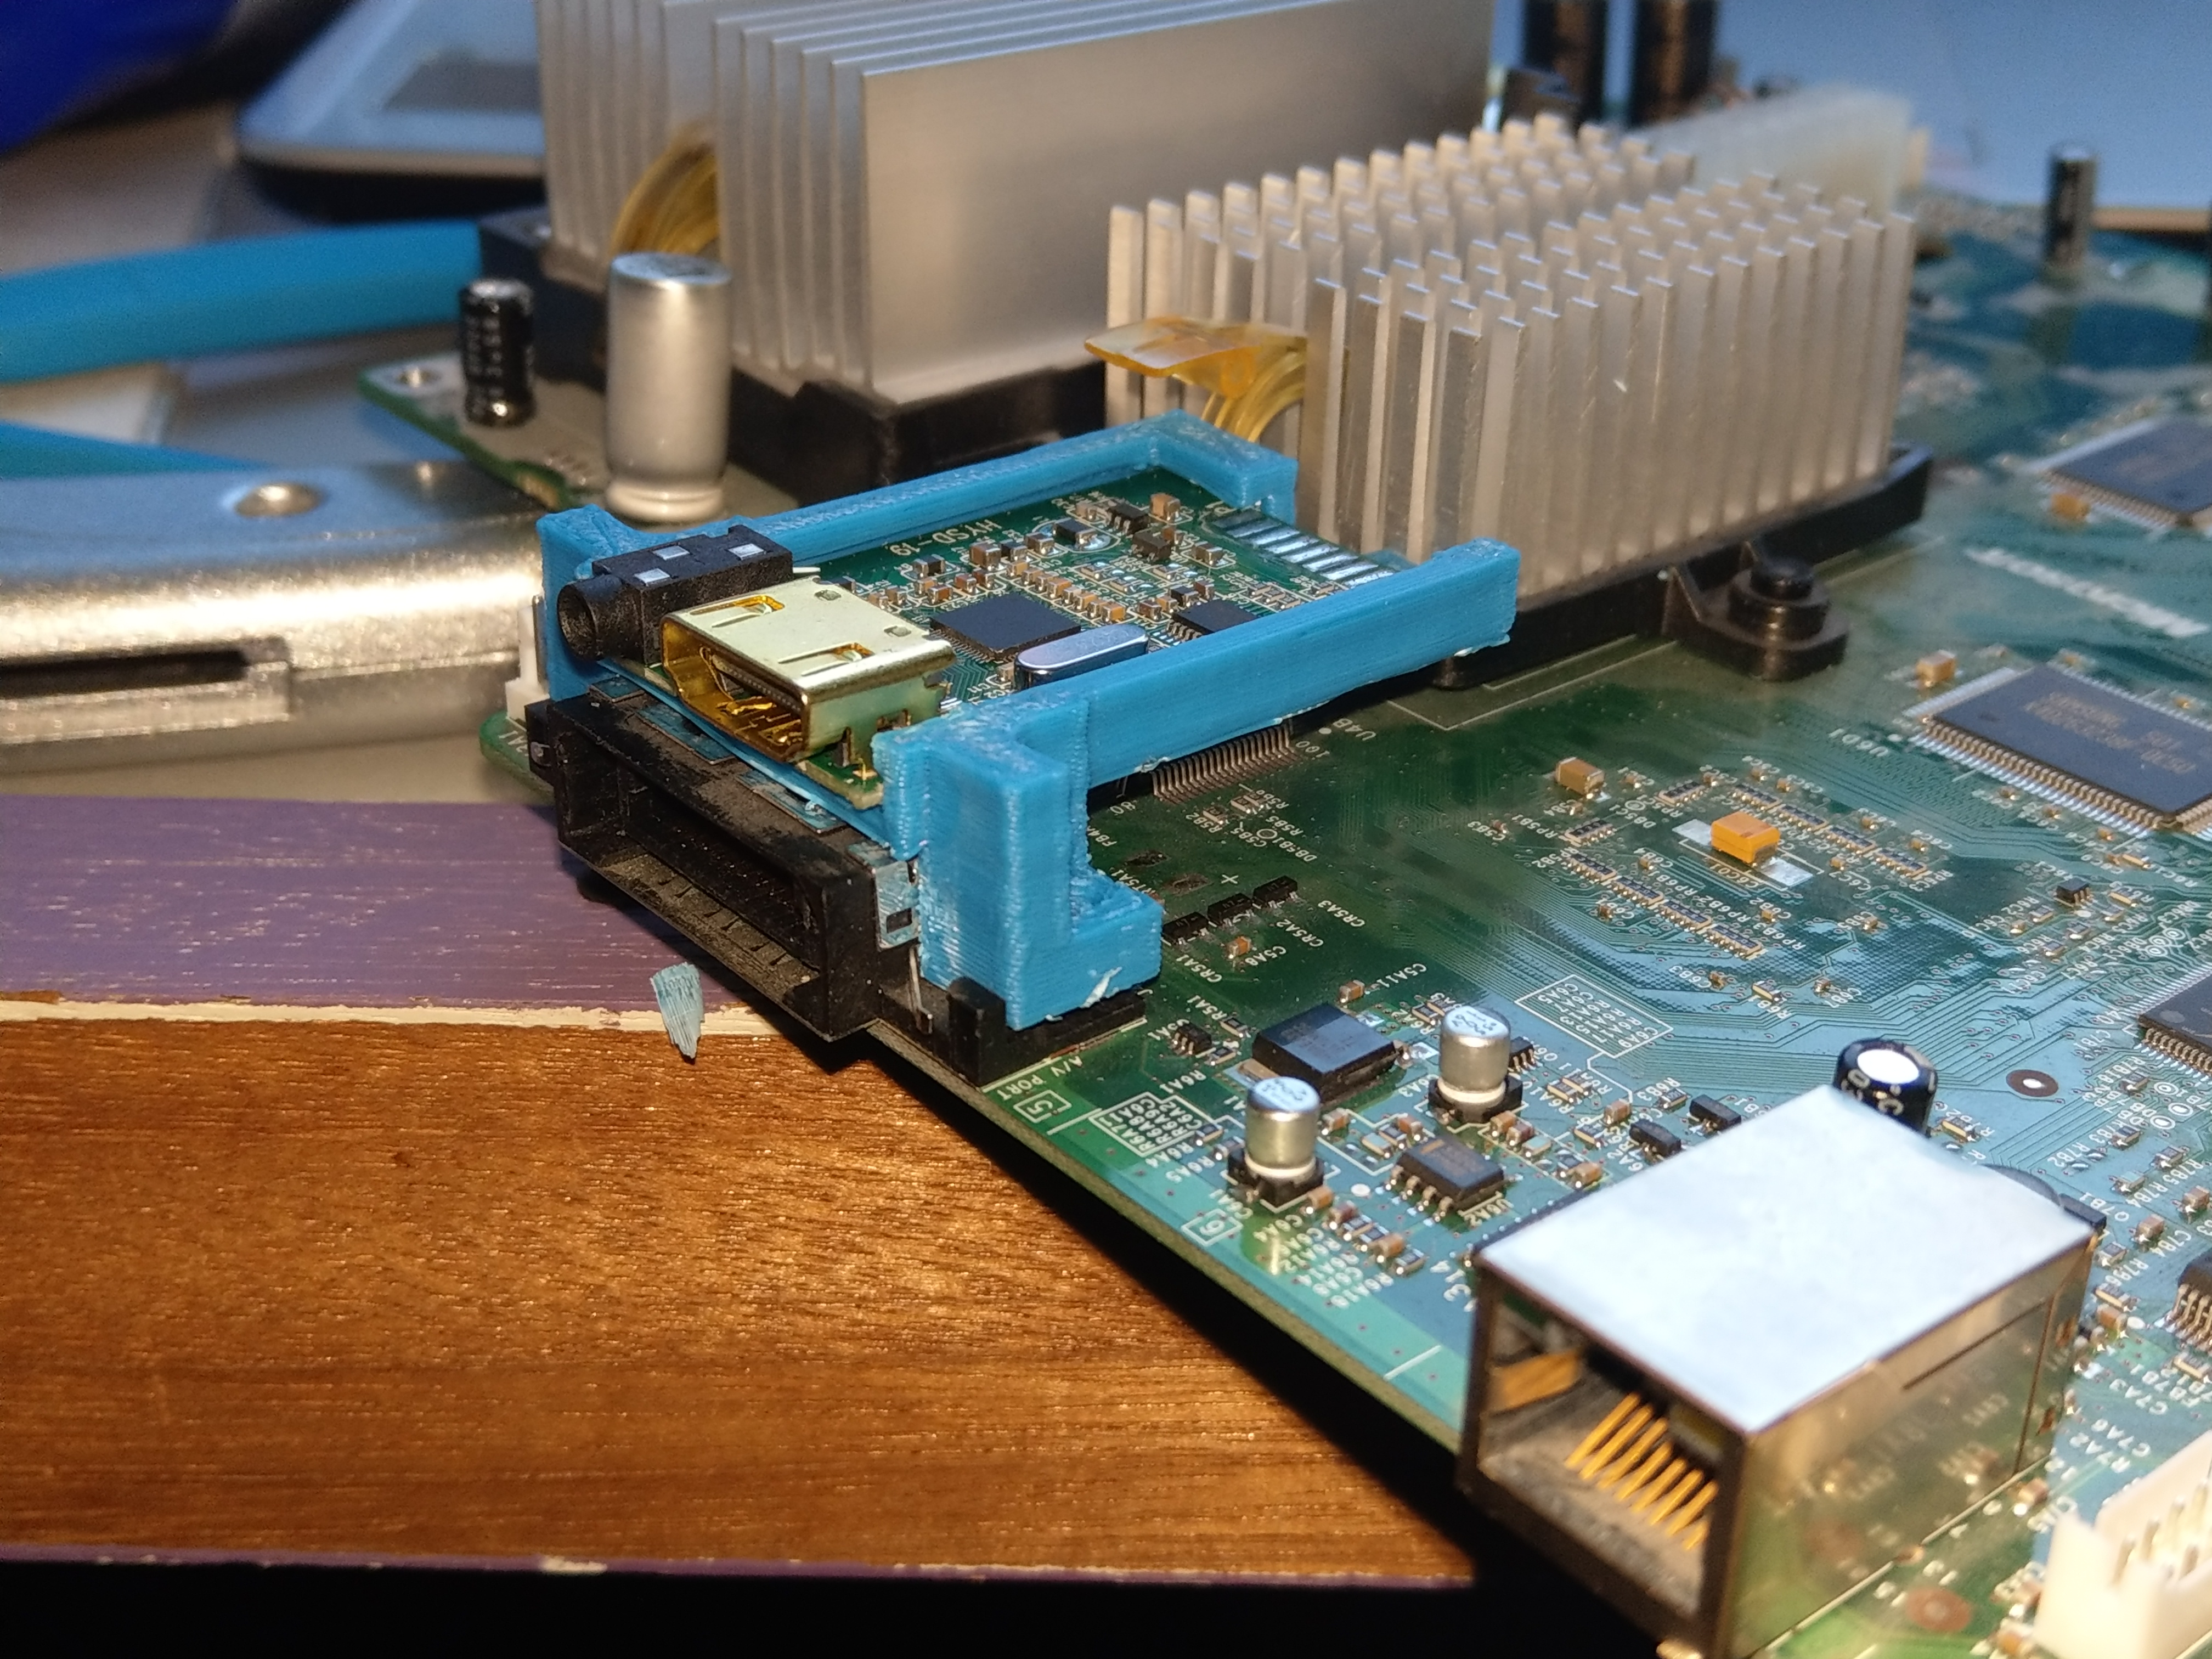
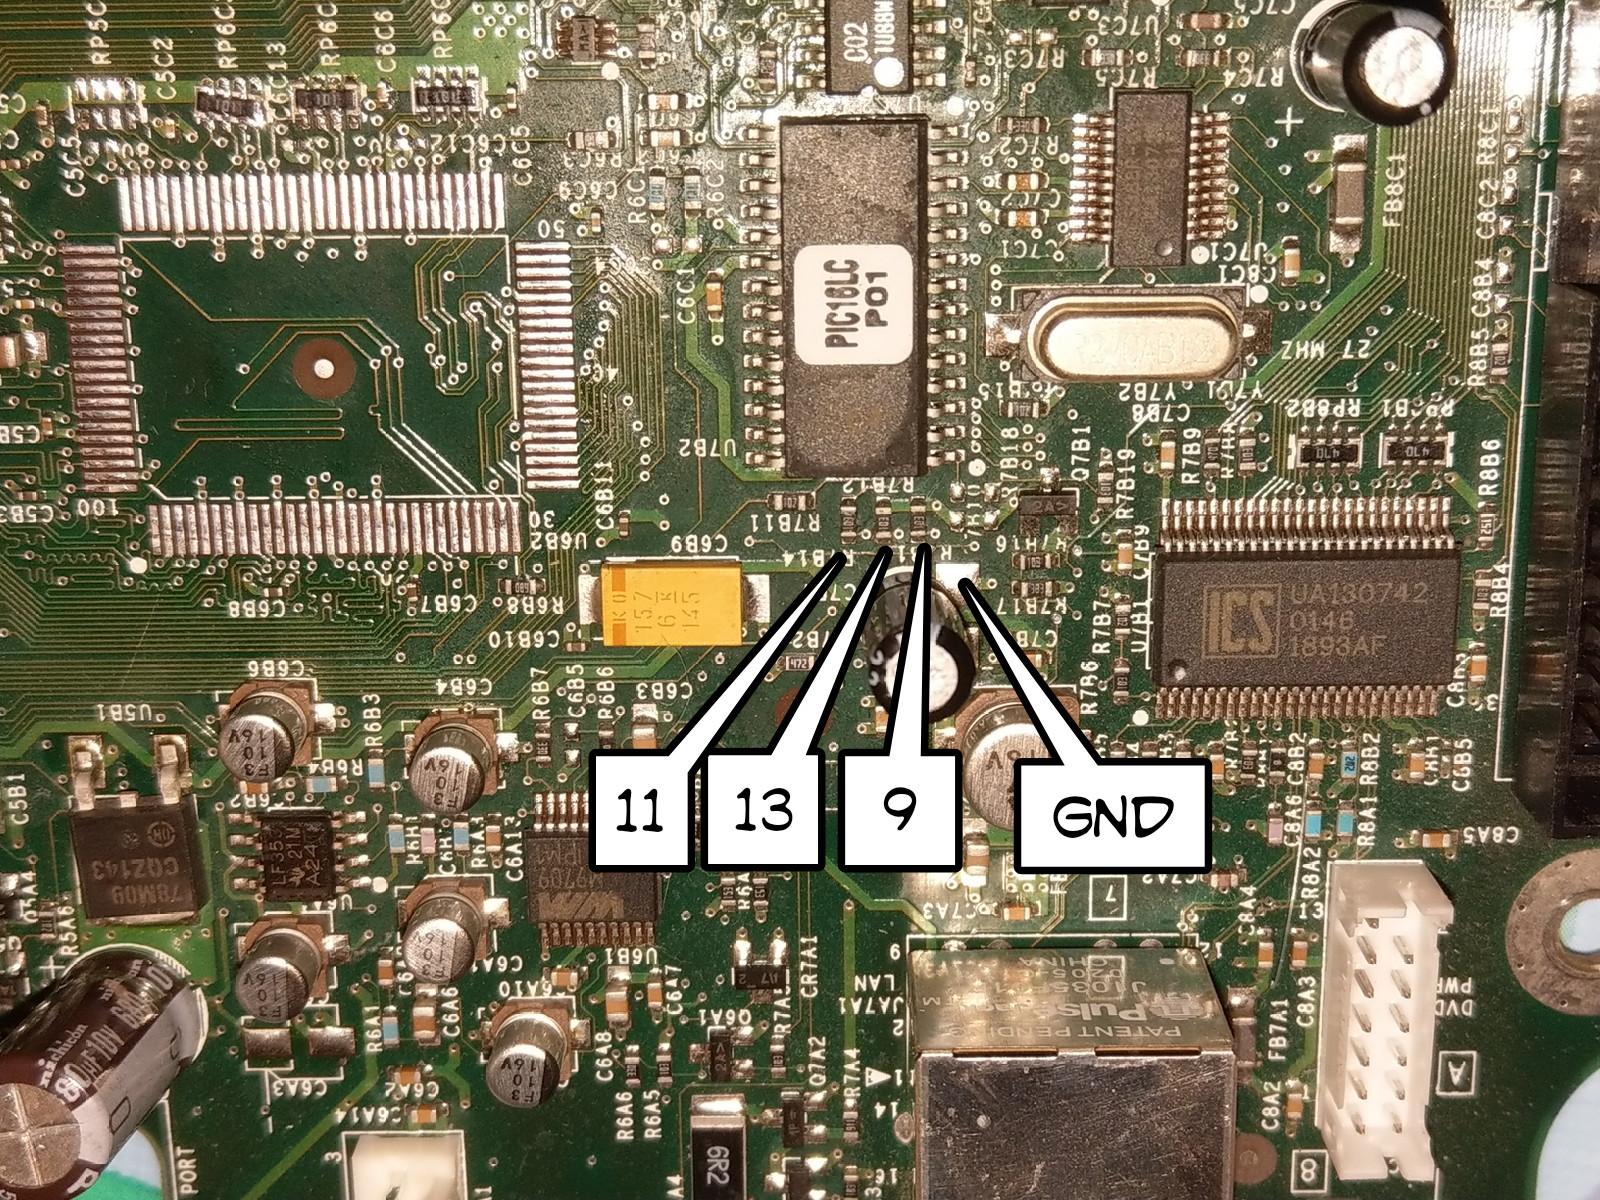
I use a few alternative points, these are on the top of the board so you can use shorter/thicker/shielded wires.
this is on a version 1.1, not yet tested on other consoles, but as i can see the mainbords, the differences are minimal.
This is a broken mainboard, i have removed the a/v connector from the board.
You can also use these points for a wii2hdmi, short 9 and 13 to ground to put in component mode.
-
Welcome here!
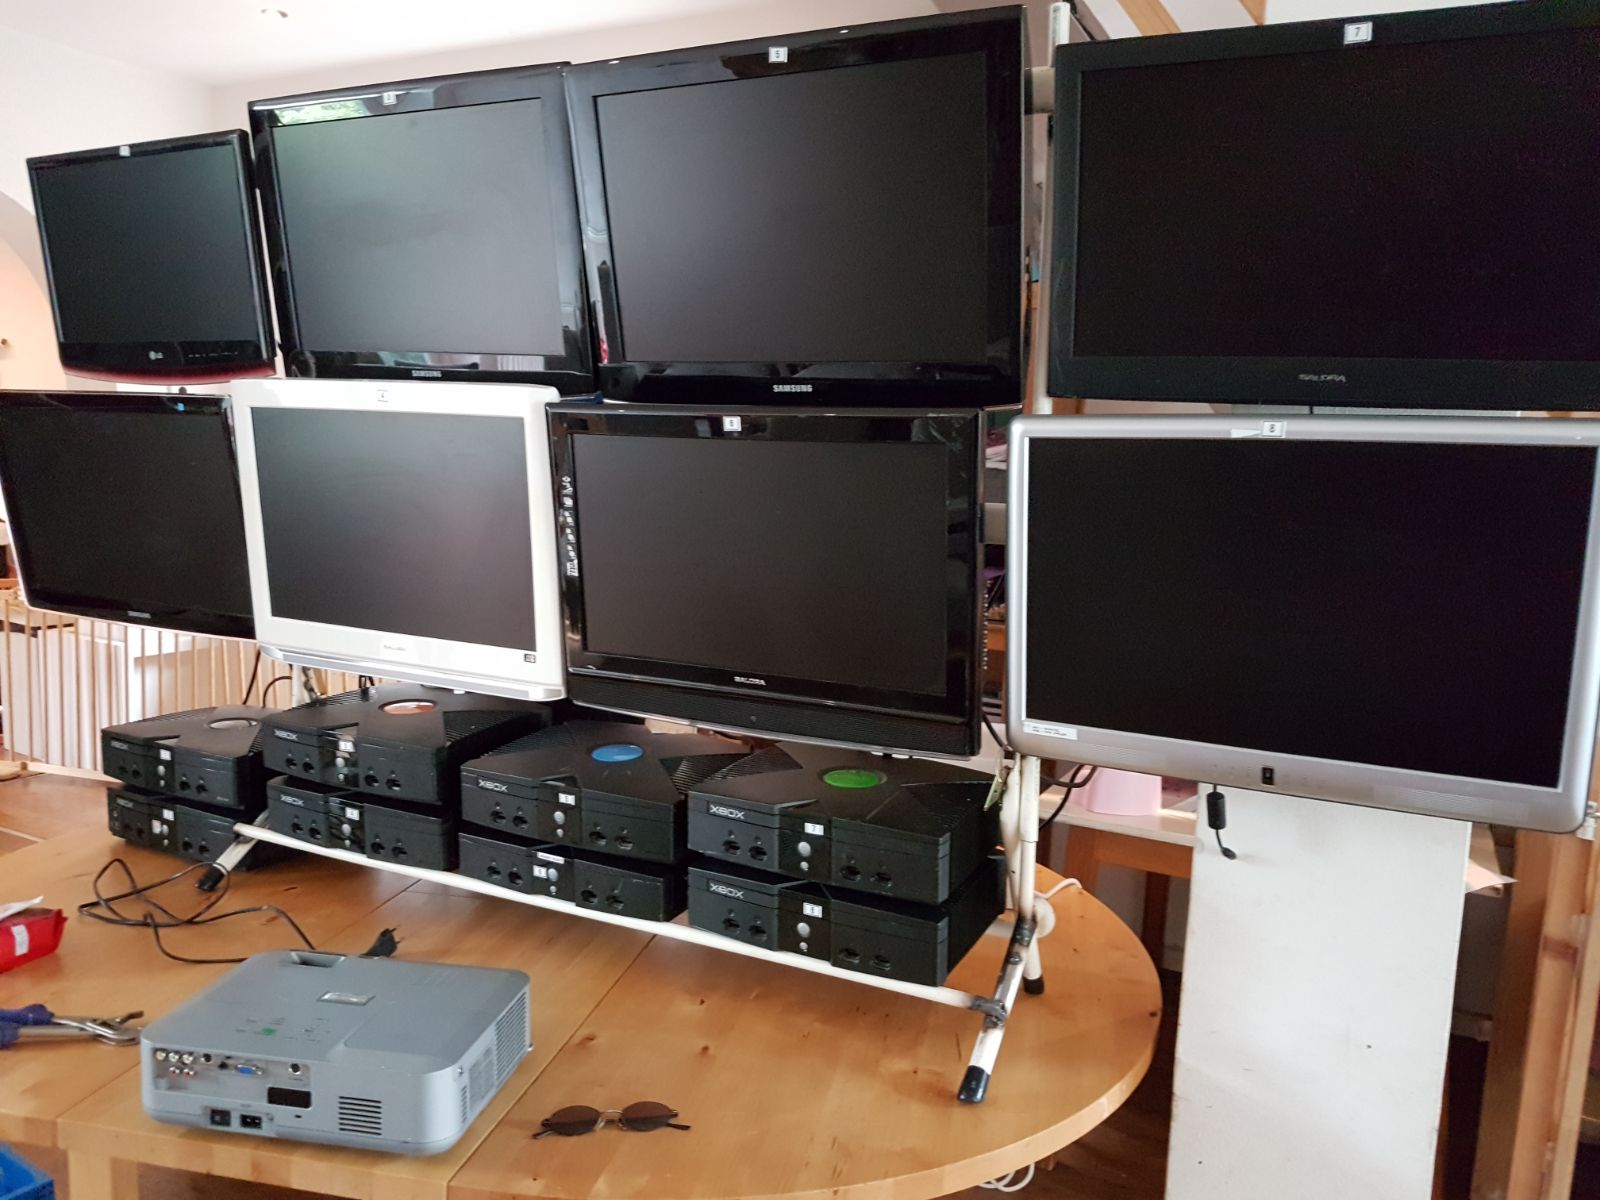
I am also a newbee here, you got 5 xboxes, i have 13 at the moment, it's becoming an addiction accordig to my wife.....
-
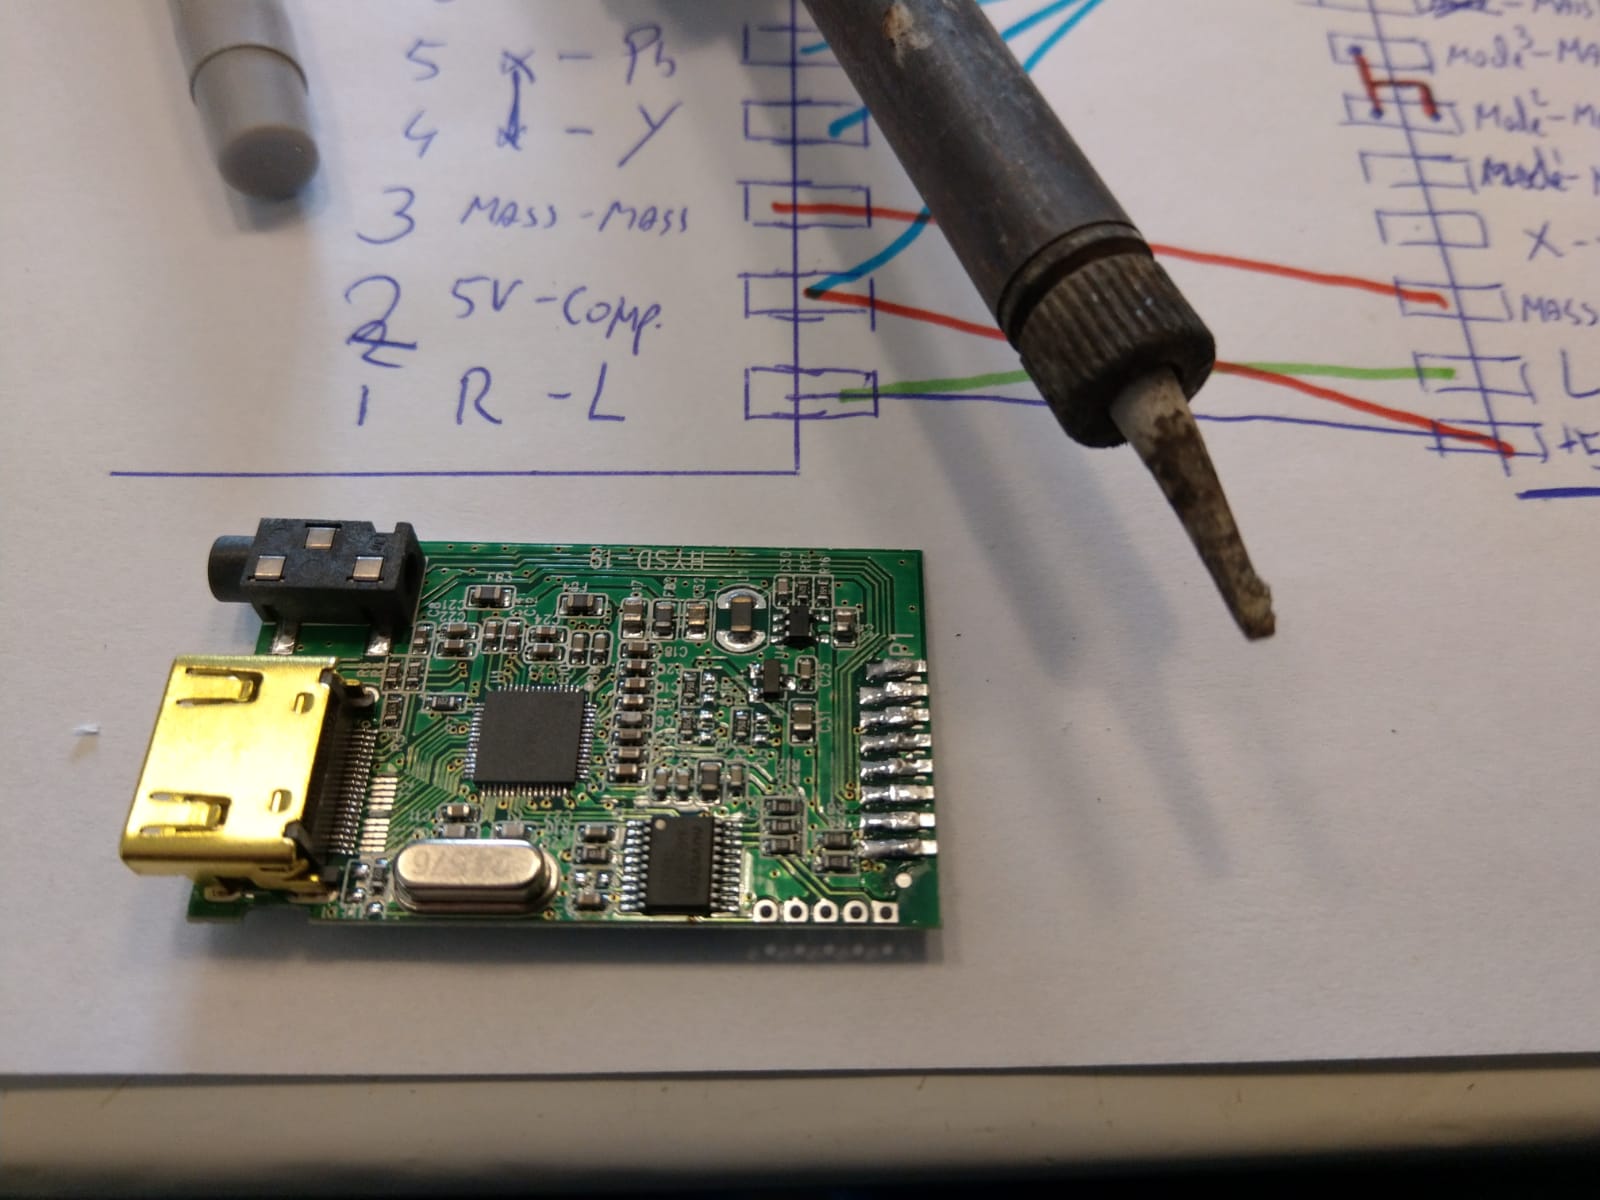
If you are very lucky you can get one with a ms9282 converter chip, instead of this one....
The ms9282 can handle digital audio in!
Maybe this one also, but there is no datasheet for these.
-
Any specific mods in mind?
-
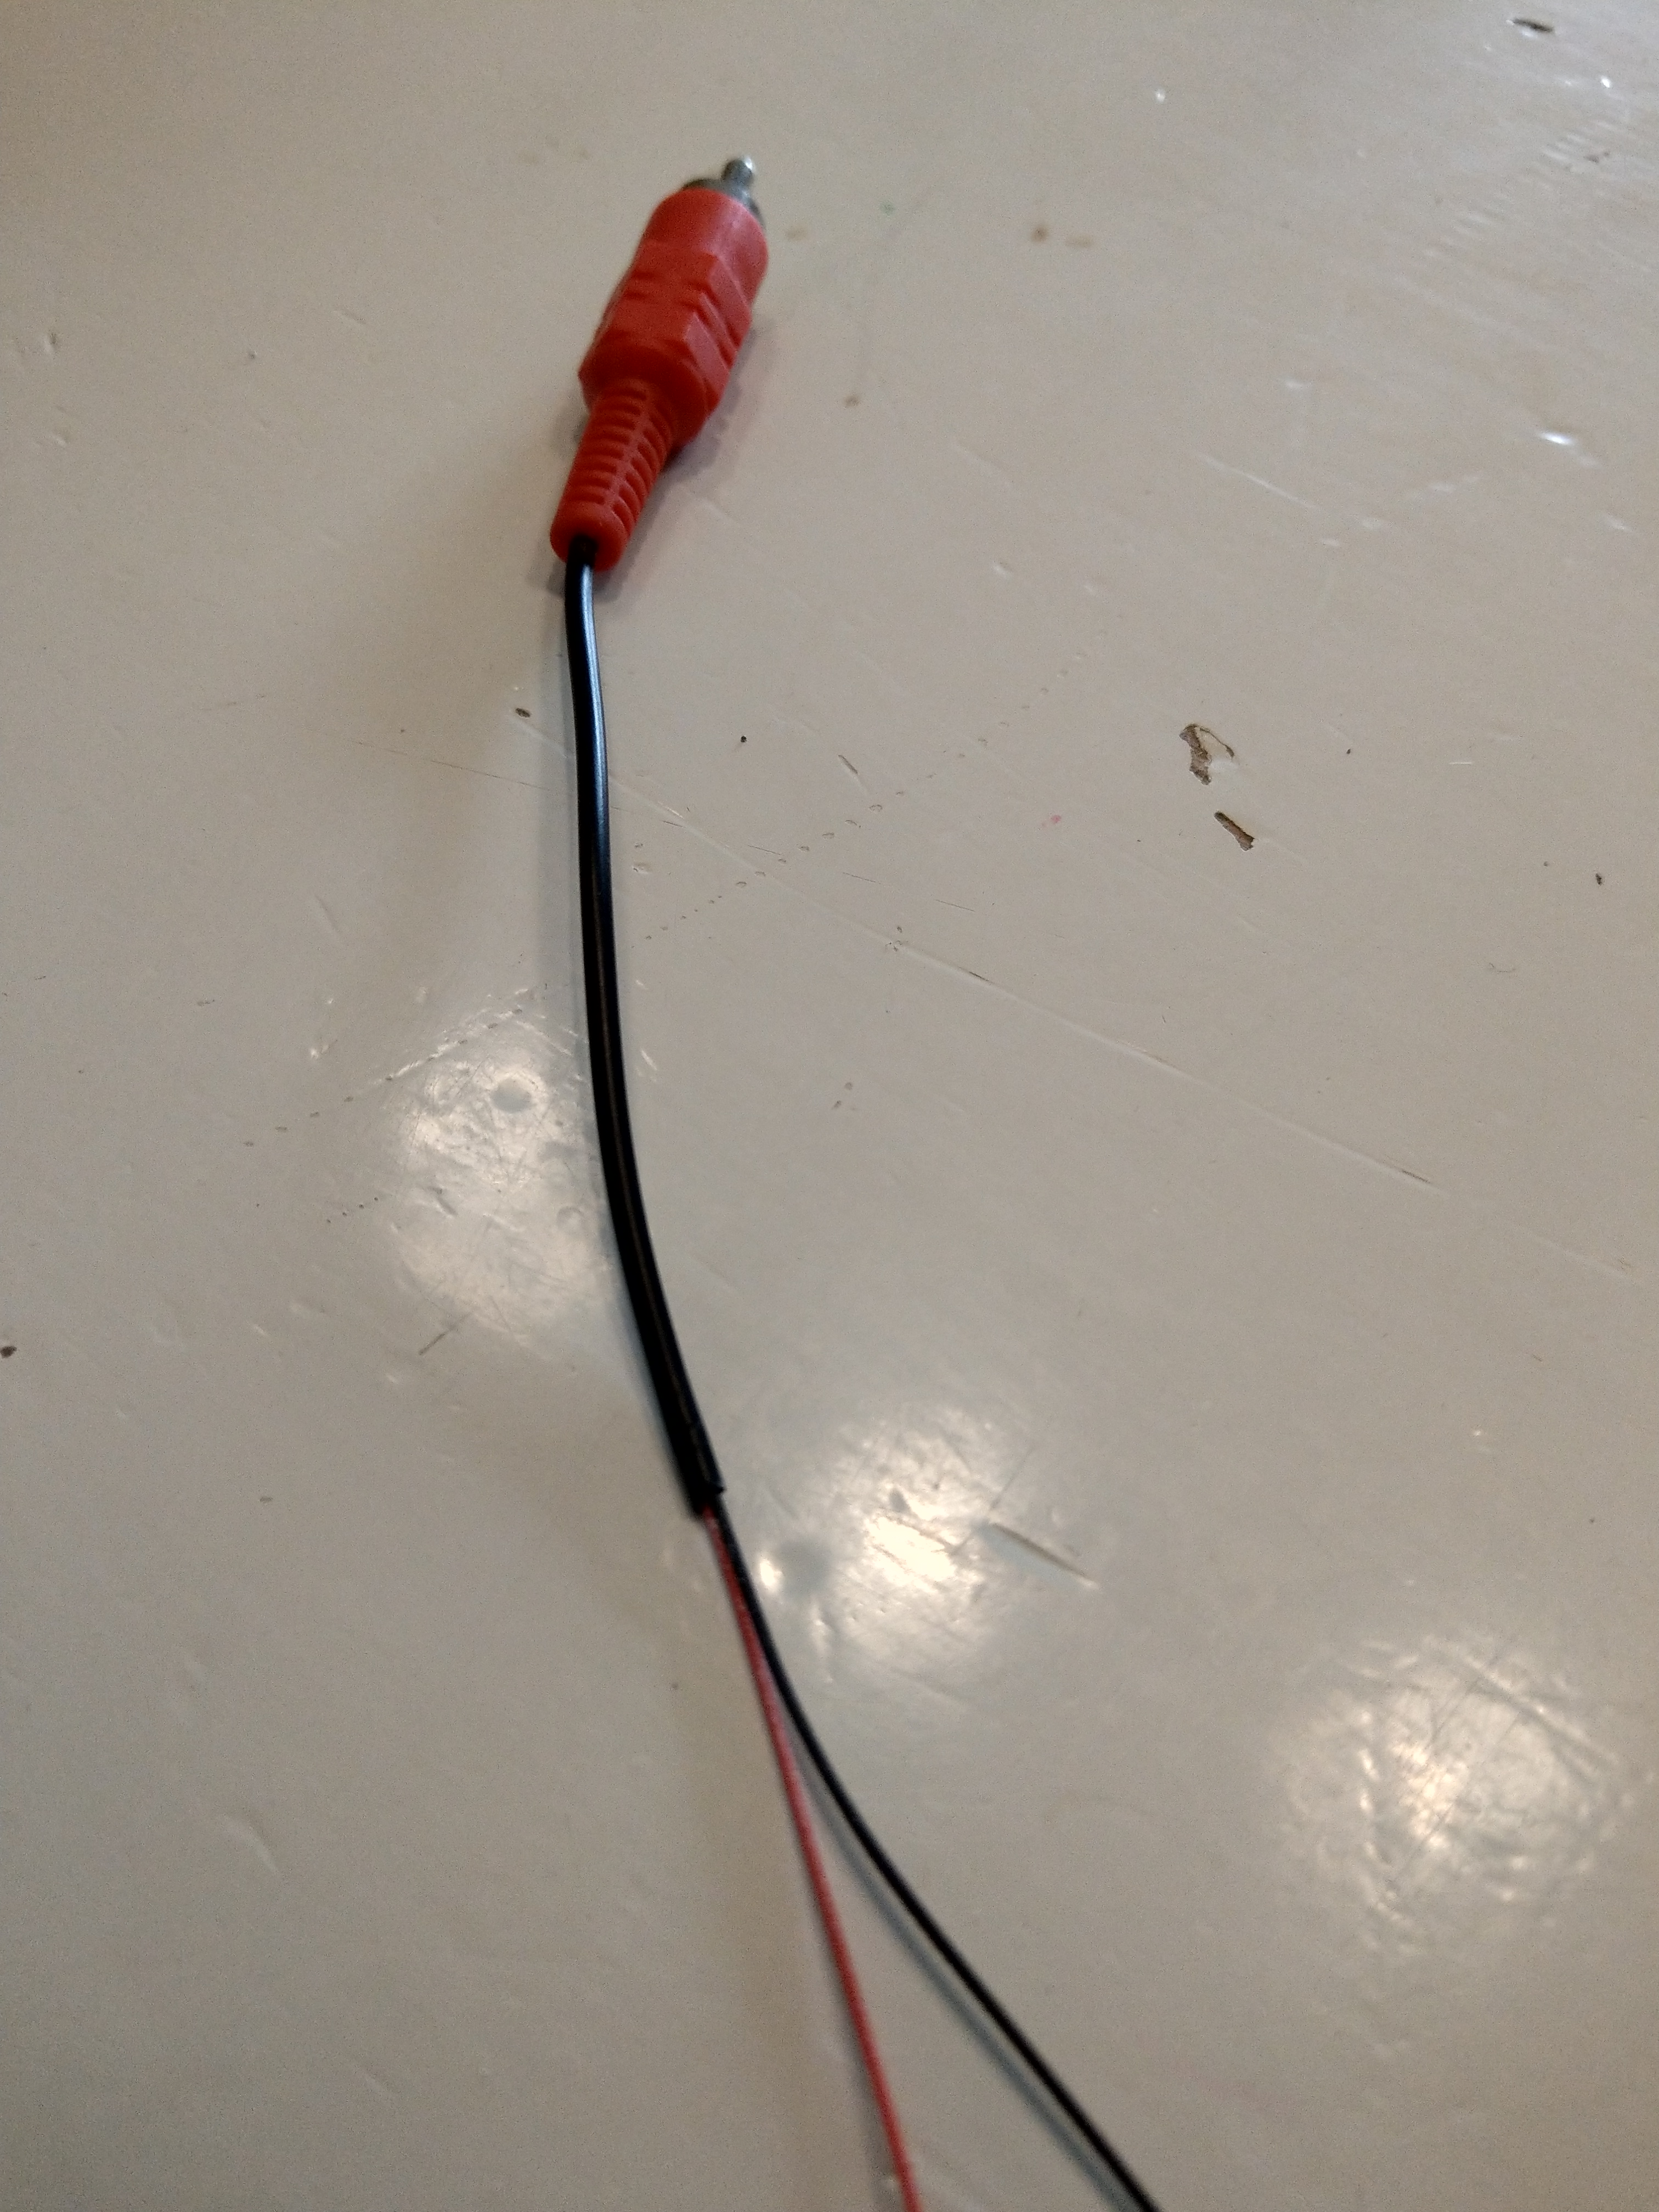
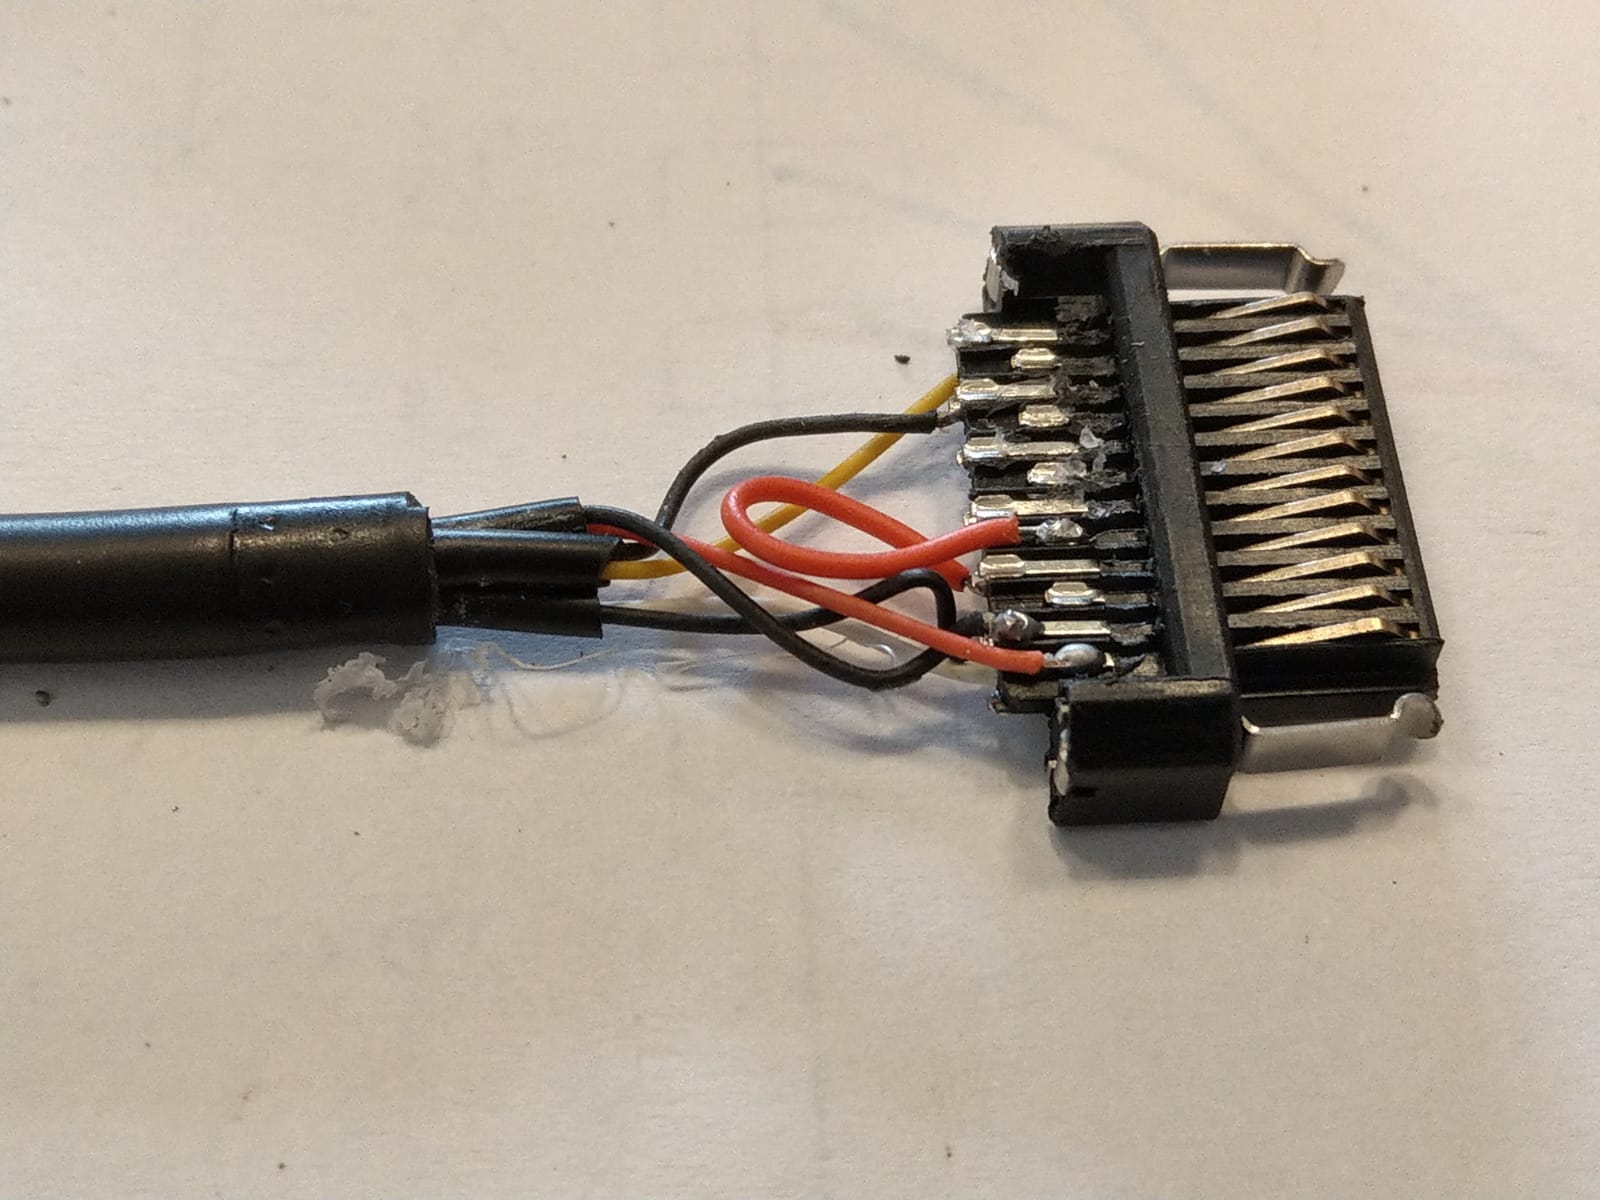
For those who are interested in those el cheapo cables from china...
This is whats inside them, no coaxial cable with shielding, just 2 very thin wires for each connector!
-
 1
1
-
-
Change it to 360 cavles, it will change your world completely.
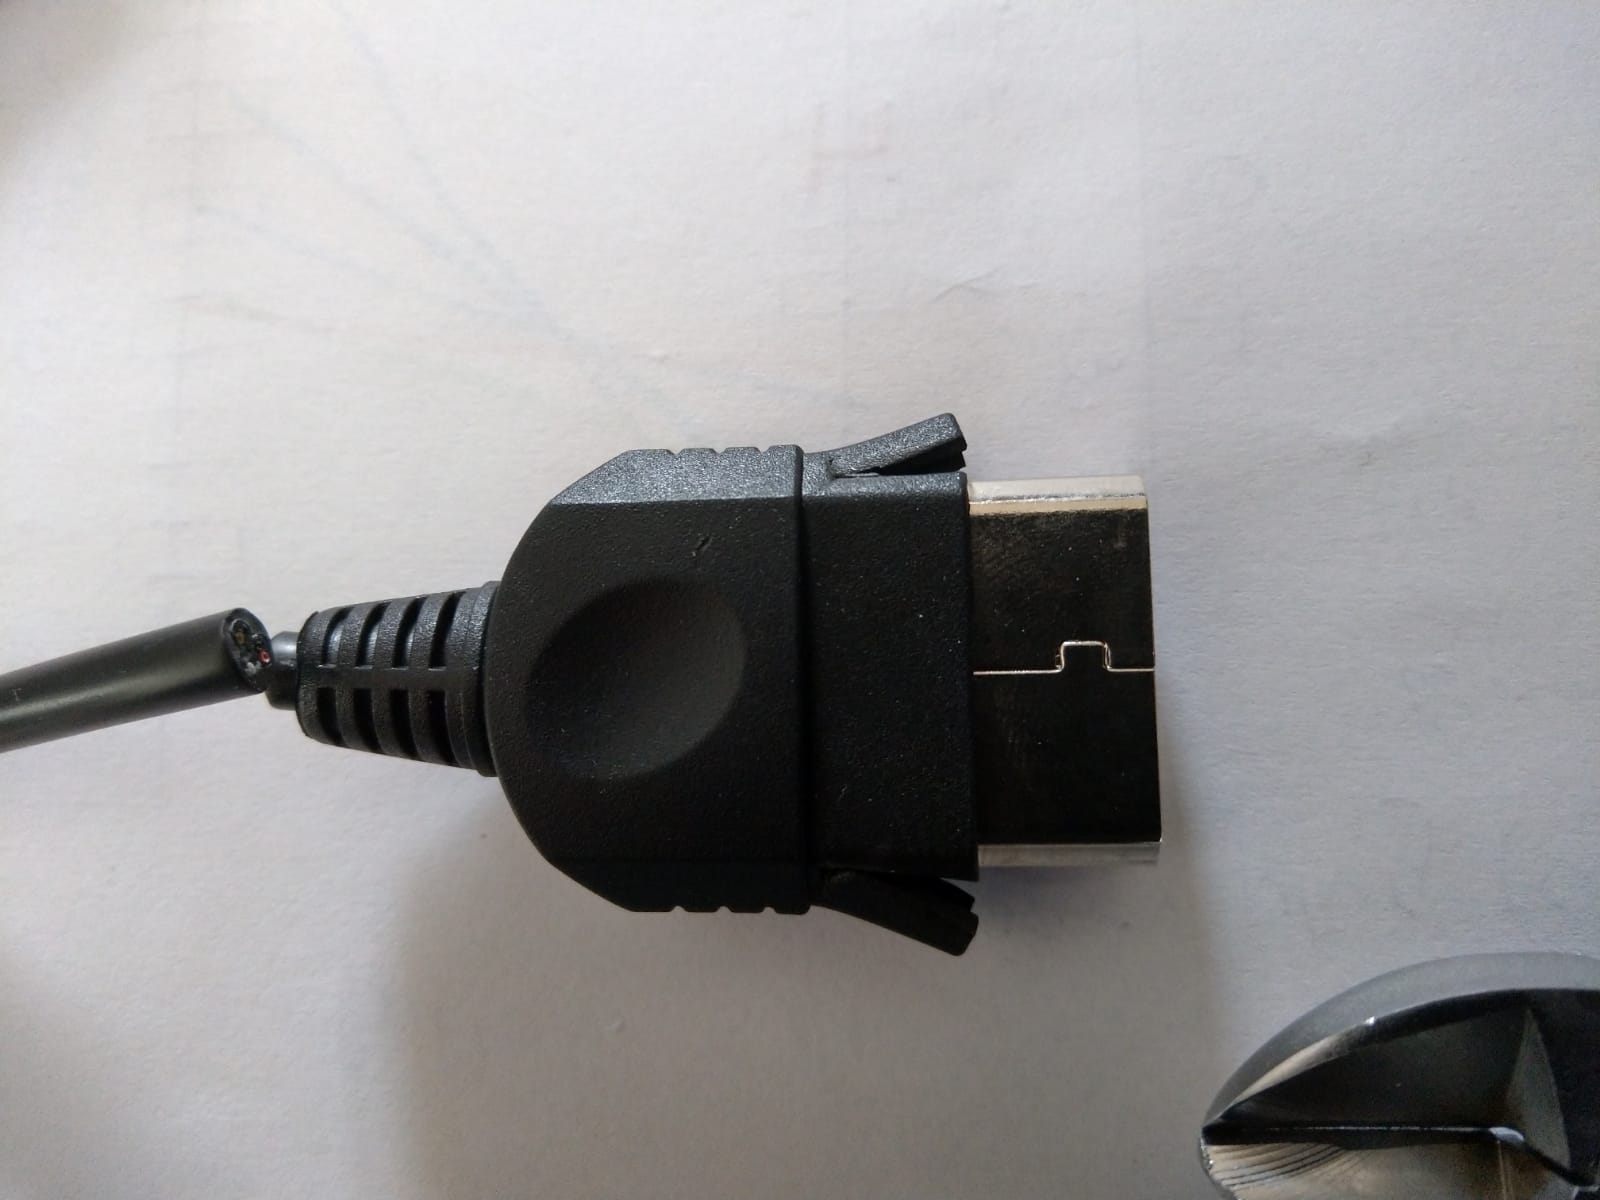
The plastic from the connector is locked at the side, if you prone 2 pieces of metal at both sides it will come of withou damage.
After that you can build it up completely as a new cable, you can't tell if it is opened from the outside.
-
 1
1
-
-
Above that, the quality of the component cables you get now a days is crap at best.
The only good component cables are the monster ones and the originals.
Have broken more than a few 360 cables to make them.
This is cost effective and you can use it on newer tv sets.
-
Do not know that either, but the delay is minimal, although i do not notice it.
The video quality is equal to component, normaly your tv will convert this, which also gives display lag.
For my use this is the ideal solution.
-
My game rack.....
-
1
-
-
Since there is no clear tutorial on the web I will submit it!
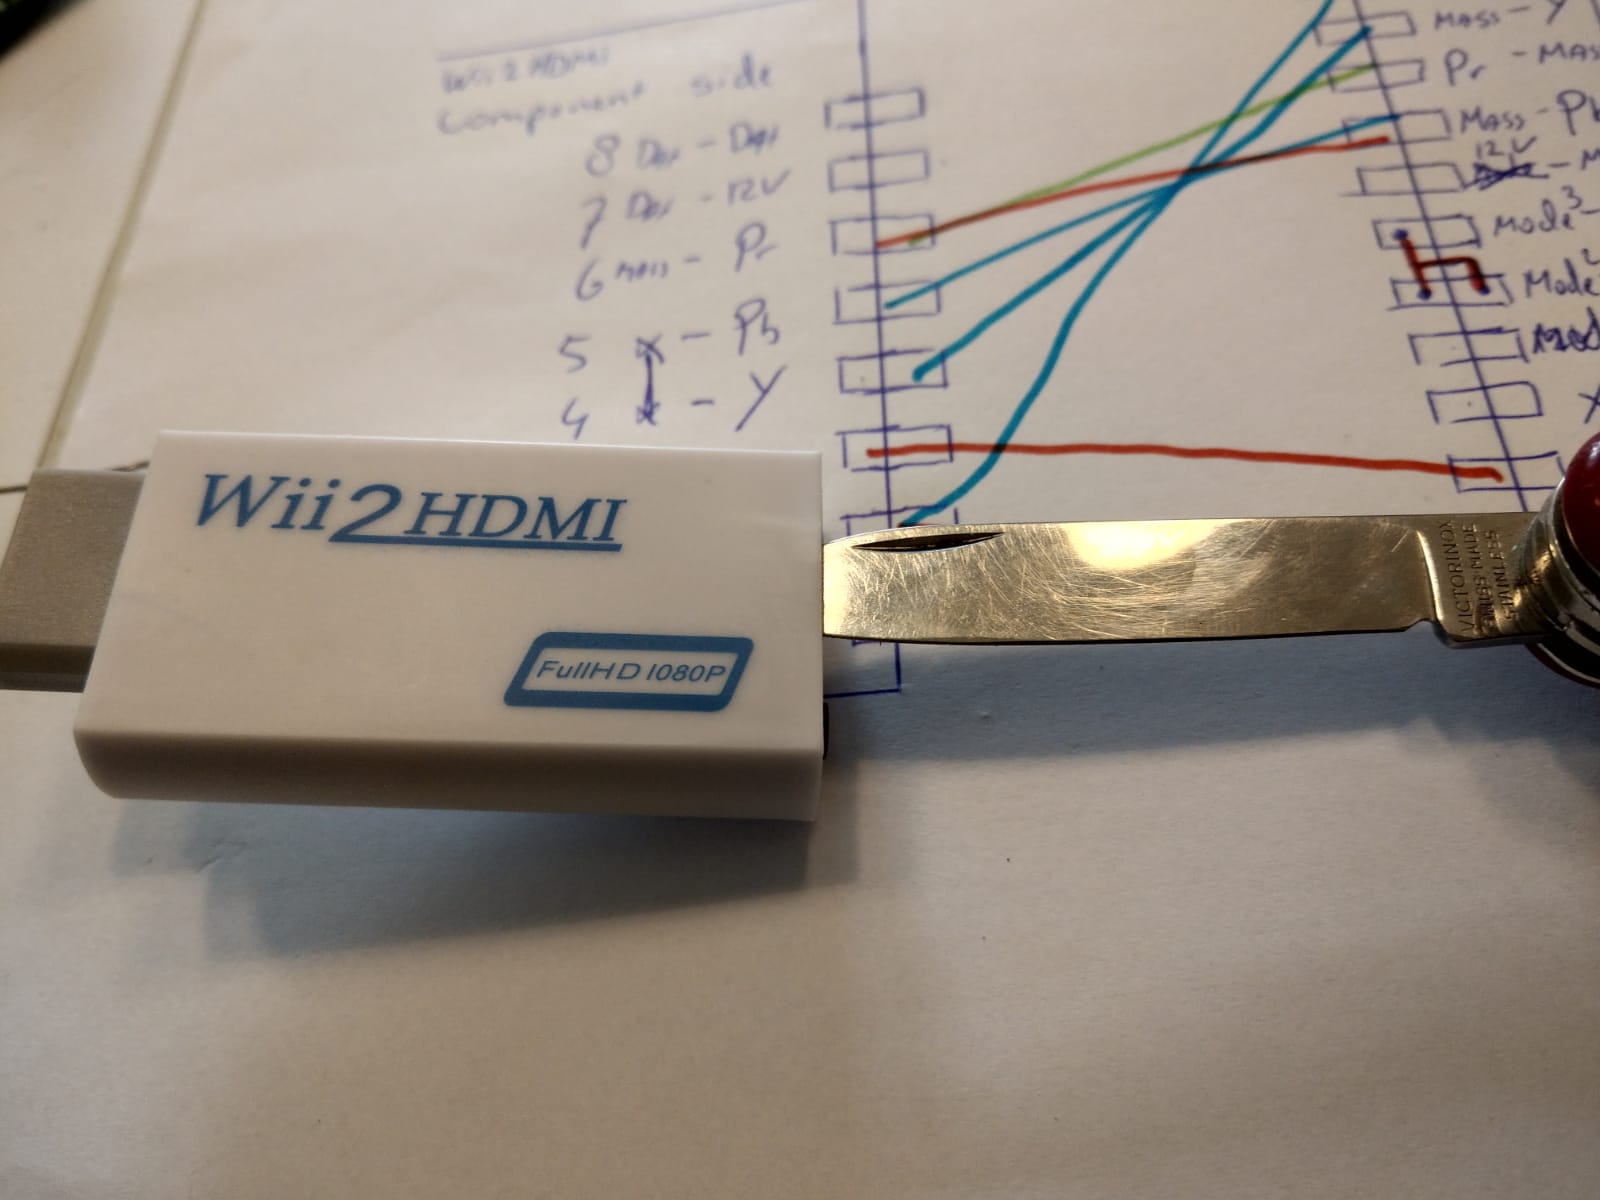
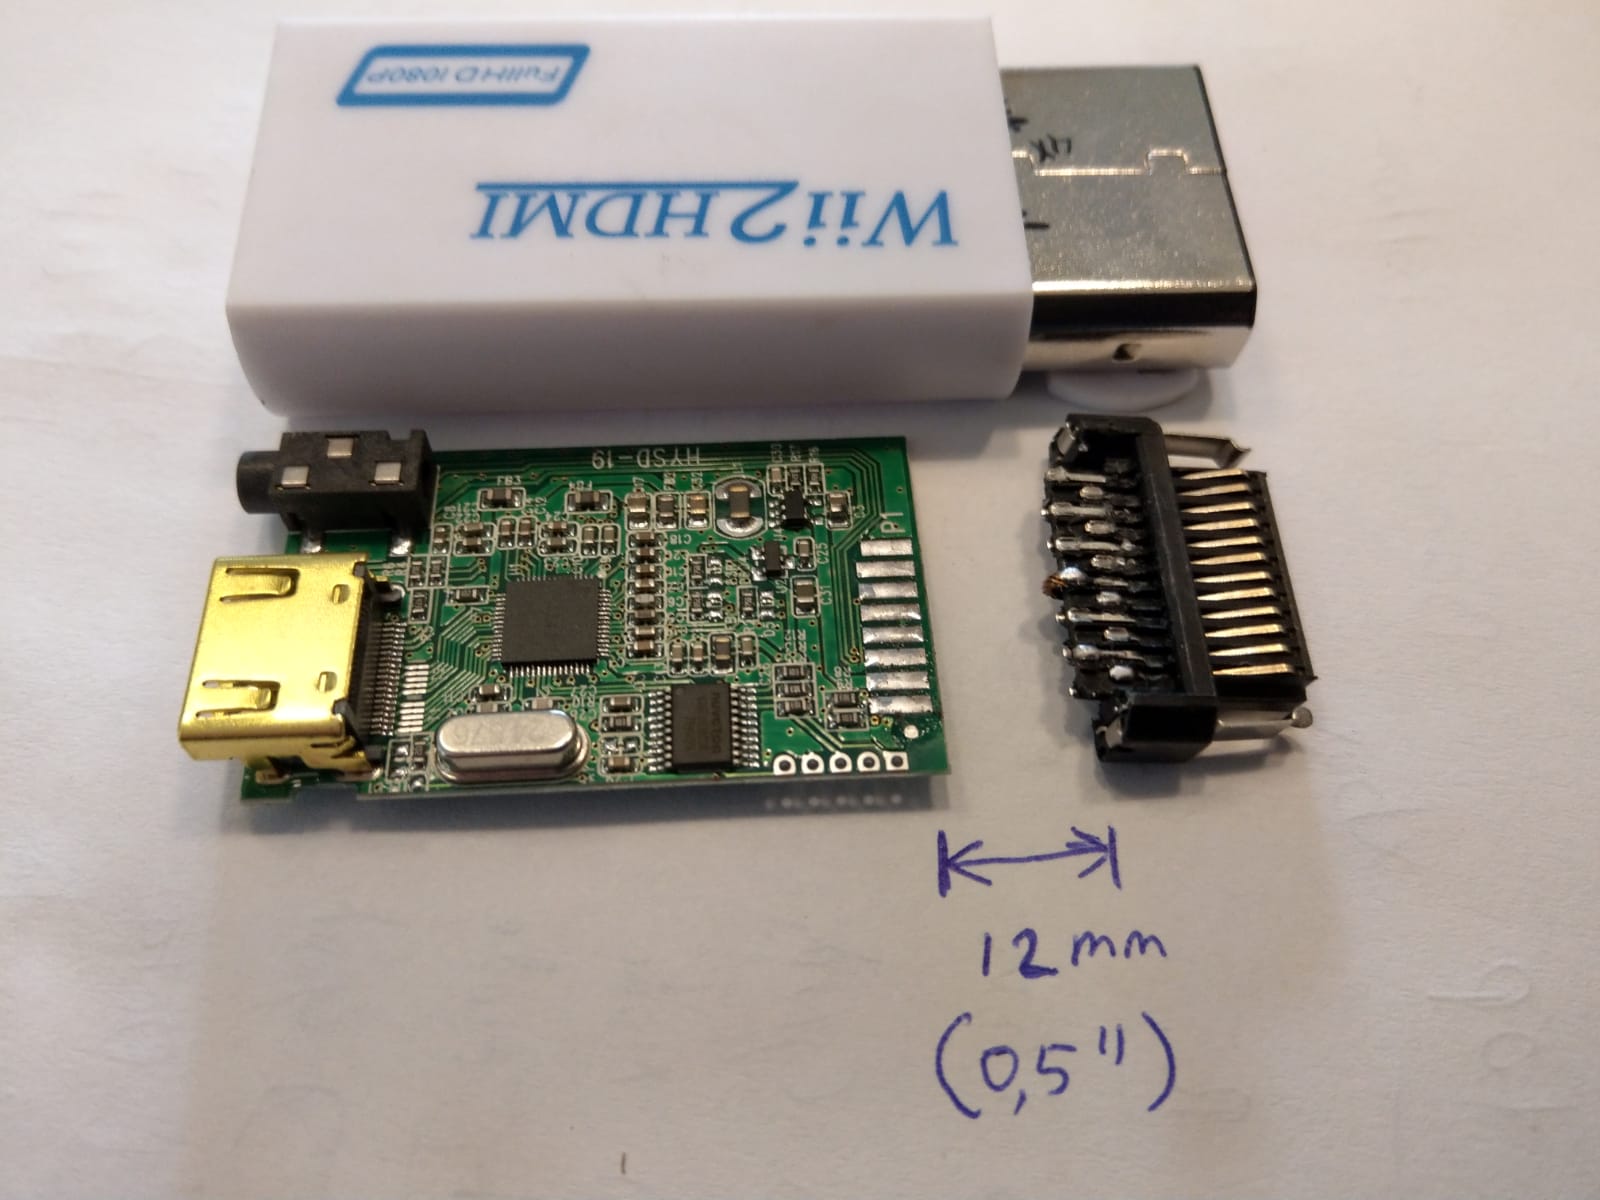
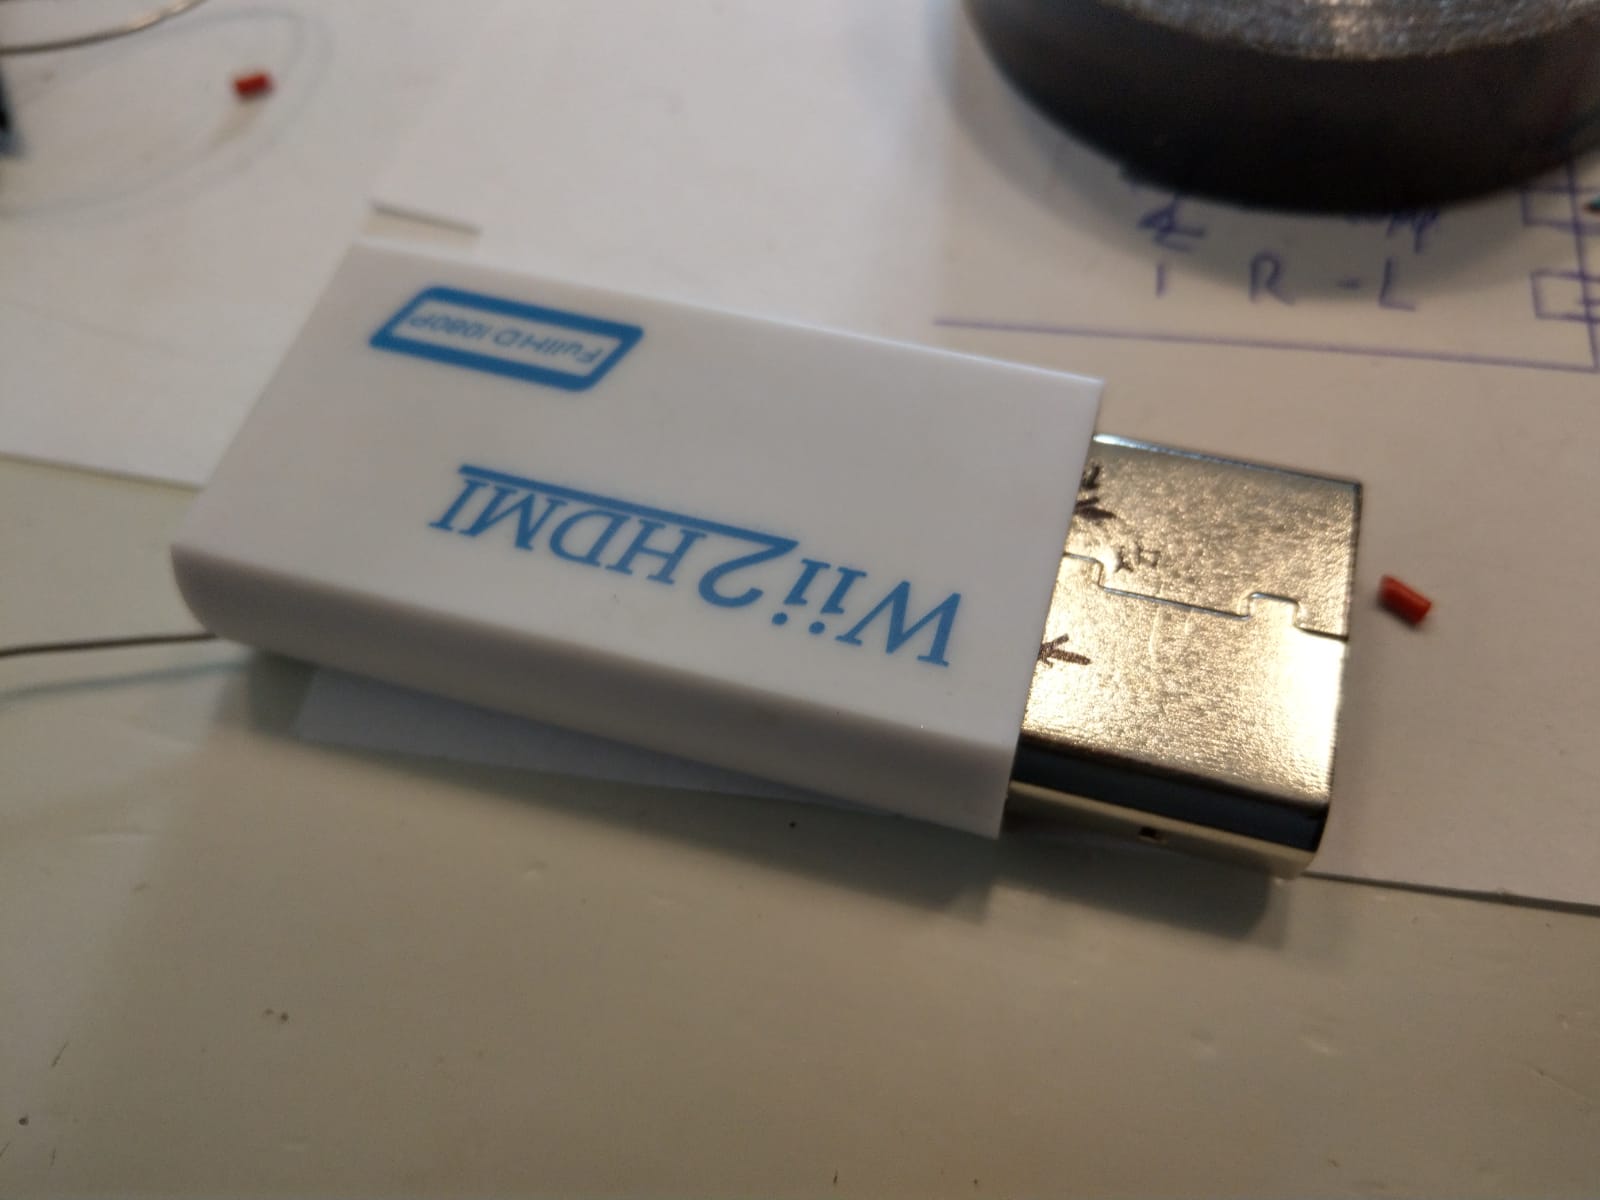
I have made a few plugs from wii2hdmi converters.
These converters are plenty and cheap, they do not upscale, unless you buy more expensive wii2hdmi plugs with a hole on the top.
To follow this tutorial you need a few items:
(aftermarket preferred) av cable
Wii2hdmi converter
Thin wire
A few tools:
Soldering iron, preferred regulated station.
Sharp knife
Cutting tools for metal (angle grinder is fast)
Electrical wire stripper/cutter
A pocket knife or small screwdriver.
I used a chinese av cable, the long and short soldering connections are opposite to original!
Just follow the pictures and you will be on hdmi in no-time.
Reminder, the wii2hdmi boards are very sensitive to static electricity, i have busted a few.
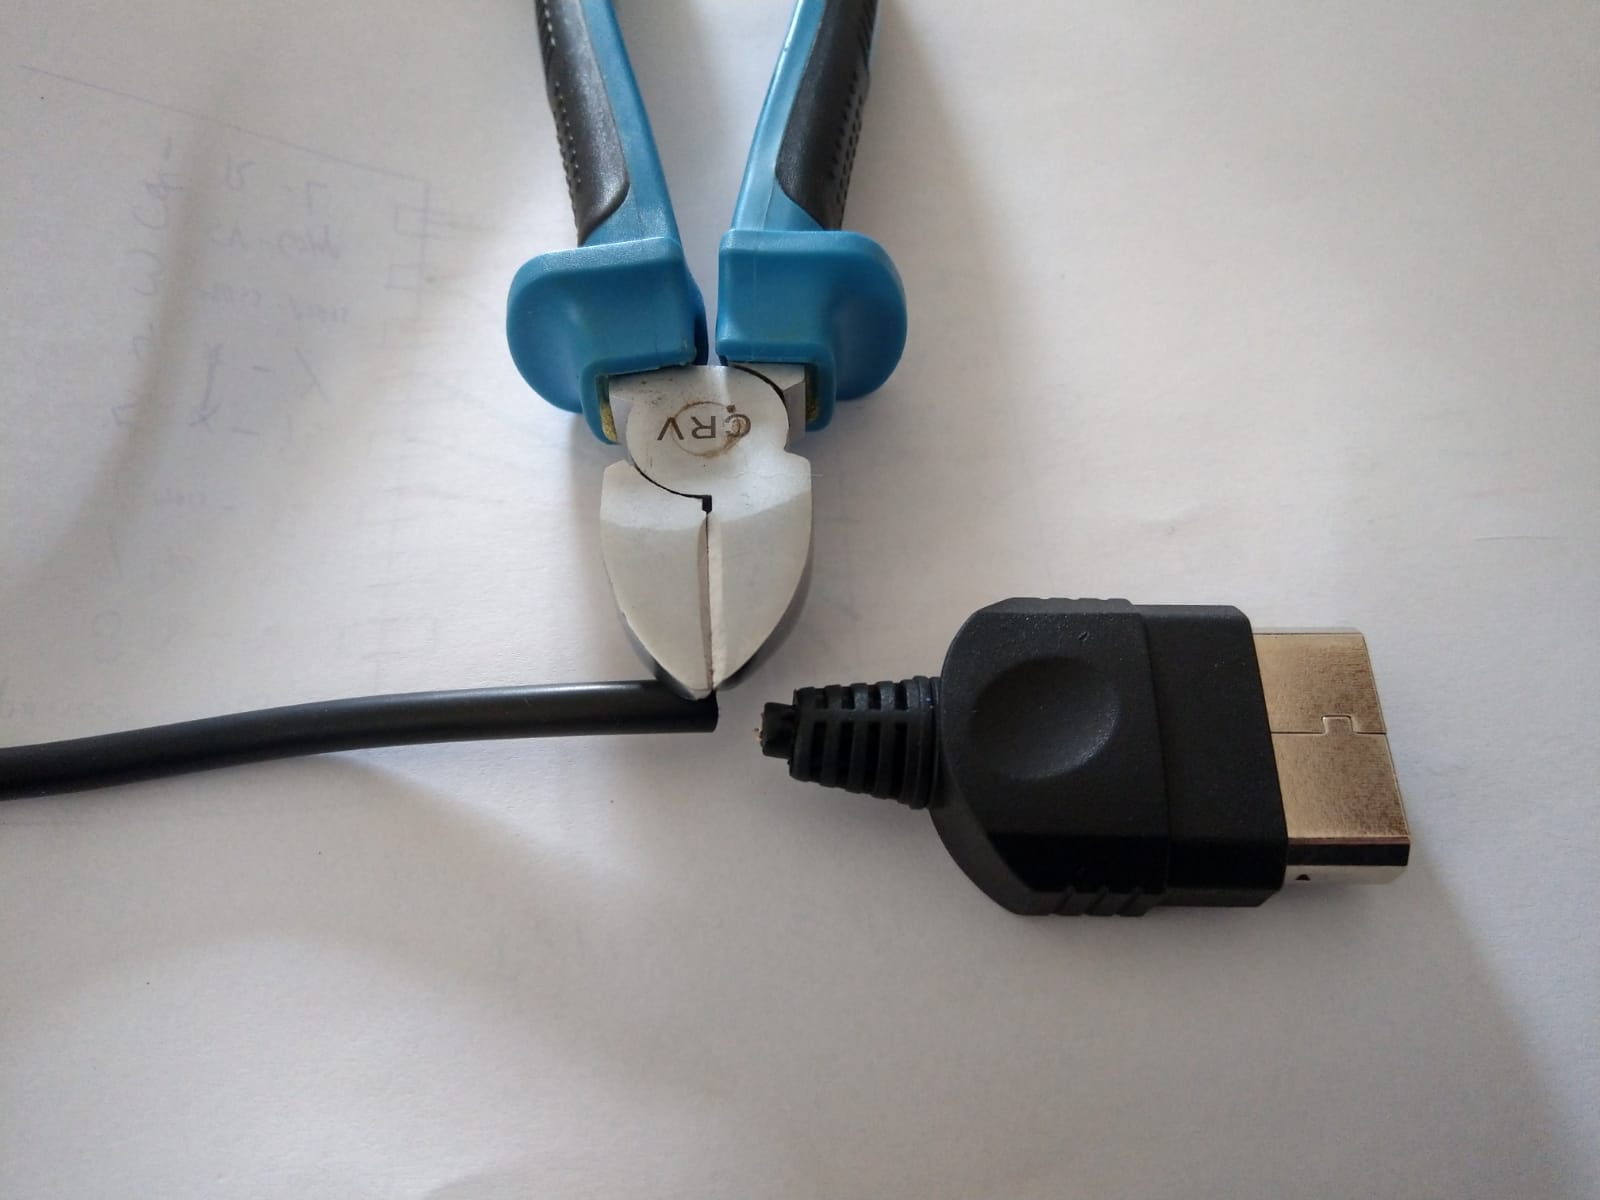
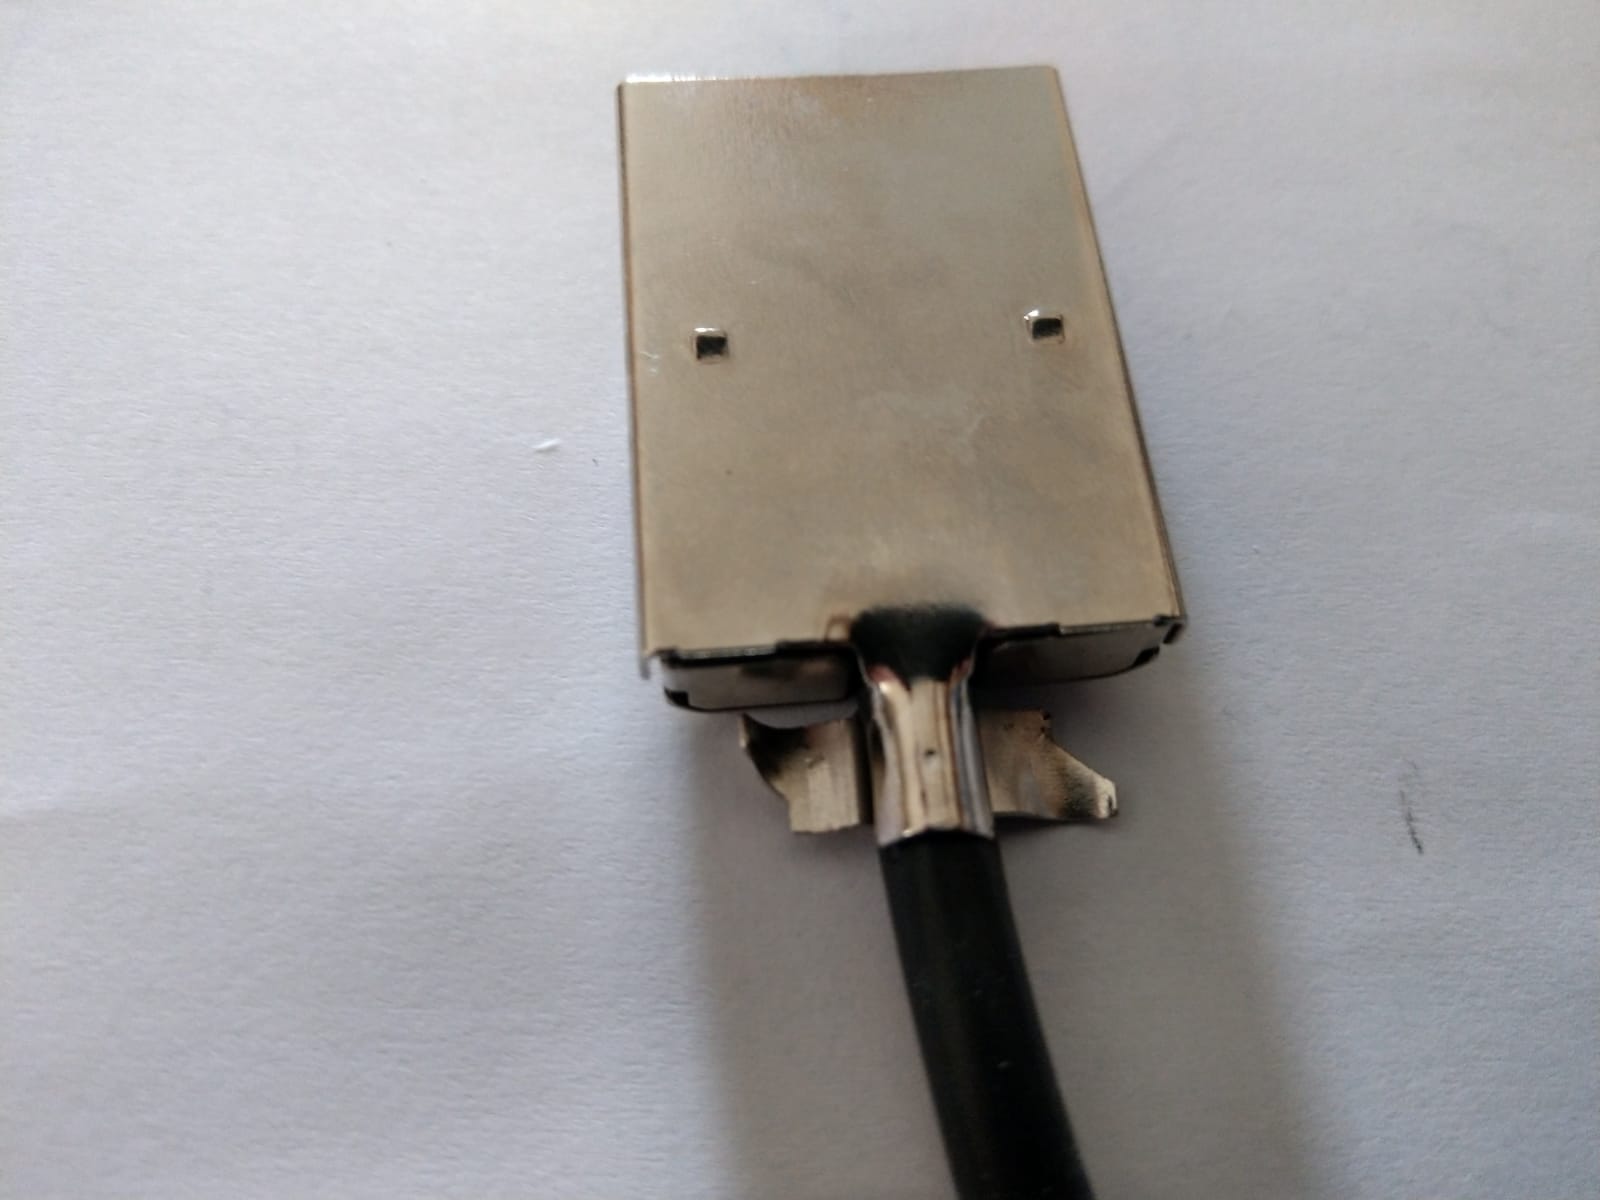
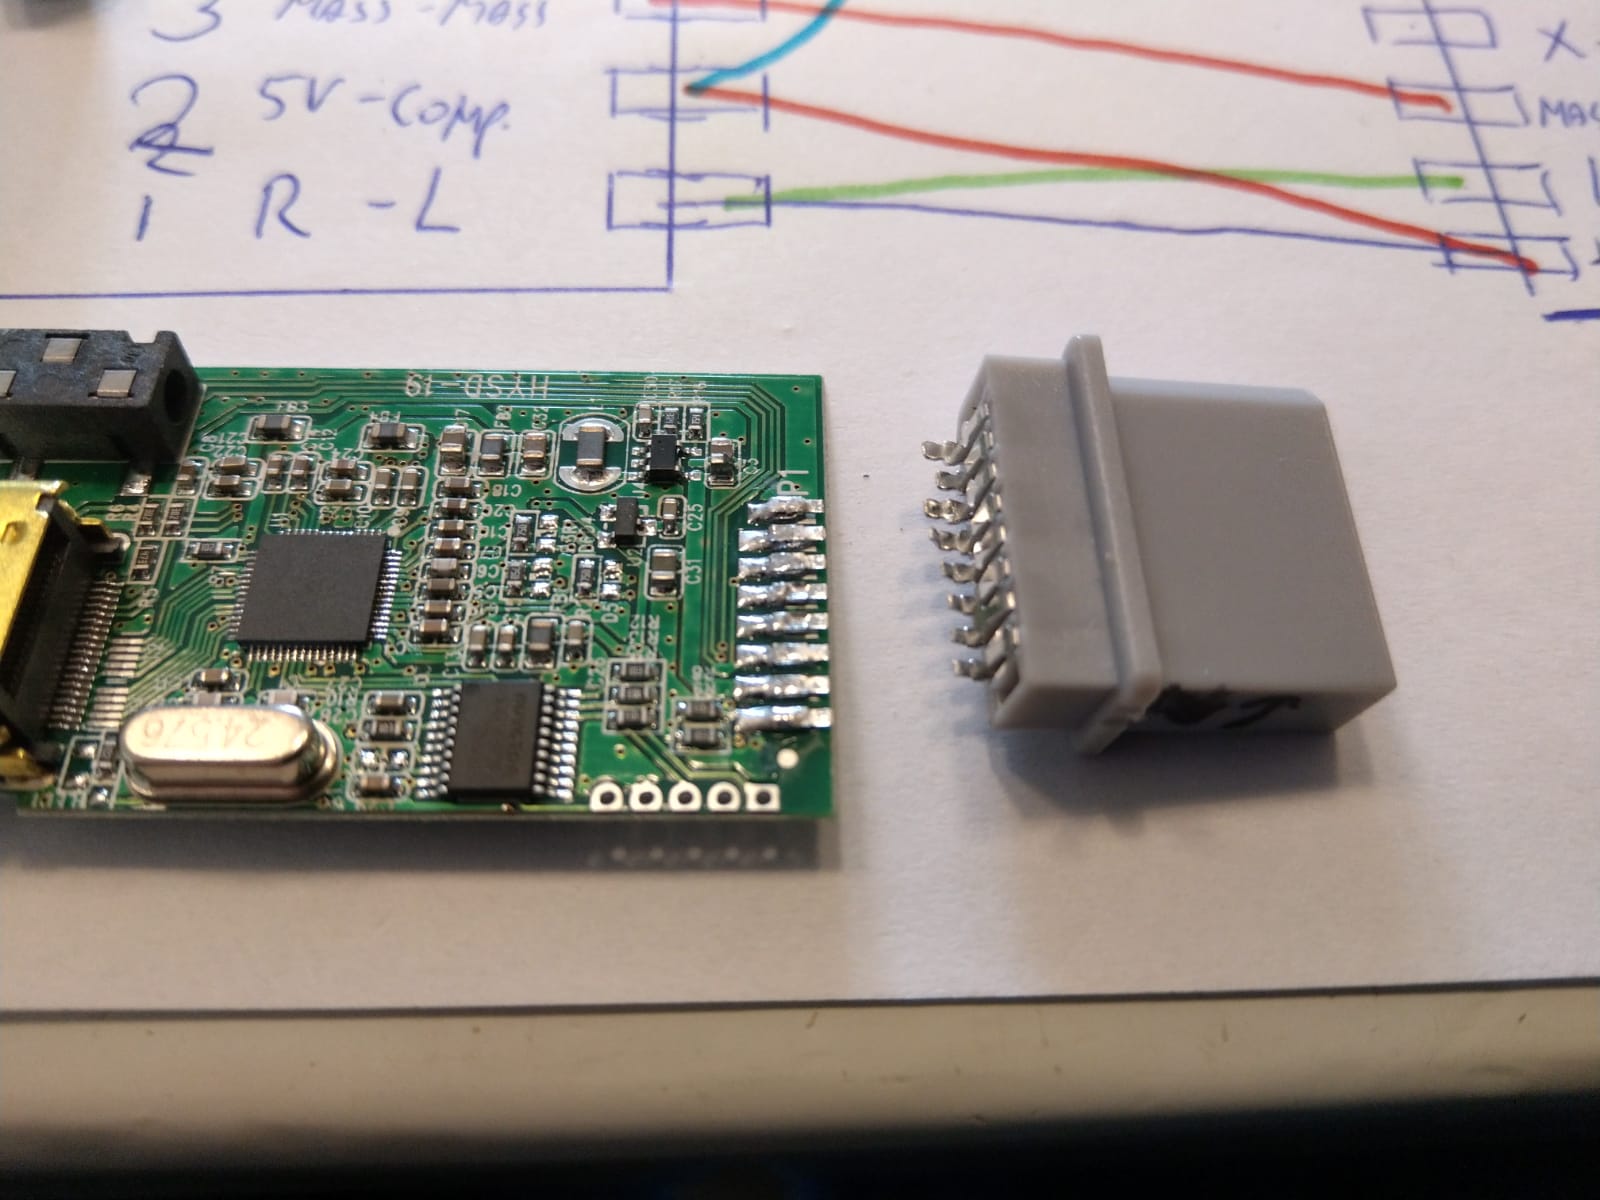
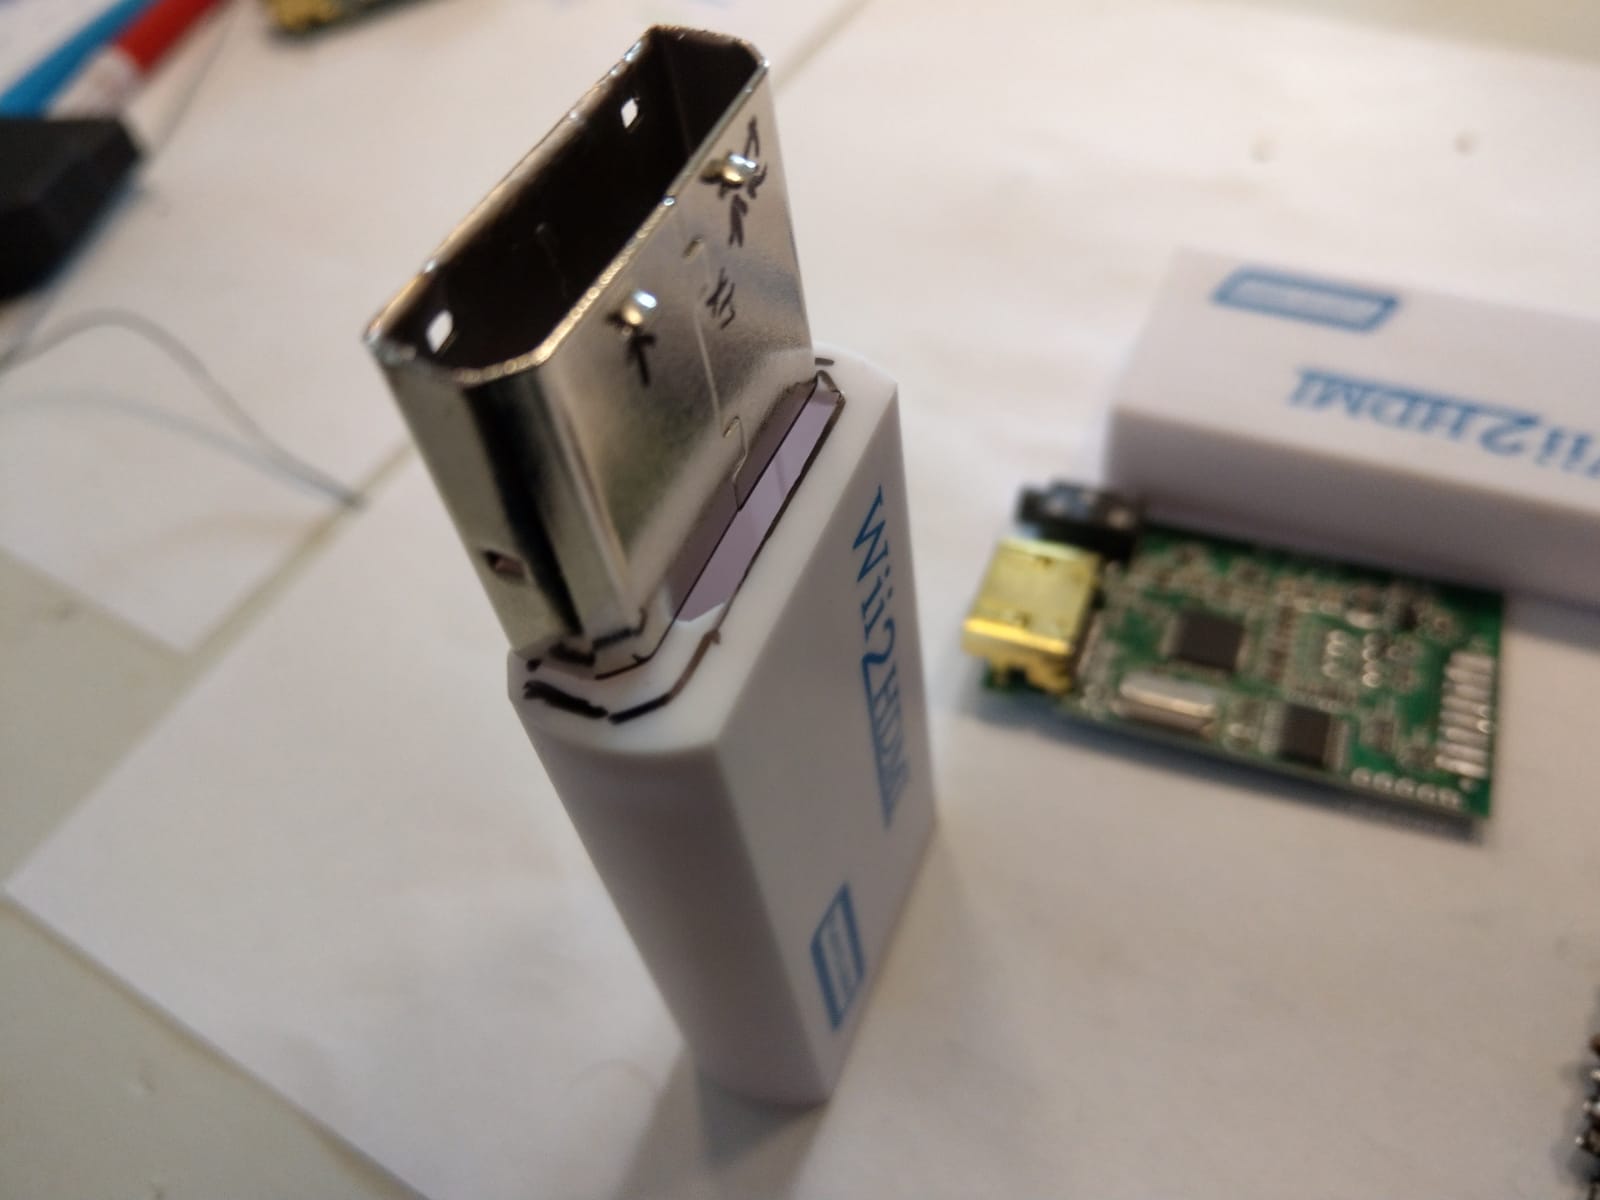
Cut of the connector.
Cut in the sides to release easily.
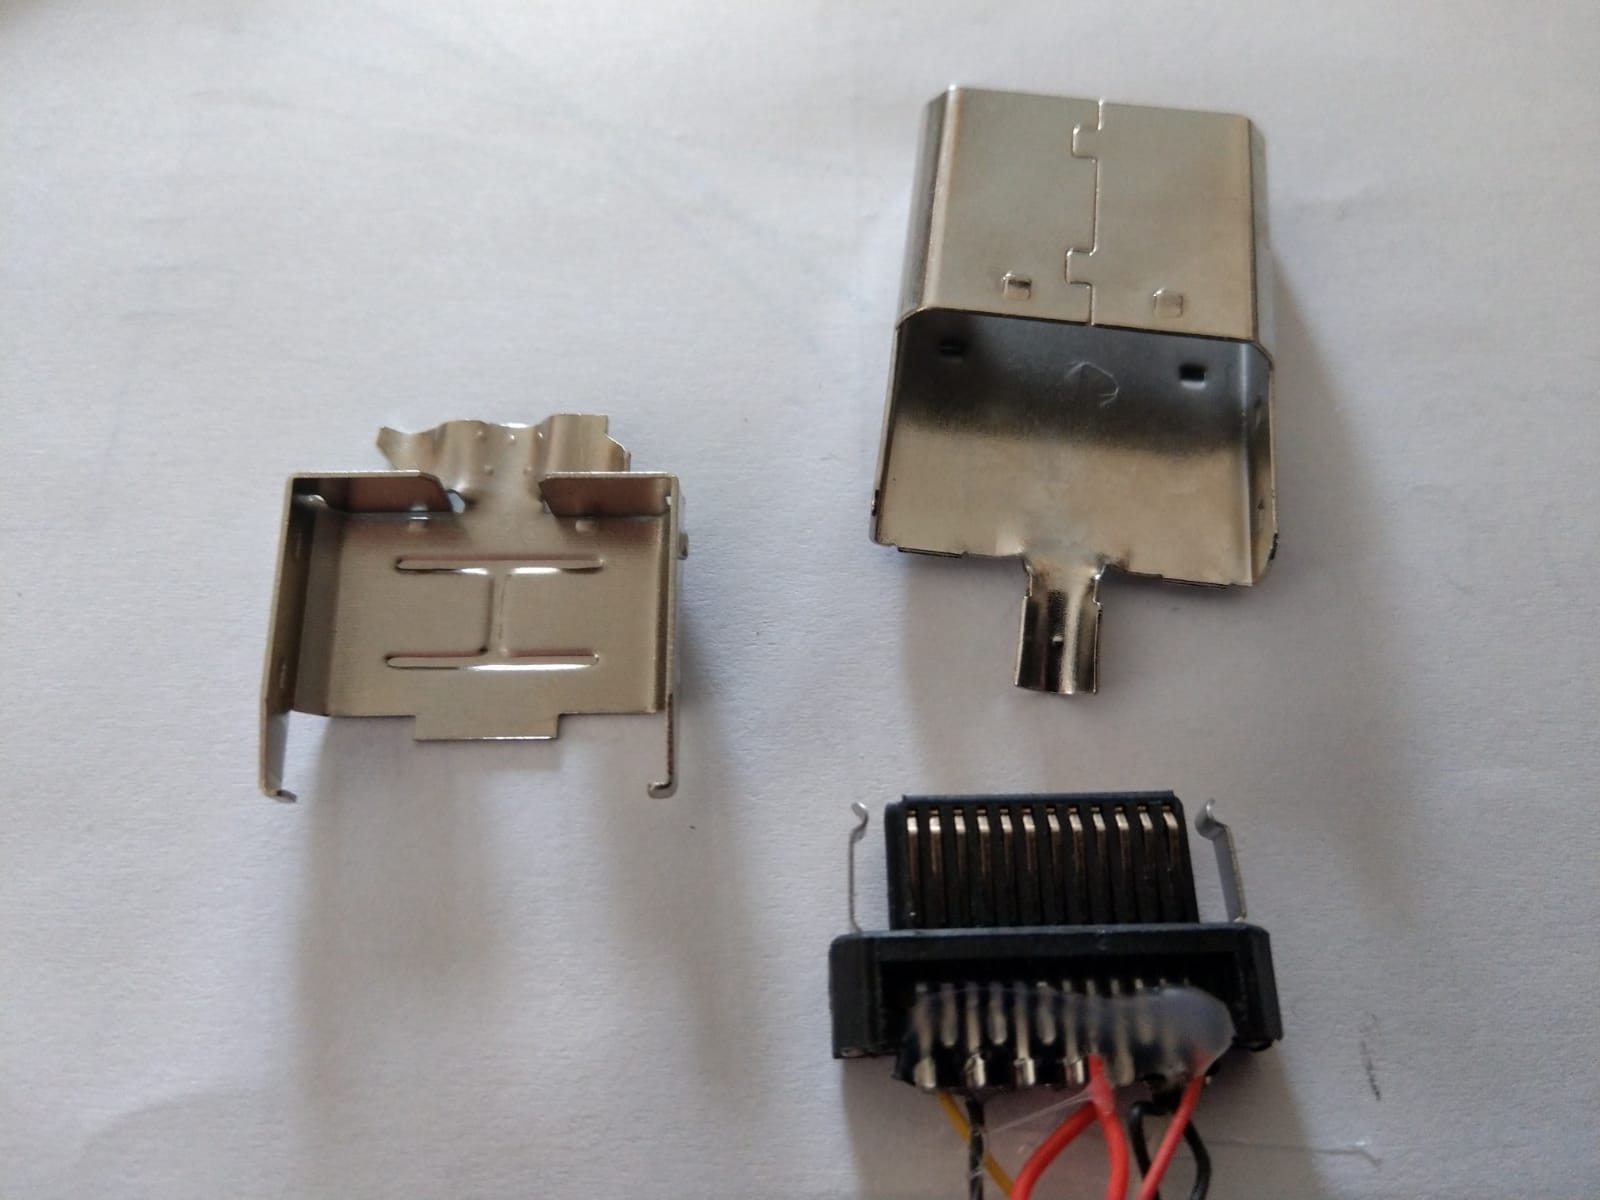
remove plug and open up.
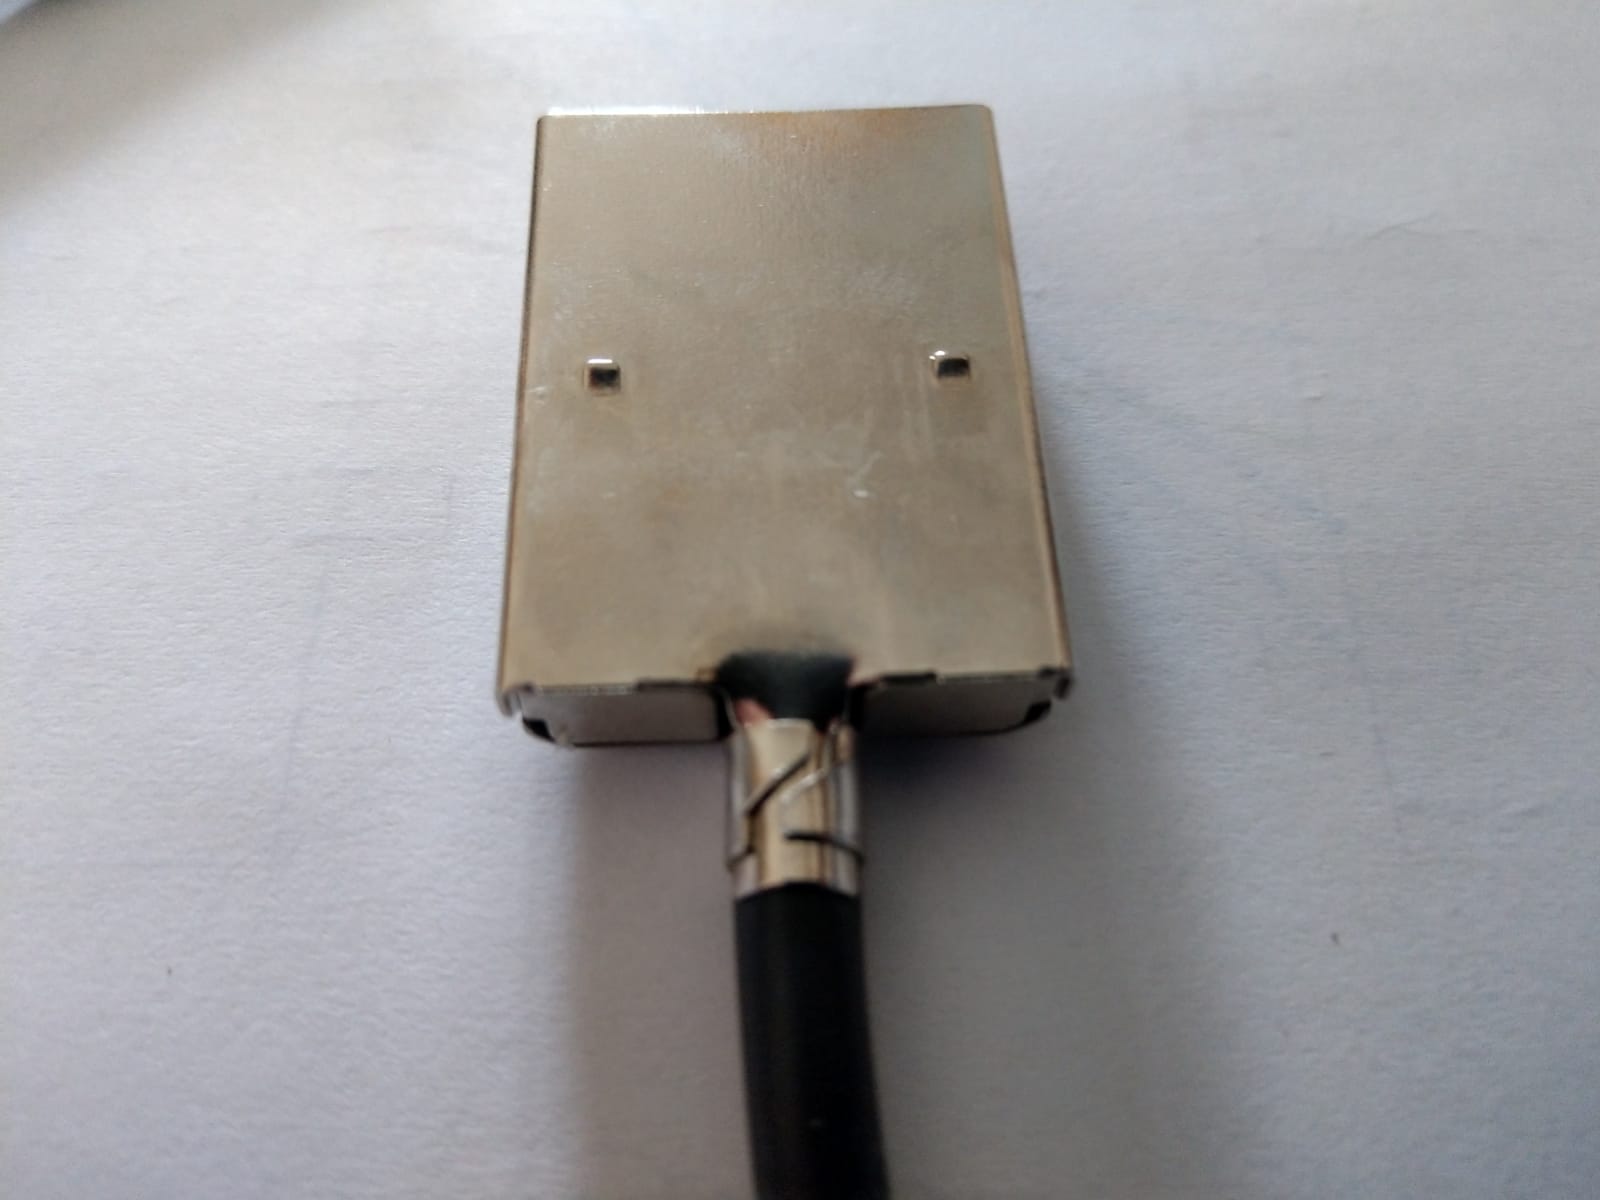
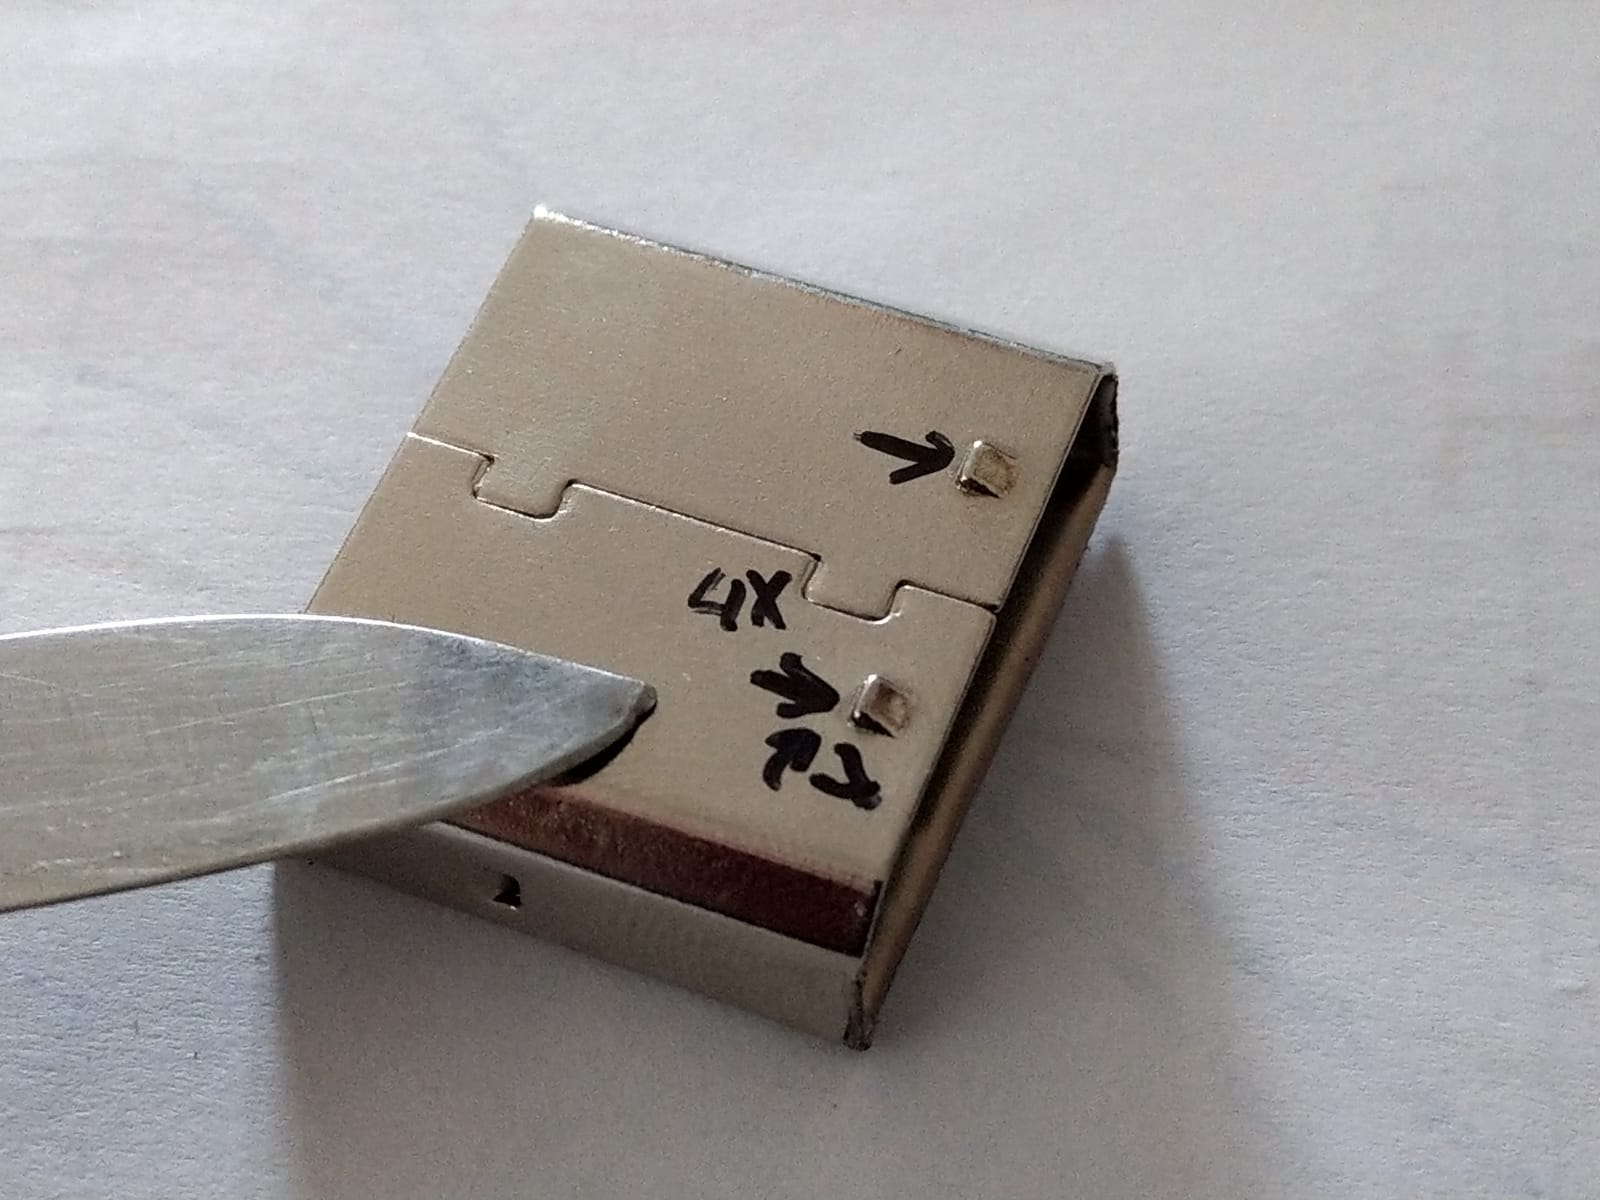
cut the metal on the black line.
bend the pins open as far as possible, this will sturdy up the connector.
remove the hot glue, on original cables it is a piece of tape.
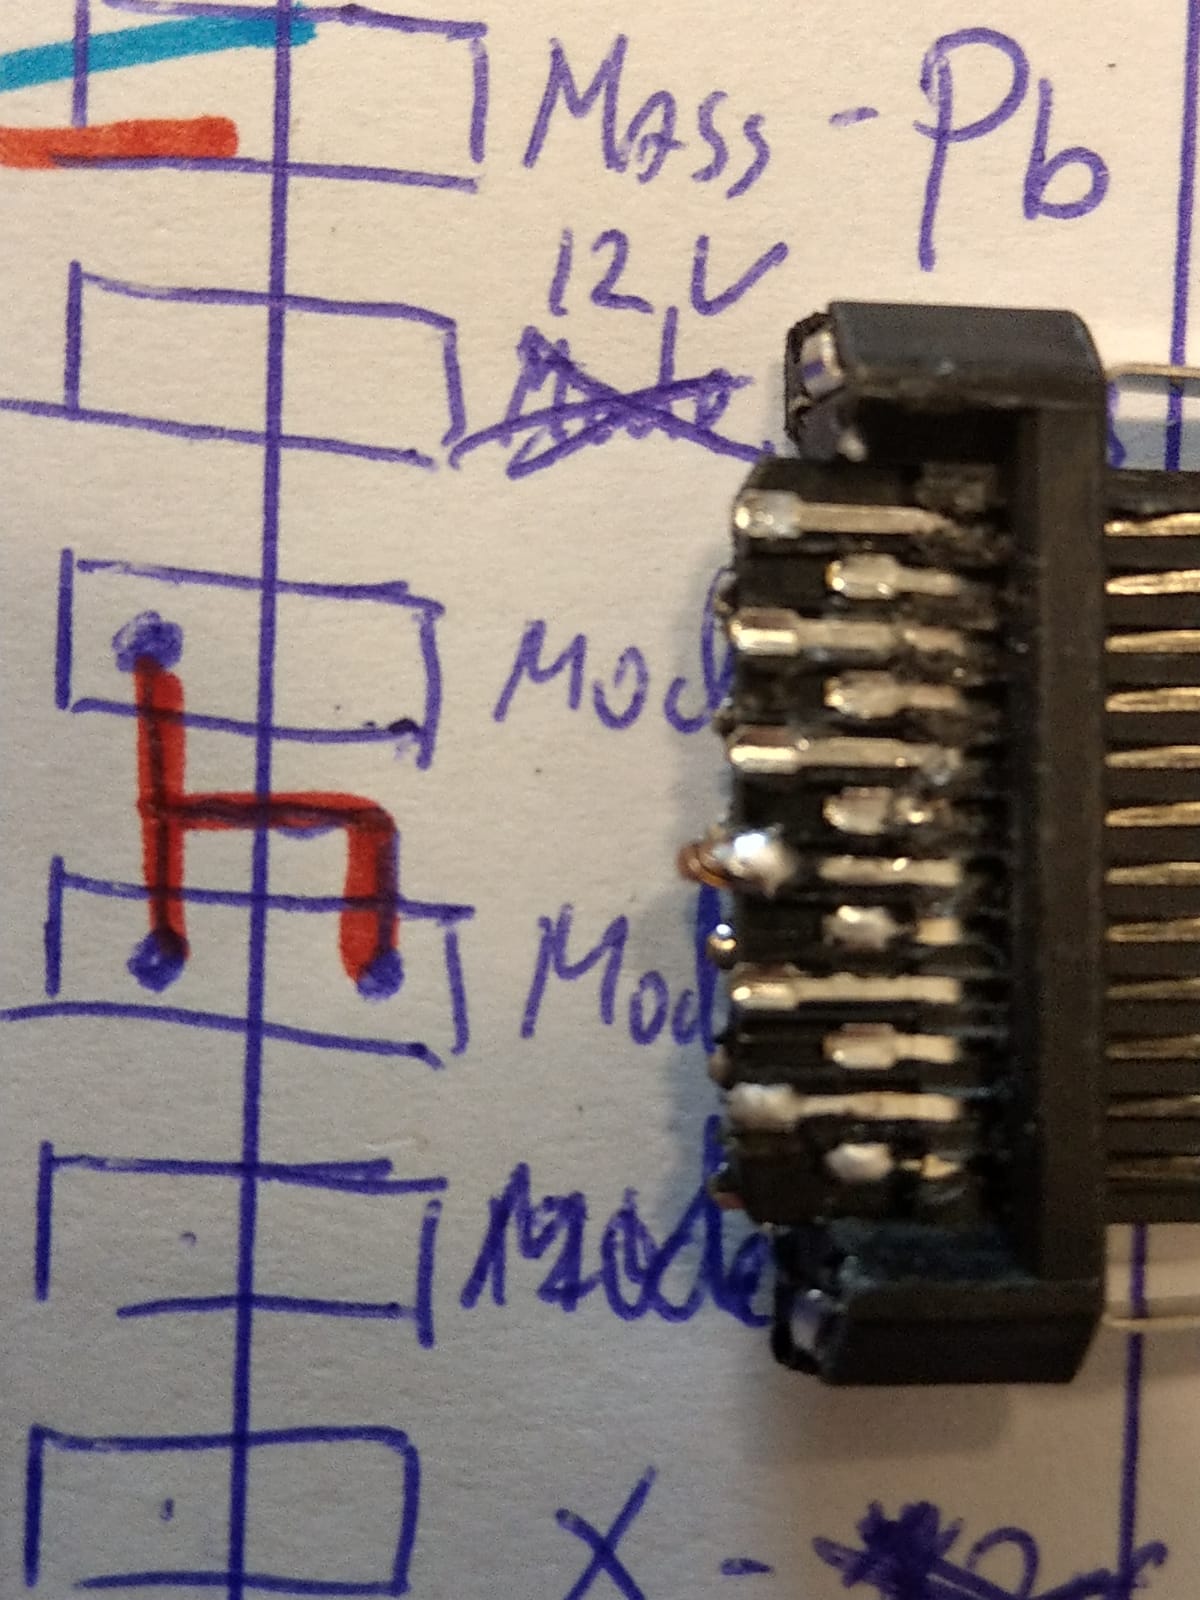
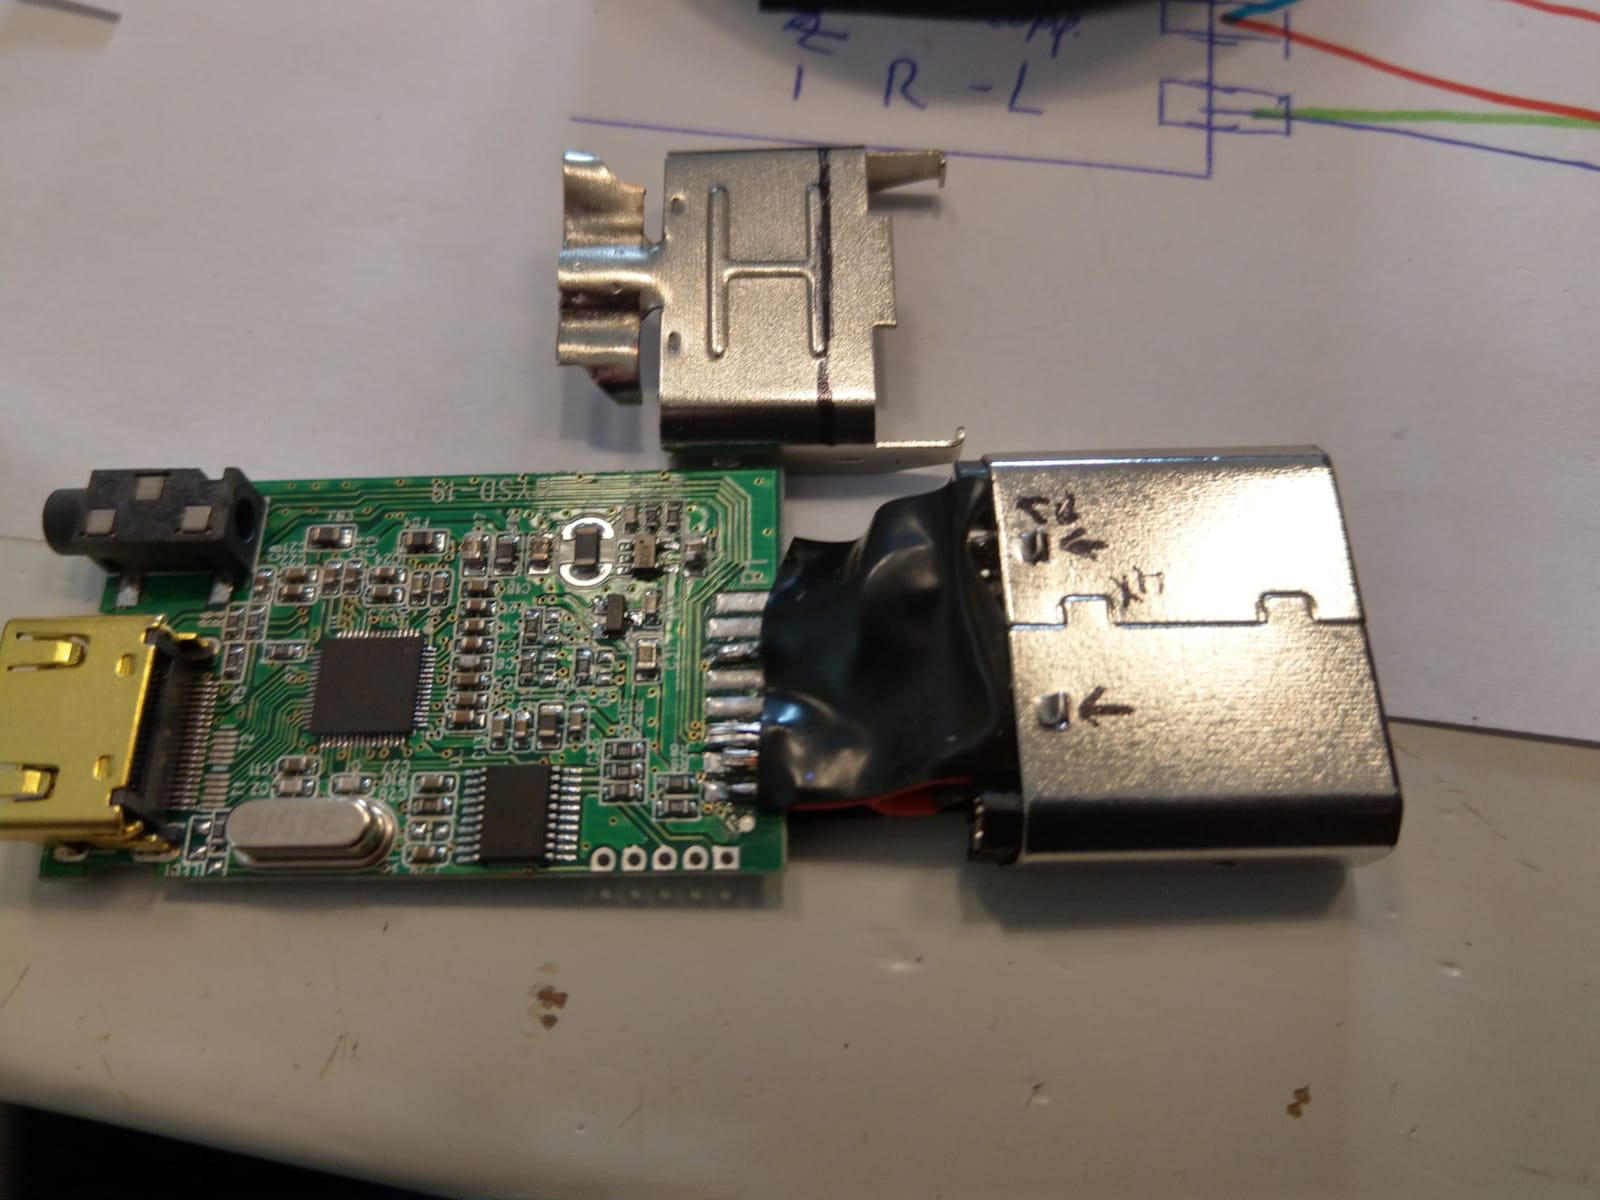
desolder the wires.
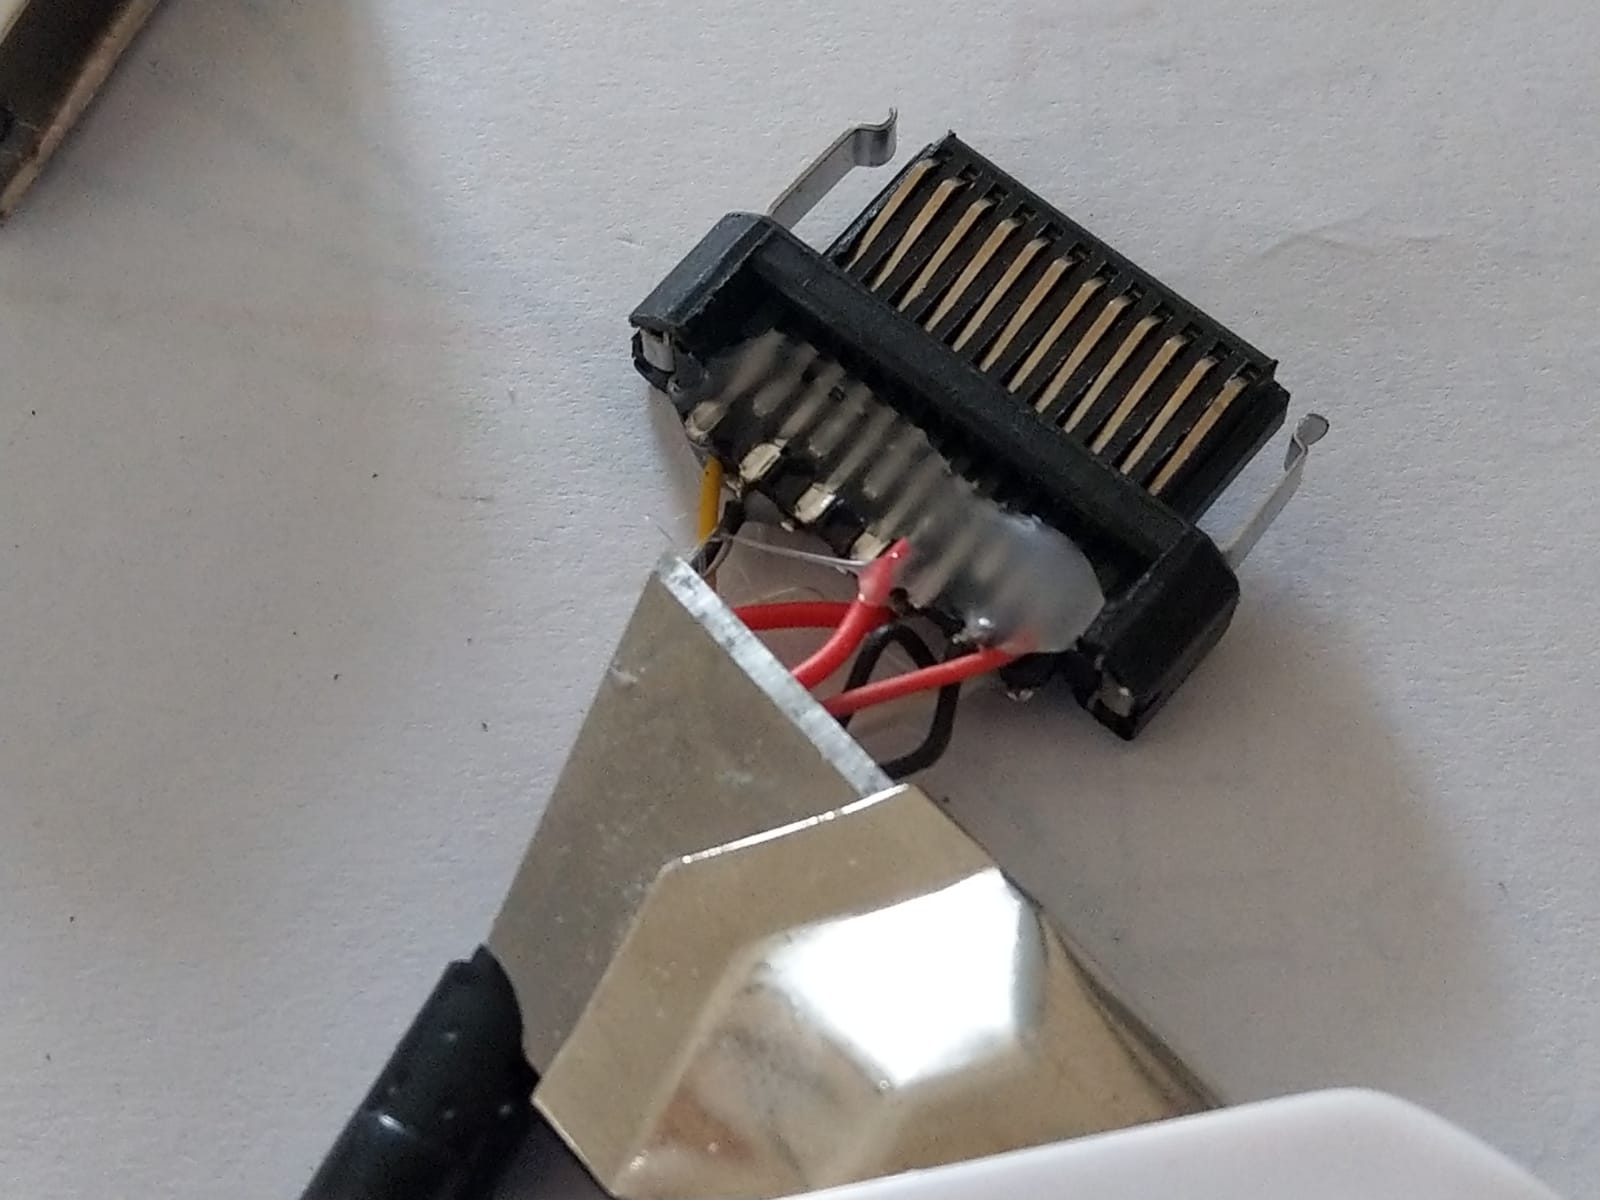
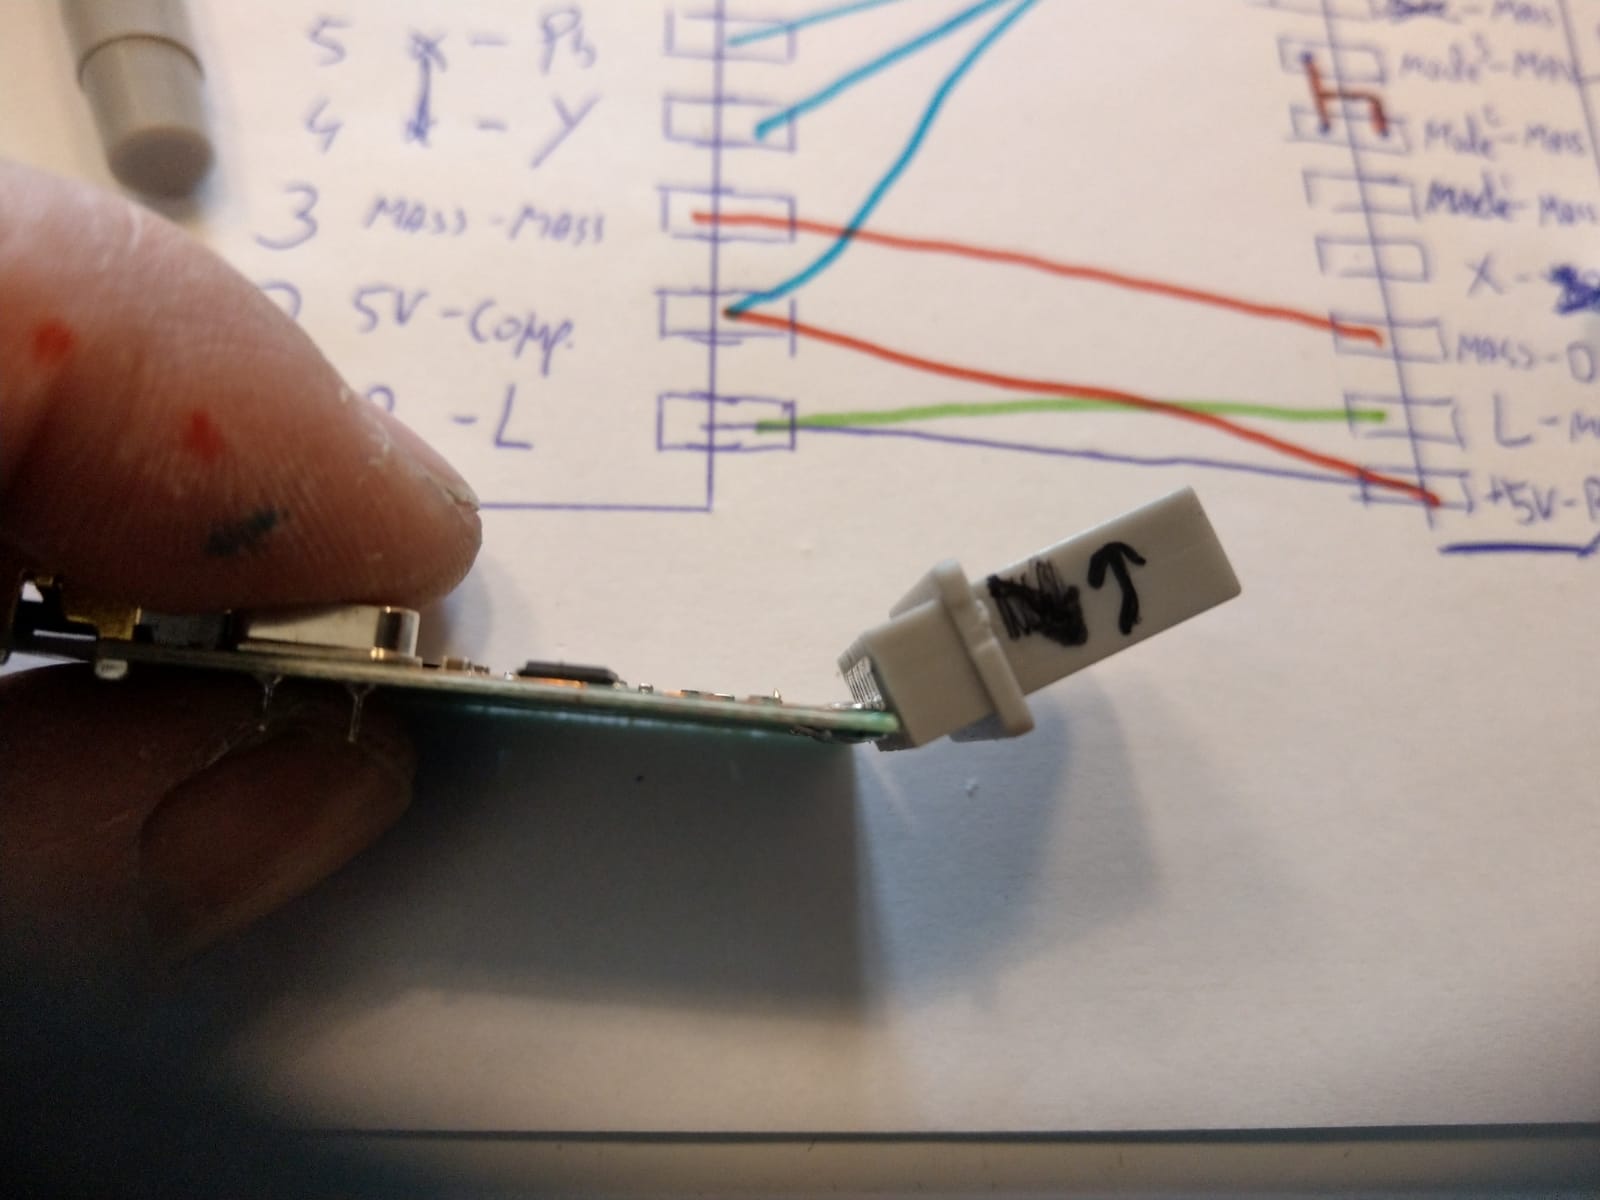
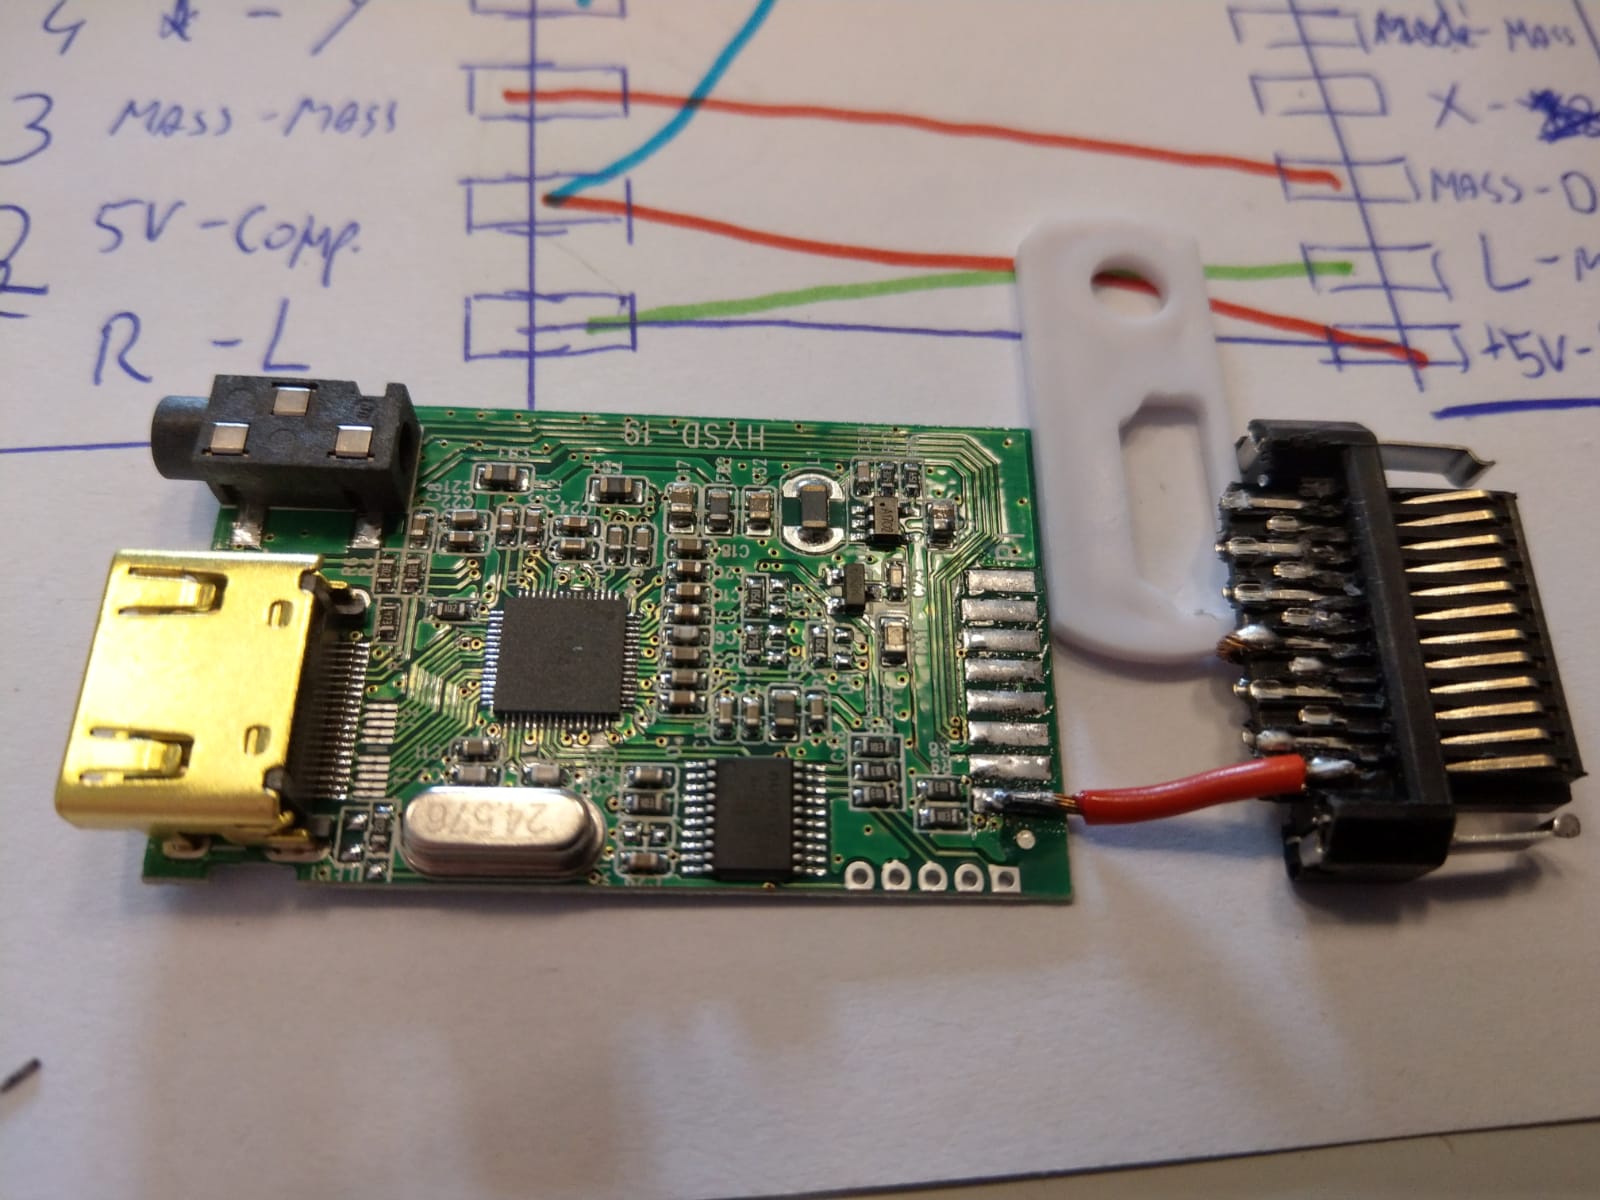
place the mode selector connections, use the shortes wire you can, unshielded is o.k.
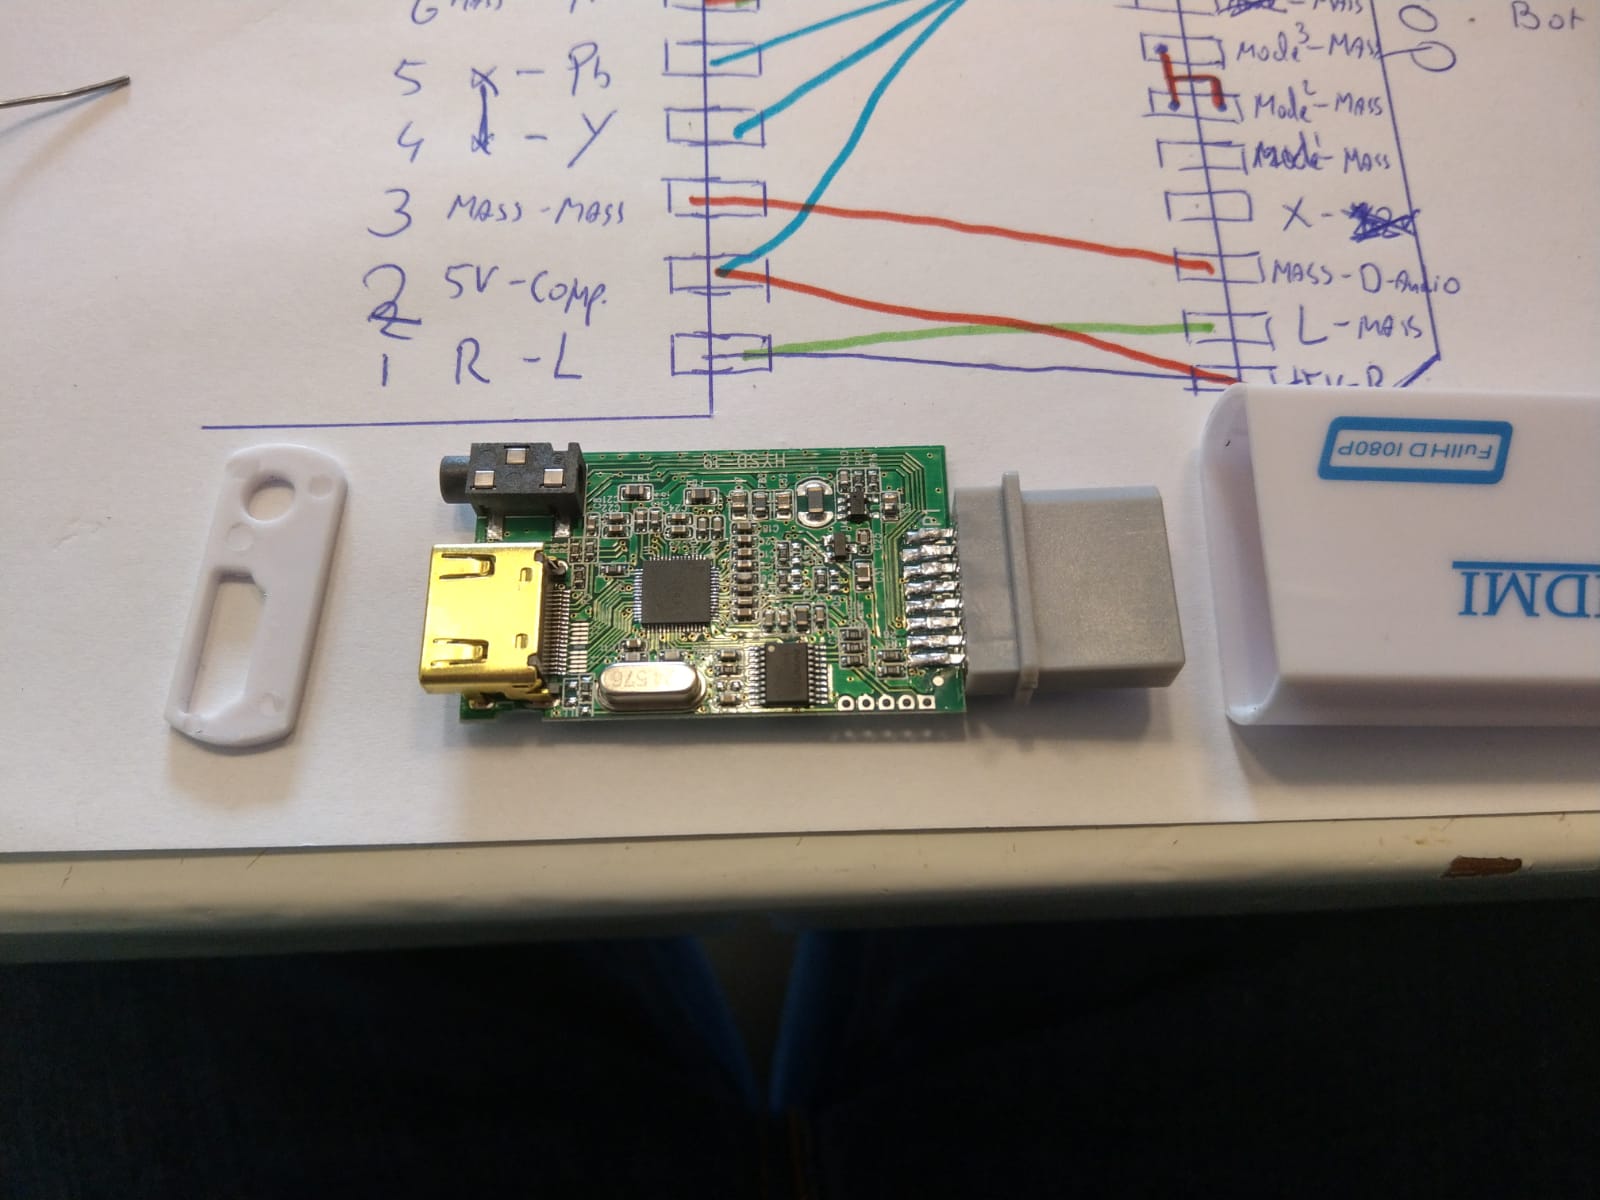
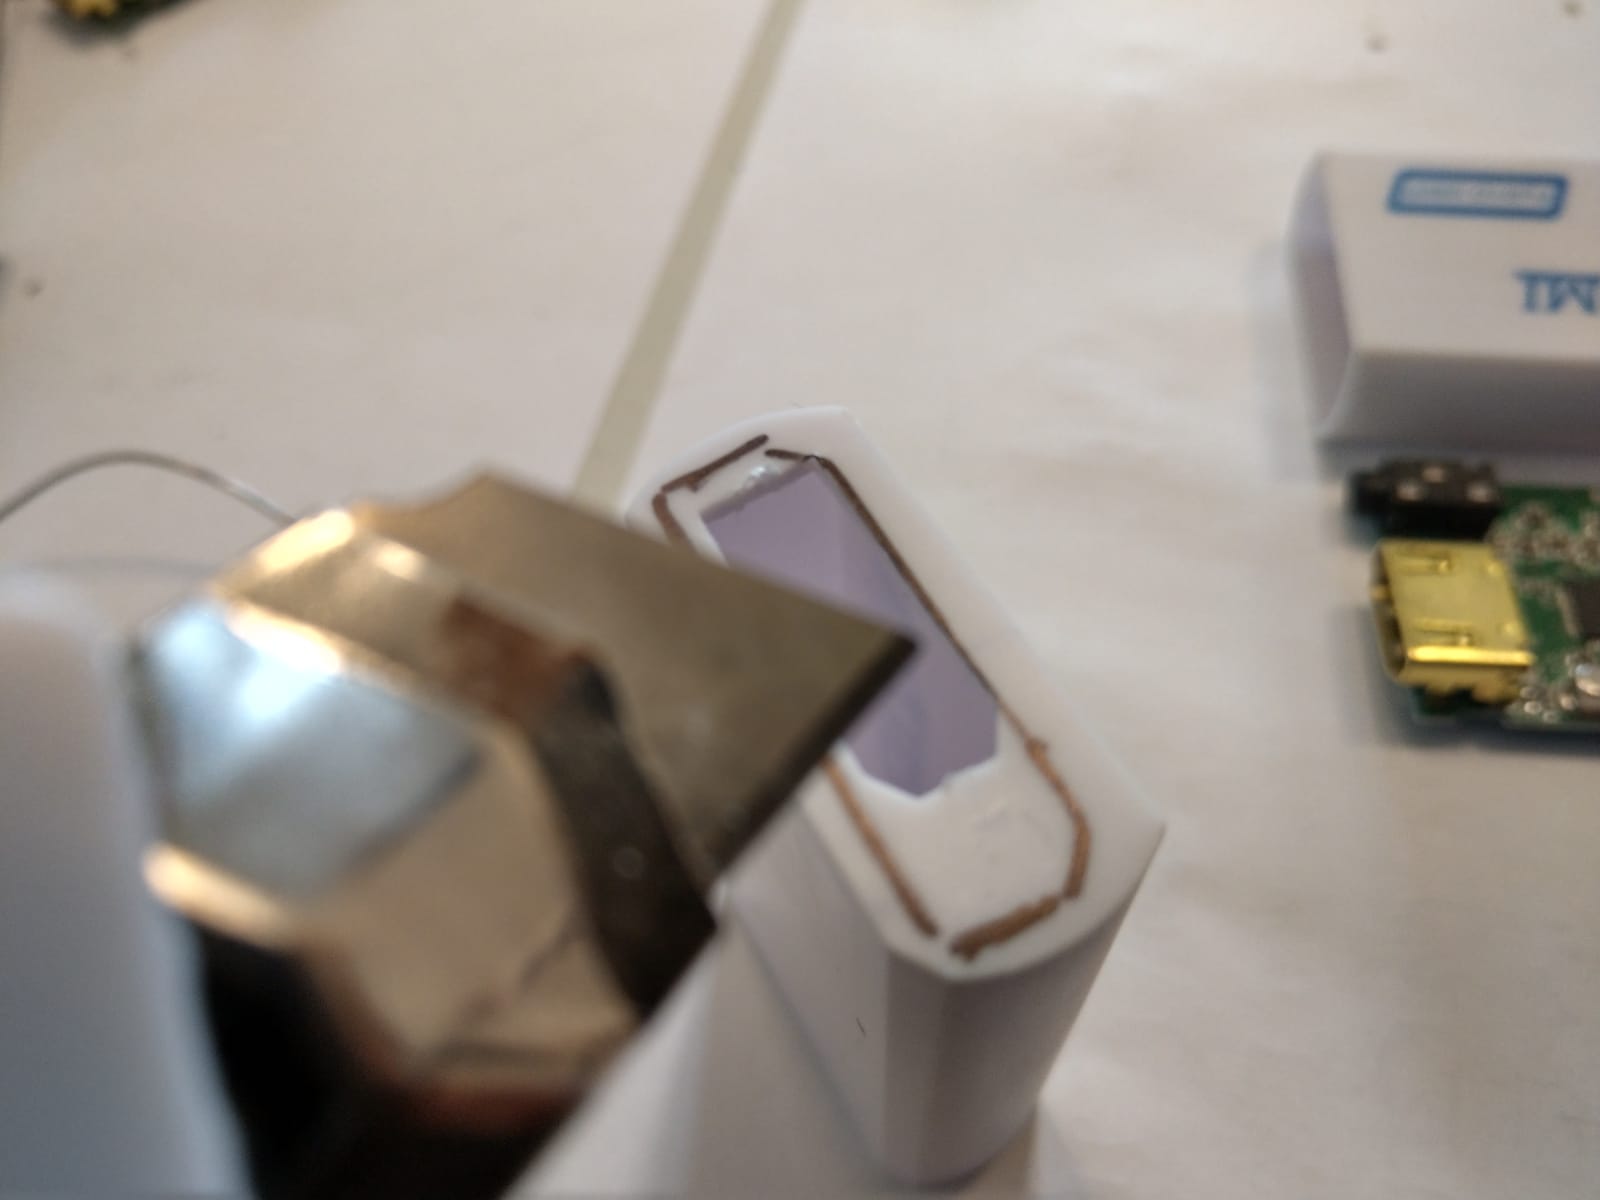
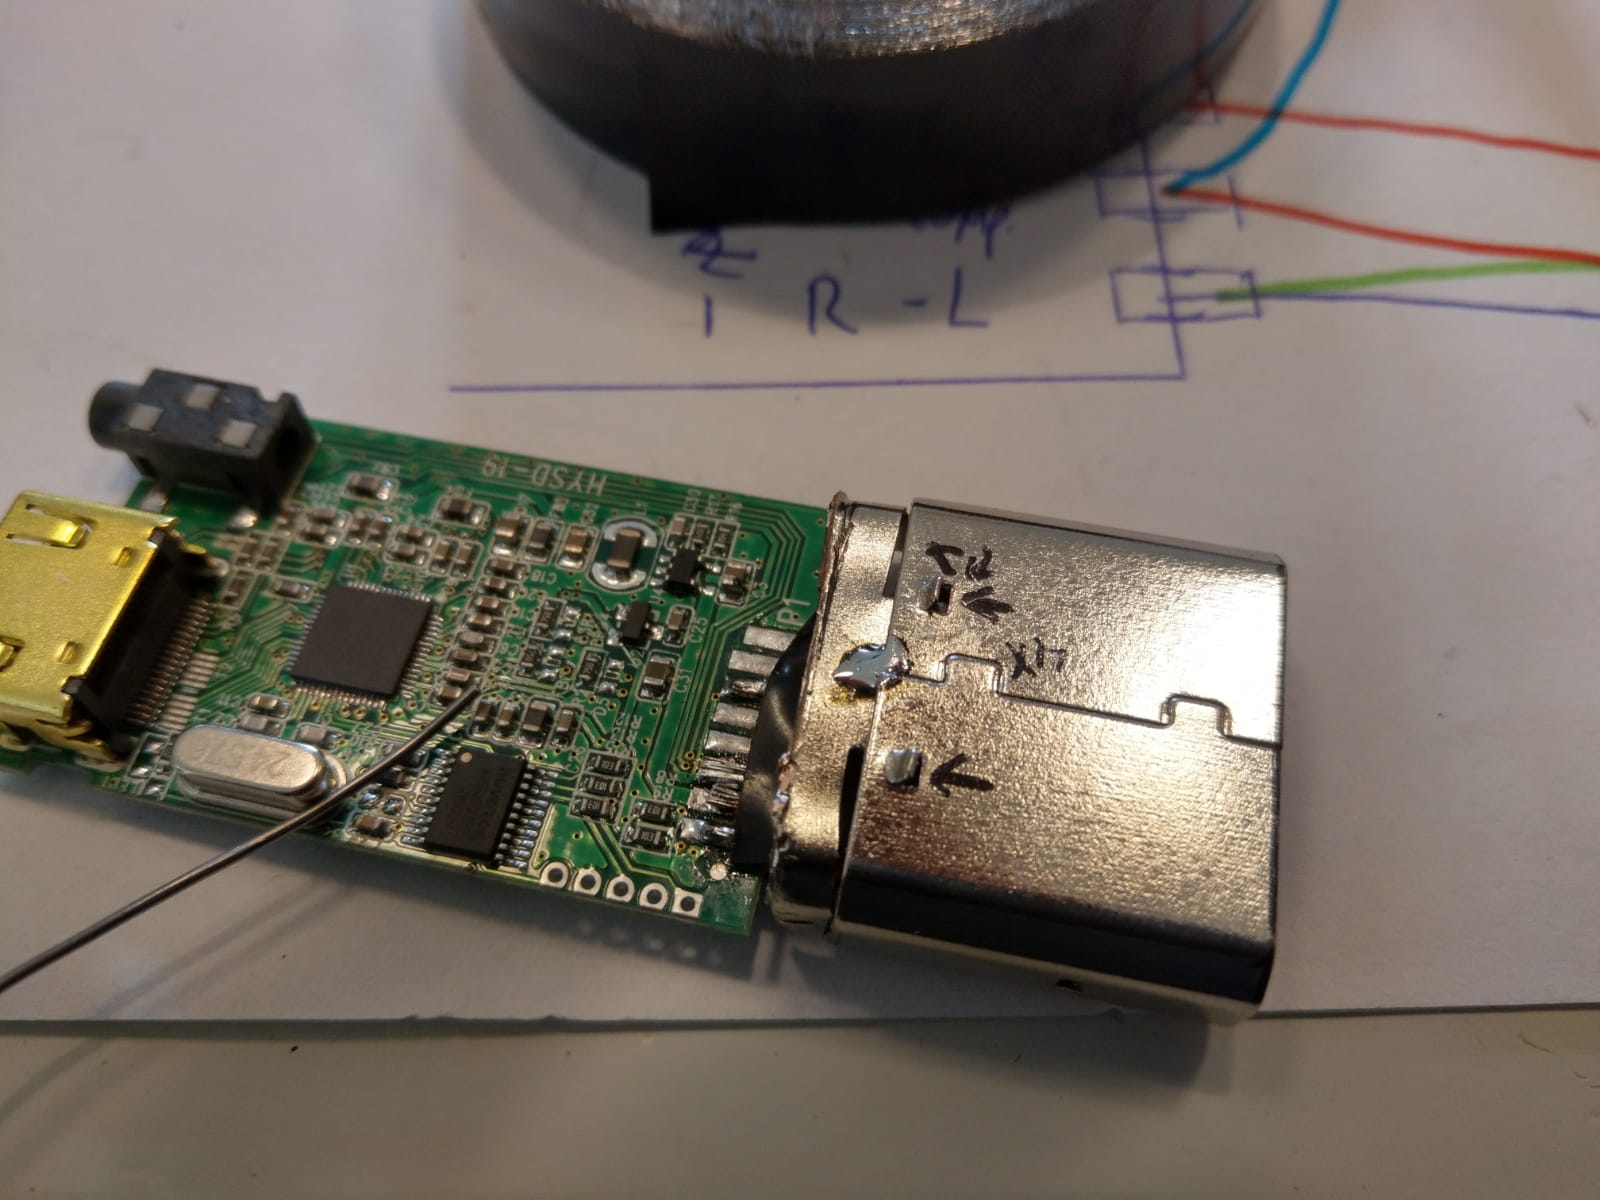
open up the wii2hdmi and snap off the connector. clean all the contacts
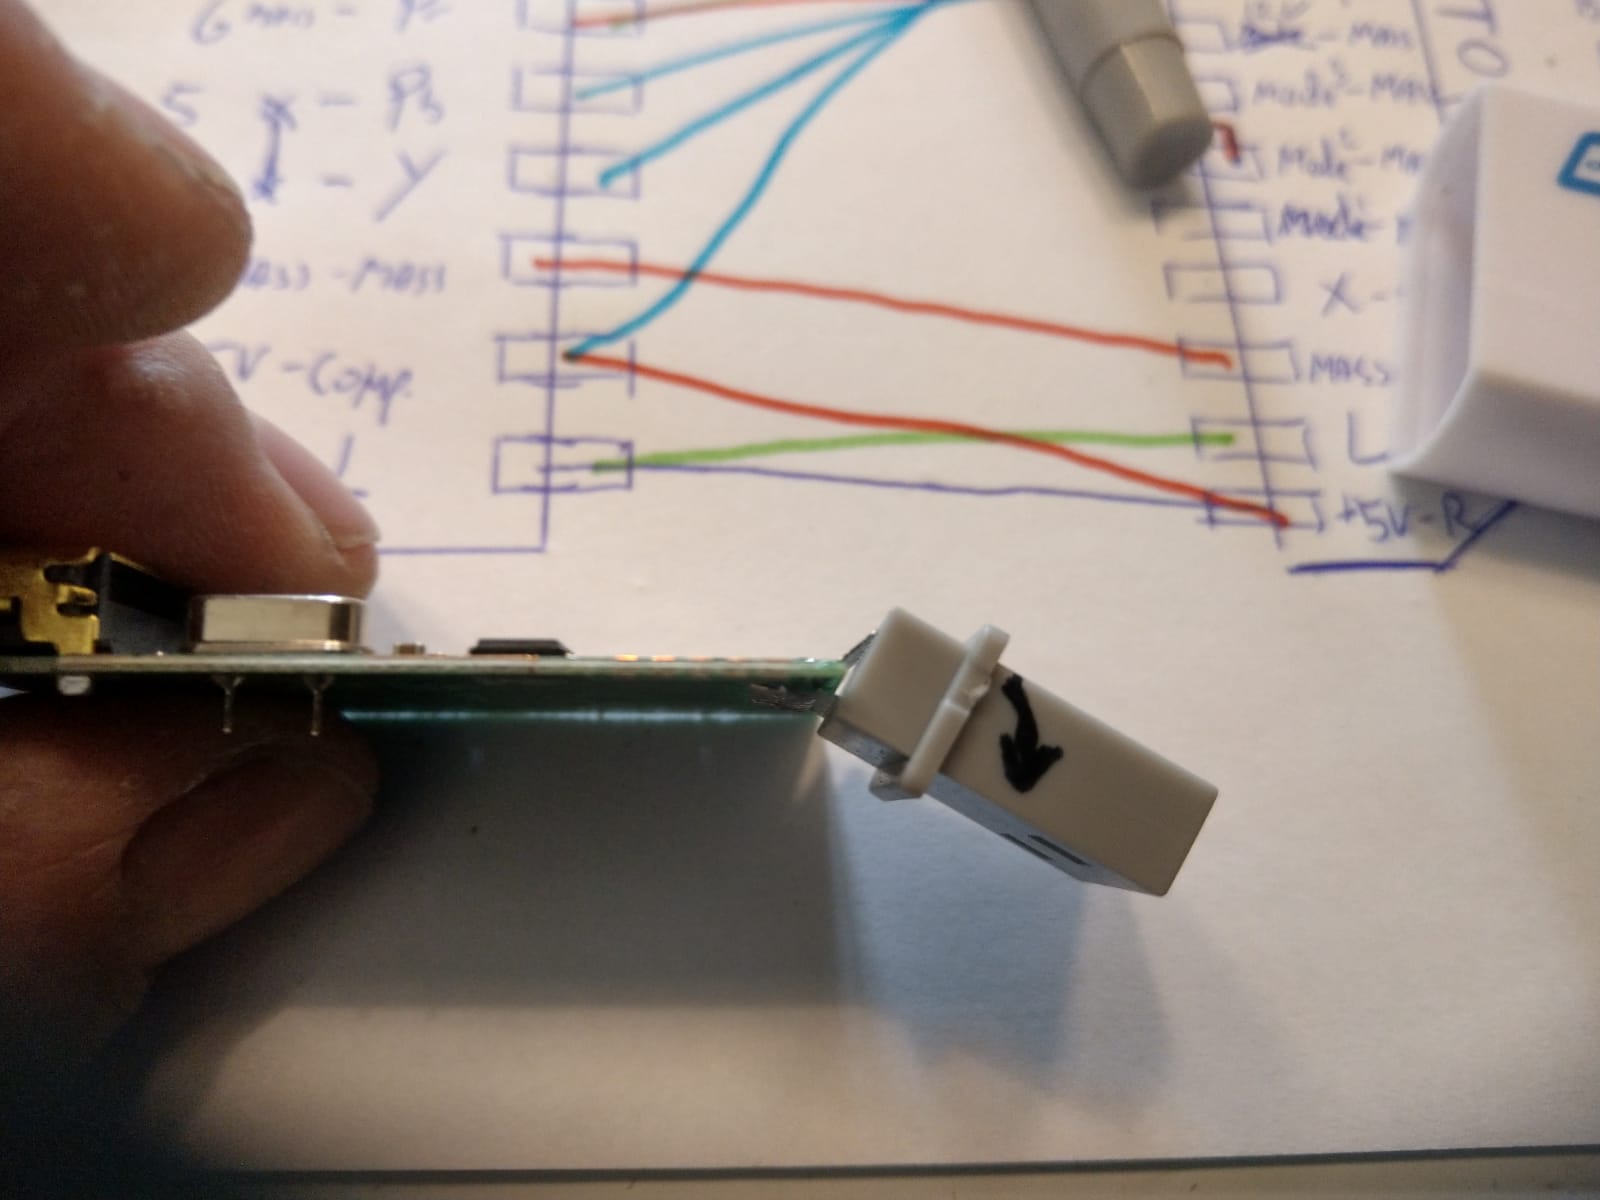
make the first connection, it will sturdy fings up, the lid has the exact size you need.
with 2 cables installed, you do not need the spacer anymore.
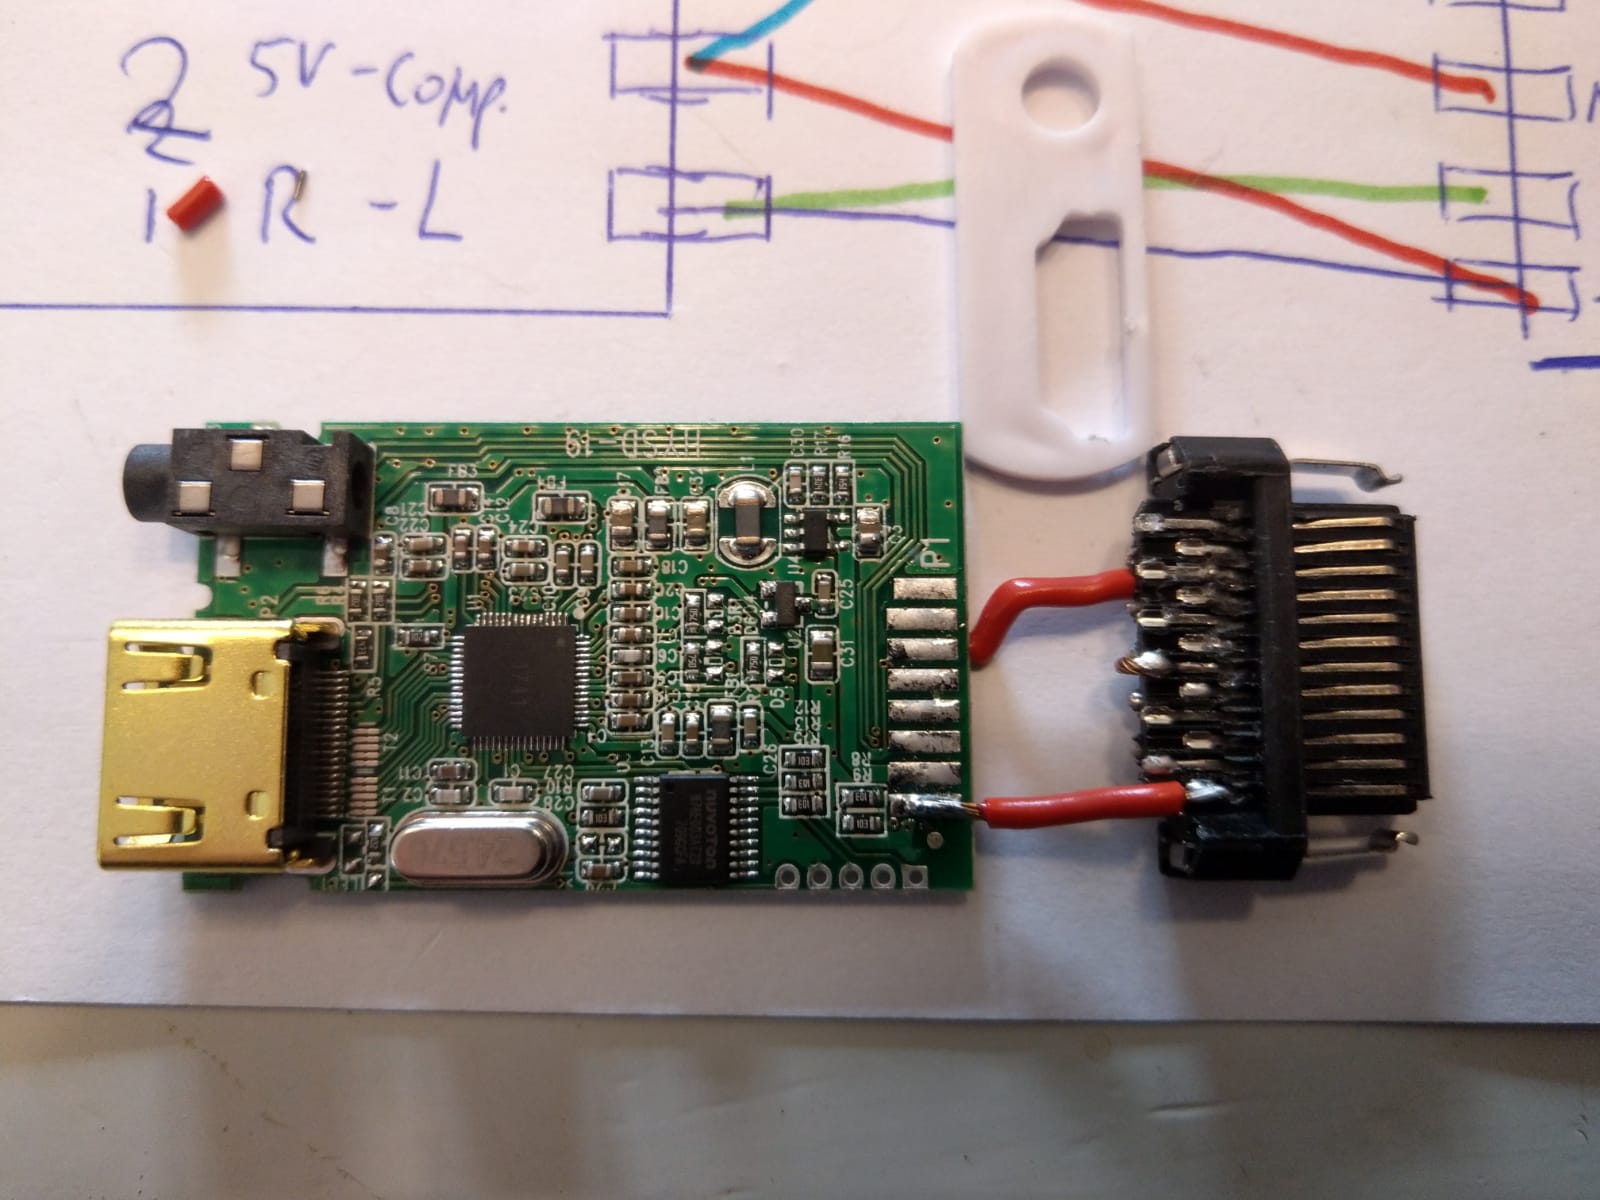
make sure all the cables are as short as possible and don't short out each other!
add a piece of insulation tape at both sides. It is wise to test it at this stage, later on it will be a pain in the a**.
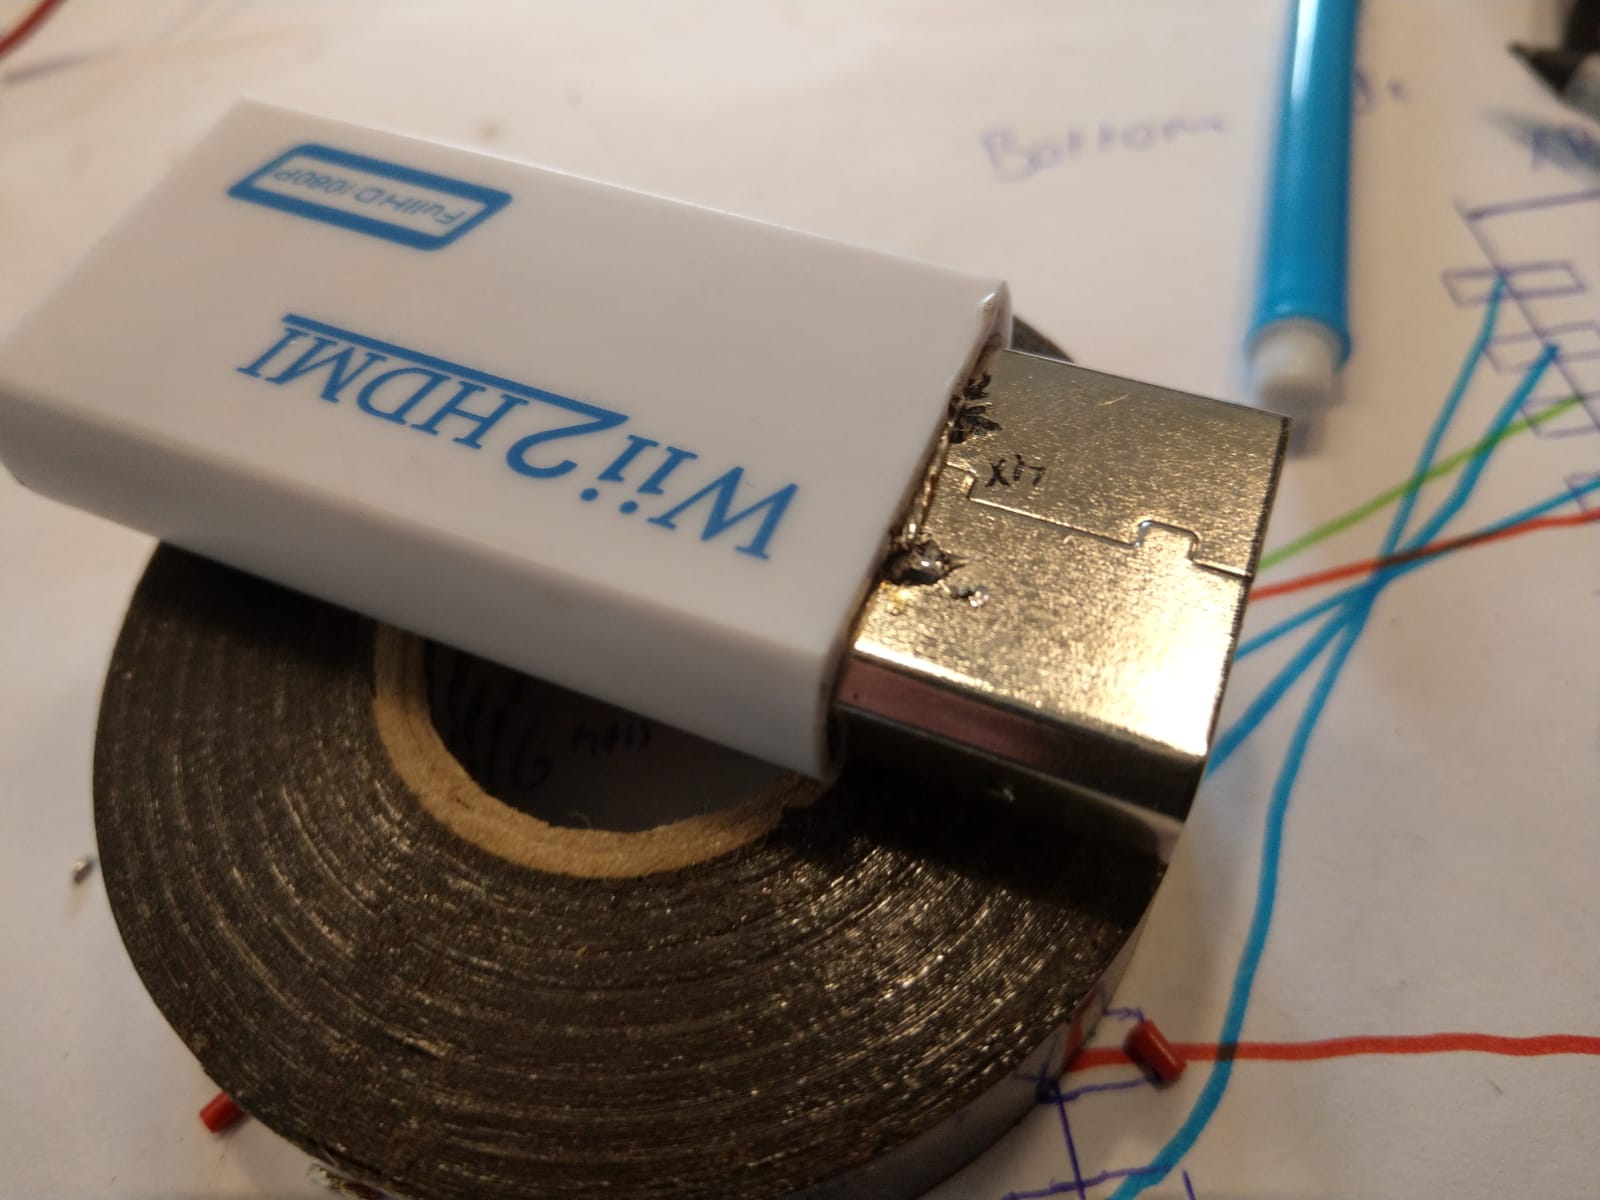
measure and cut the hole for the metal, it should slide in without to much hussle.
cut the top metal piece at the black line.
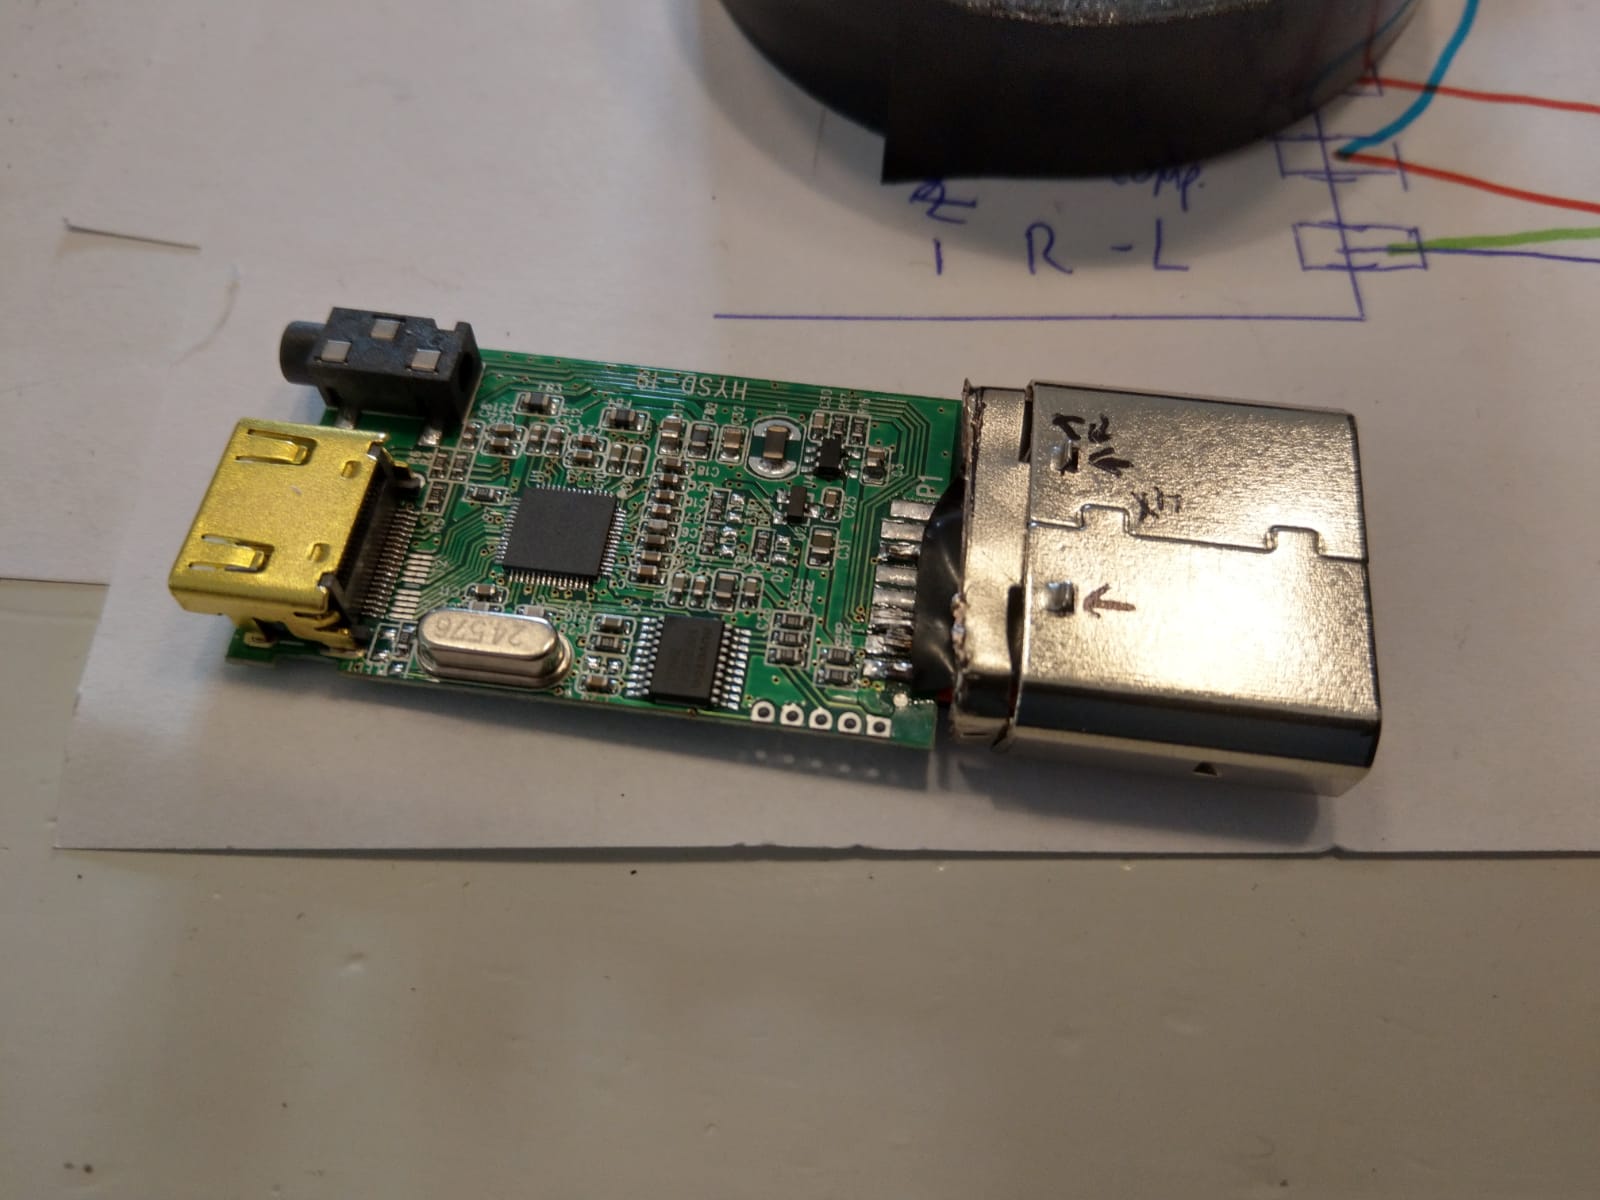
slide the metal piece in as far as possible. This will hold the internals in place!
solder it at the top and the sides. Your plug will not fall apart if you remove it from the xbox this way.
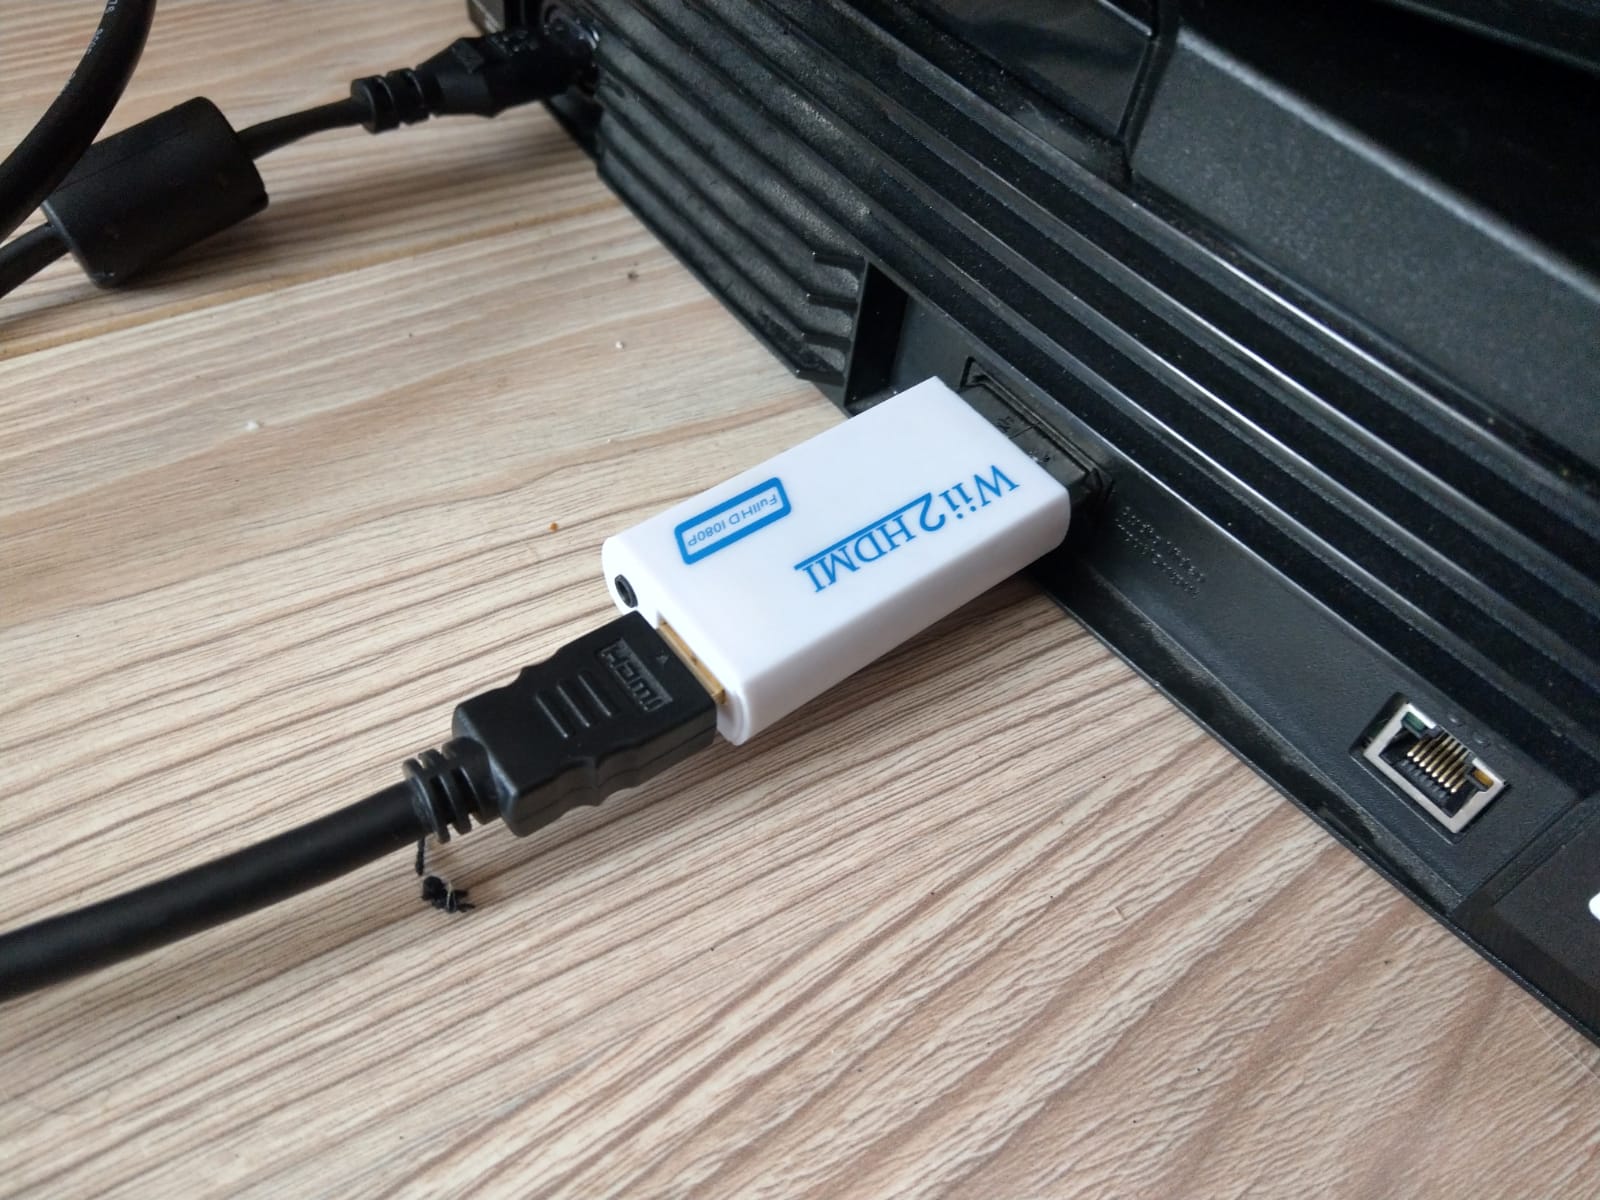
insert the completed converter,
push it through as far as possible and solder a wire to the top and bottom, against the plastic, this will keep the internals in place and removes stress on the converter.
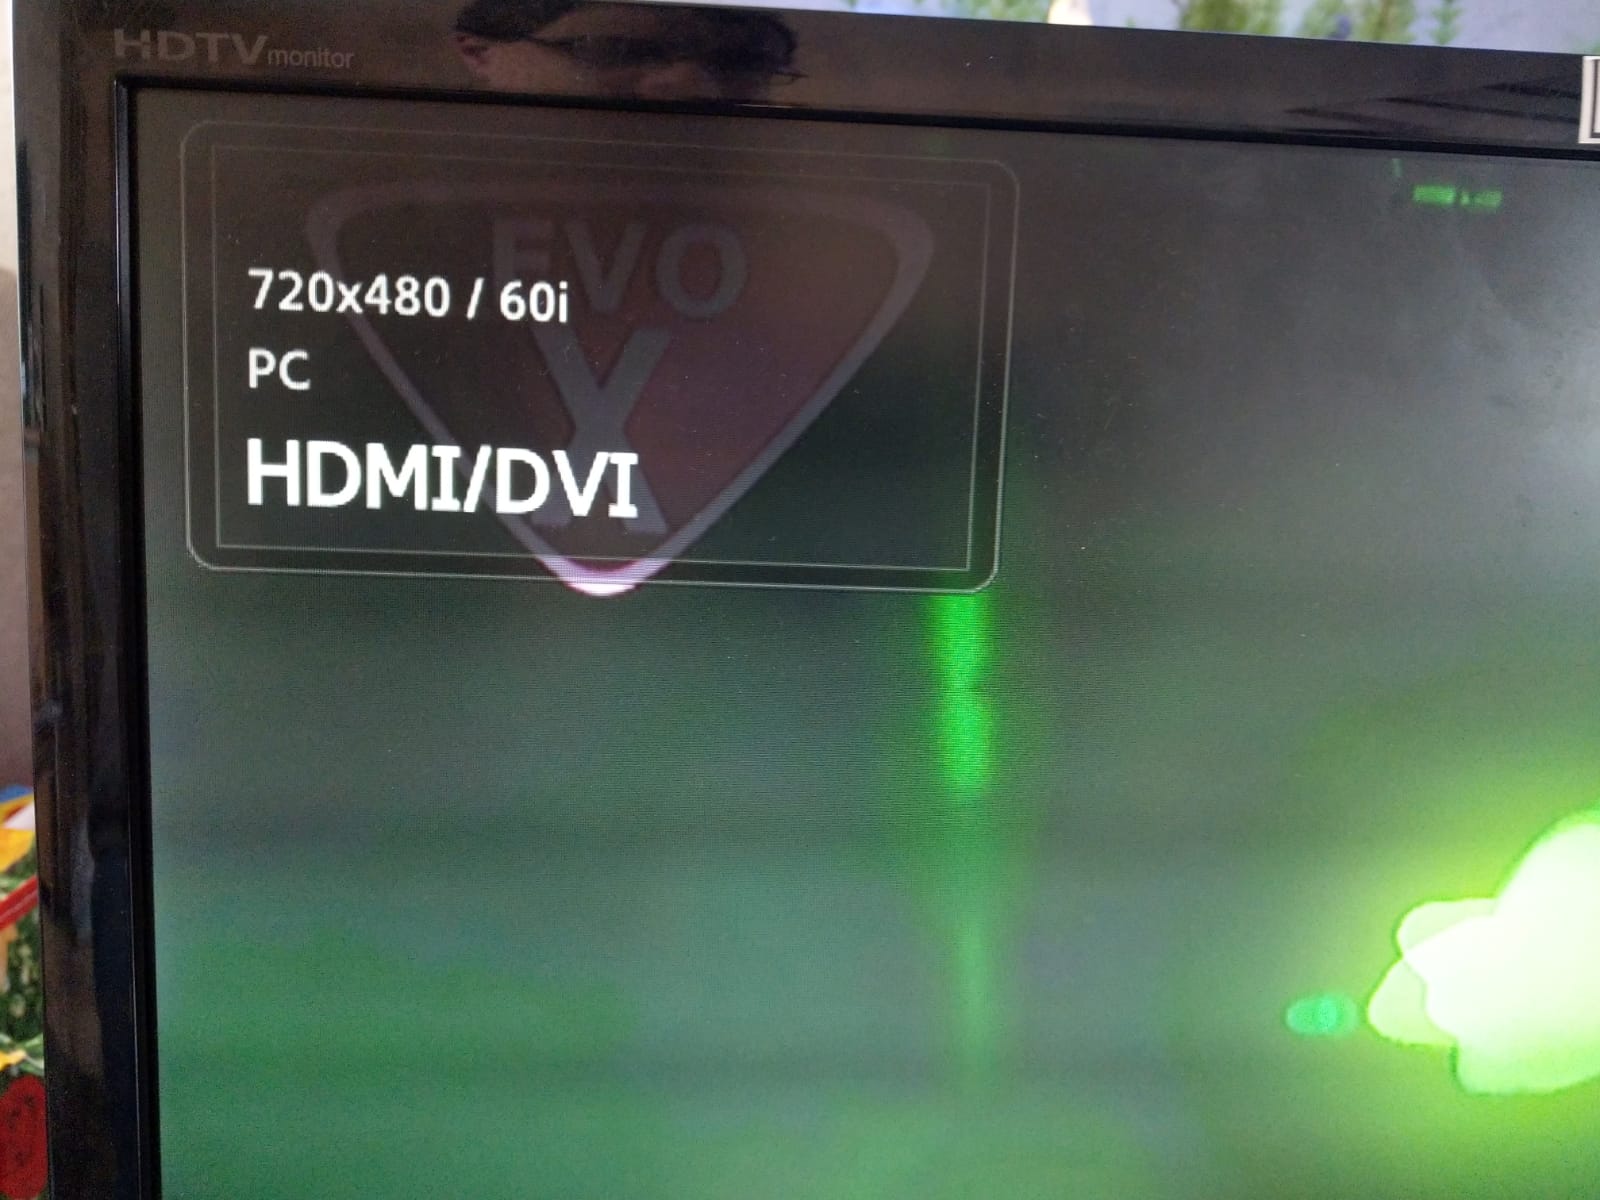
time to test!
720x480@60i, the boot screen, some tv units have problems displaying this throigh hdmi!
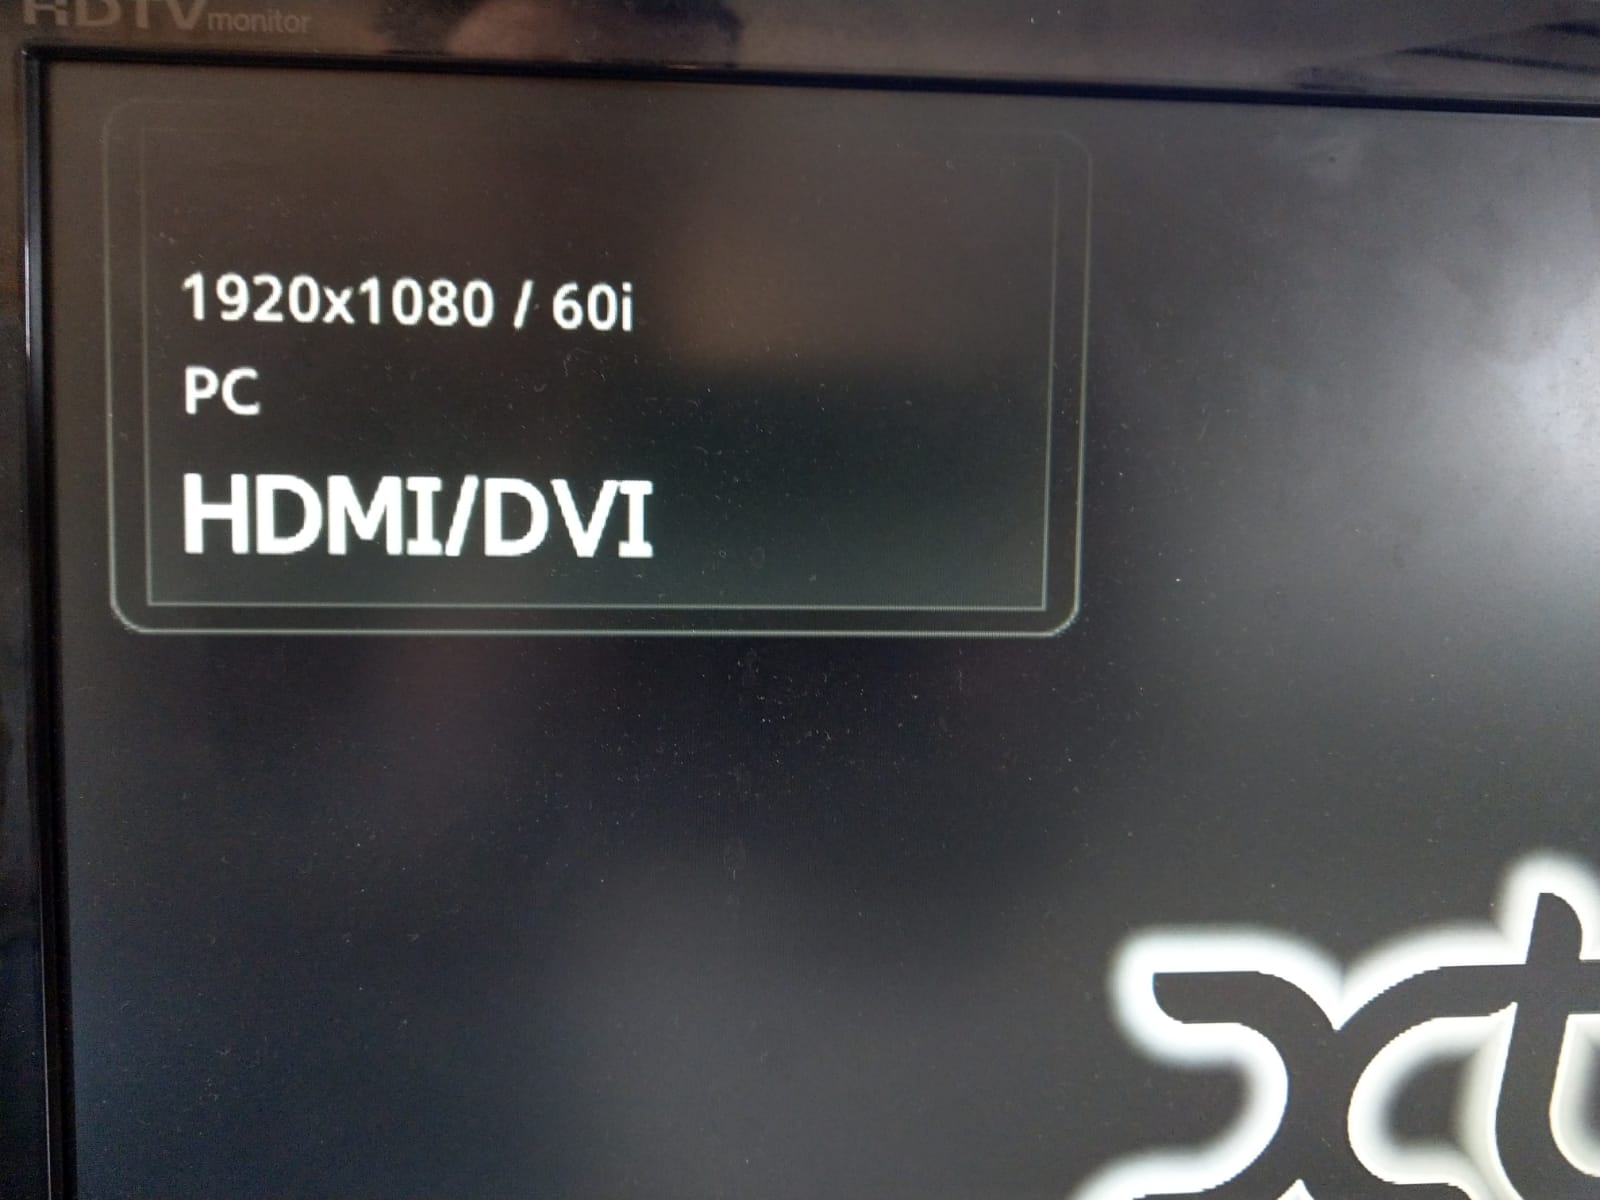
we have reached 1920x1080@60i, maximum resolution of xbmc, although I advice to use 720.
If you miss the options for higher resolution, make sure the system is set to NTSC, in pal it is unavailable. Use enigma video switcher.
I will start to sell these adapters in a short while for €45,- due to the work it takes.
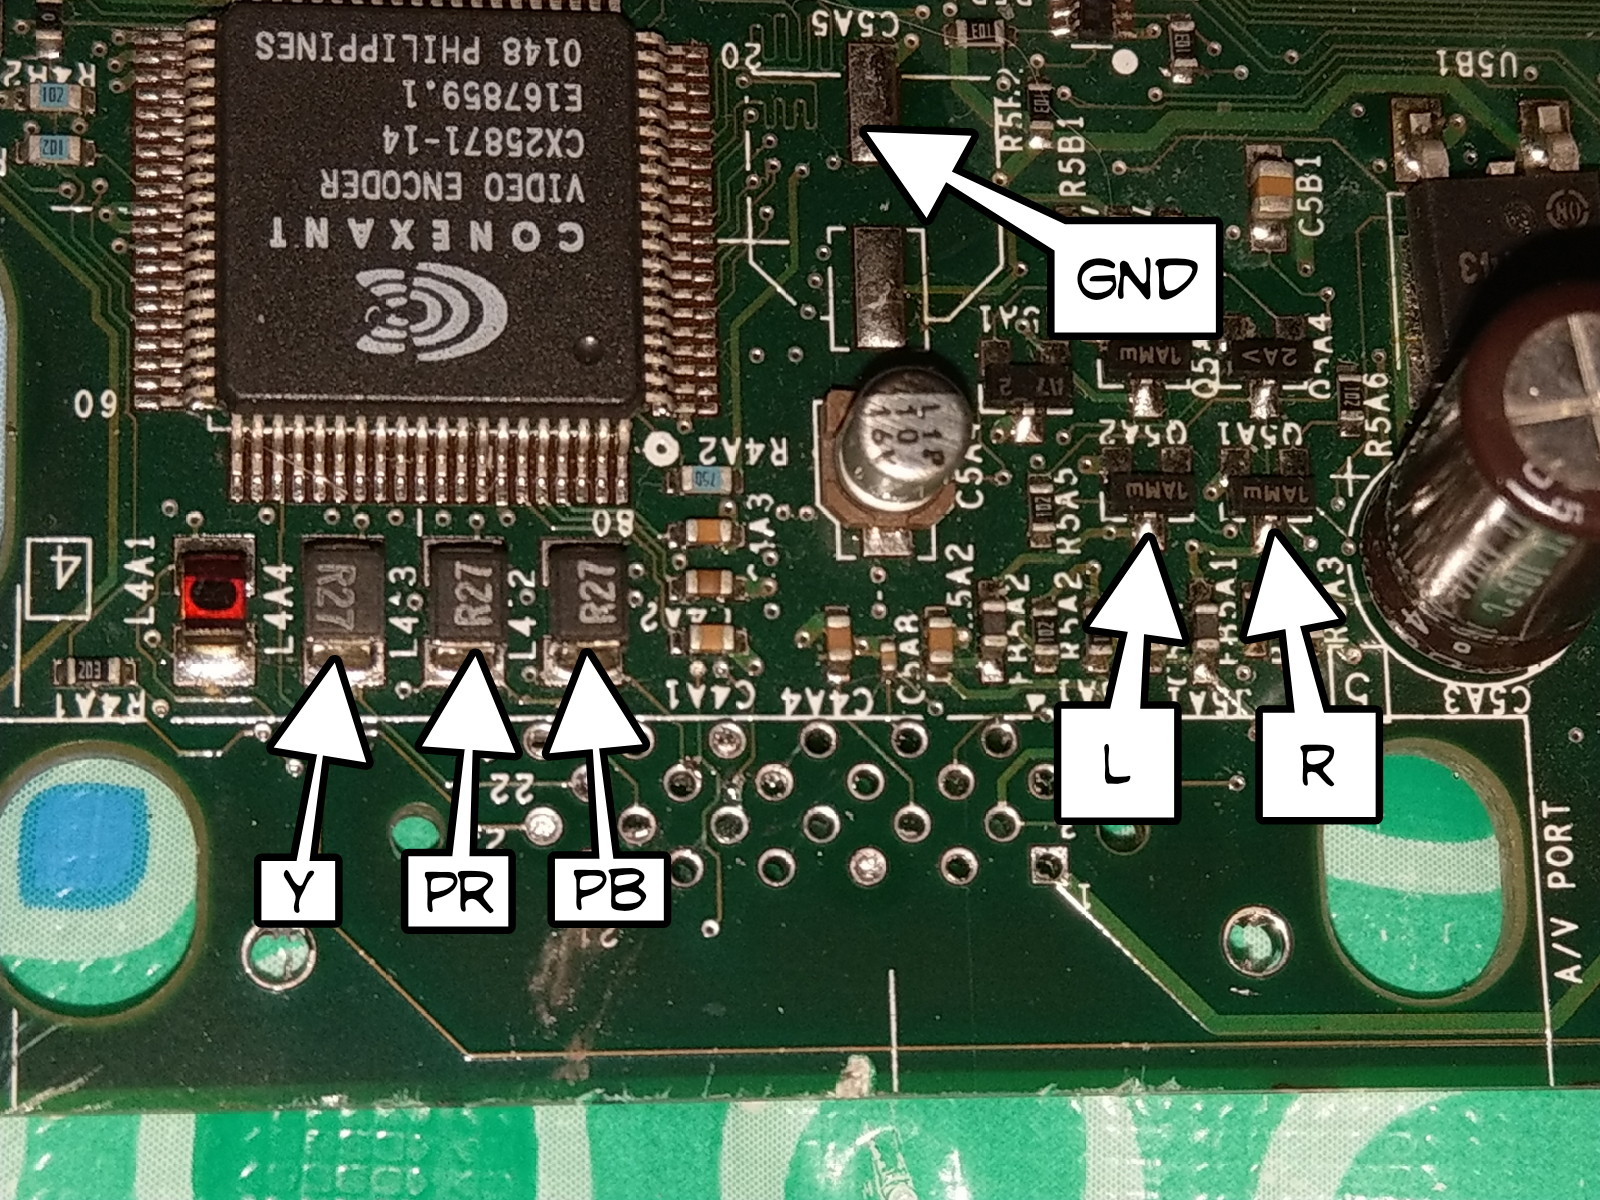
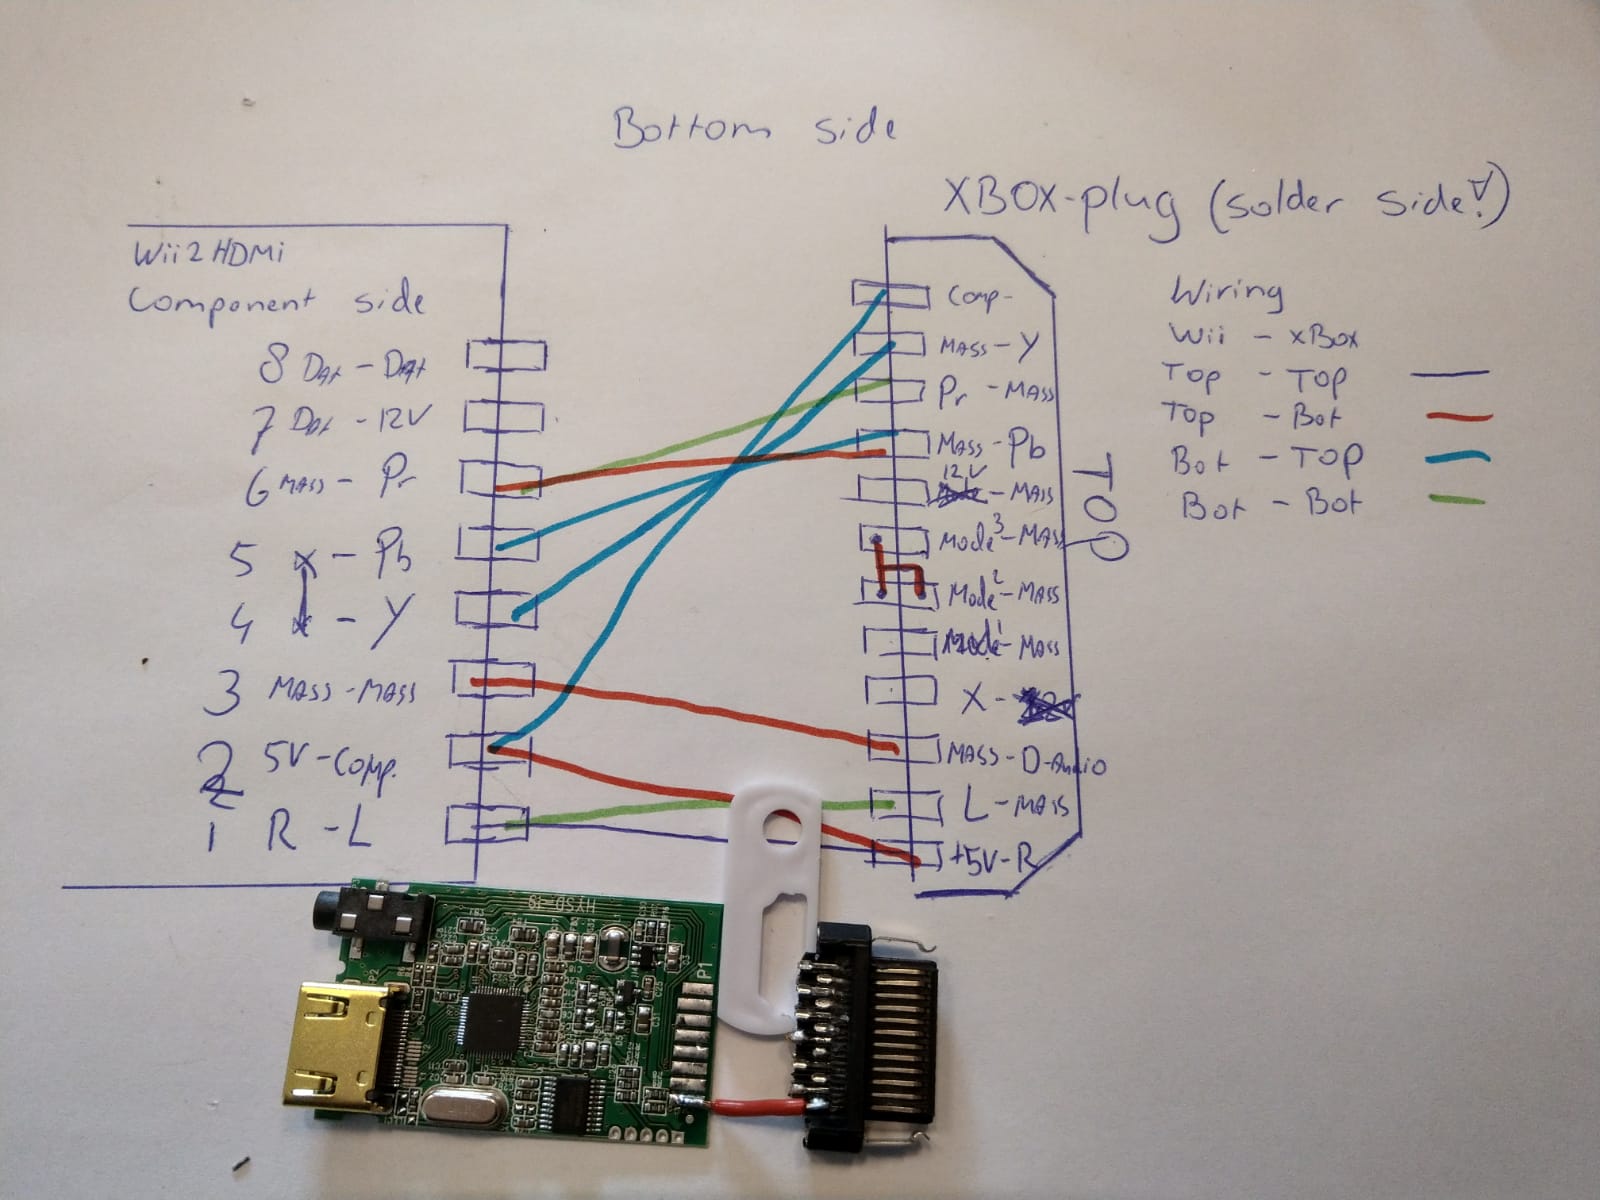
I have given all the connection types another color and the pin numbers are not the official ones!
Any questions? Be free to ask.
-
2
-
1
-


Board Life Status
Board startup date: April 23, 2017 12:45:48
Hdmi Plug Aka X2hdmi
in Tutorial Submission
Posted
Try to measure the resistance of the path from chip to chip at first, no experience with this chip.
At least at one point it is better, the manufucturer can supply you with a datasheet, I only have 1741 printed on it and havo no clue wat the chip is.