

MvZiC MaN
-
Posts
56 -
Joined
-
Last visited
-
Days Won
22
Content Type
Profiles
Forums
Calendar
Store
Posts posted by MvZiC MaN
-
-
Welcome my friend! Glad to see the forum growing. Slowly, but surely.
-
 1
1
-
-
Doesn't really feel any different to me. and yes the 360 thumb sticks fit just fine.
-
17 hours ago, XC-3730C said:
Nice! I haven't played a whole lot of 360 games that require the 360 D-pad. How does it feel in an OG XBOX controller?
My favorite D-pad of all time is SNES, but I doubt that could work in an OG XBOX controller...It feels like it does in the 360 controllers. I thought itd feel weird or squishy. But it feels like factory.
-
AFAIK there isnt a true solderless chip that will work with a 1.6 because the LPC rebuild requires soldering.
-
Scrappy is right, It depends on what TSOP chip is in your xbox. any xbox can use a 256k bios. but if you try to flash a 512k onto a 256k chip it will fail and youll need an eeprom reader or modchip to recover it.
-
You dont enter whats above. thats just telling you what buttons can be used in a password.
Like Dave C said.. Press A,Y,B,X,Start and it should work just fine.-
1
-
-
Thanks man!! will use this on the one im working on now!
-
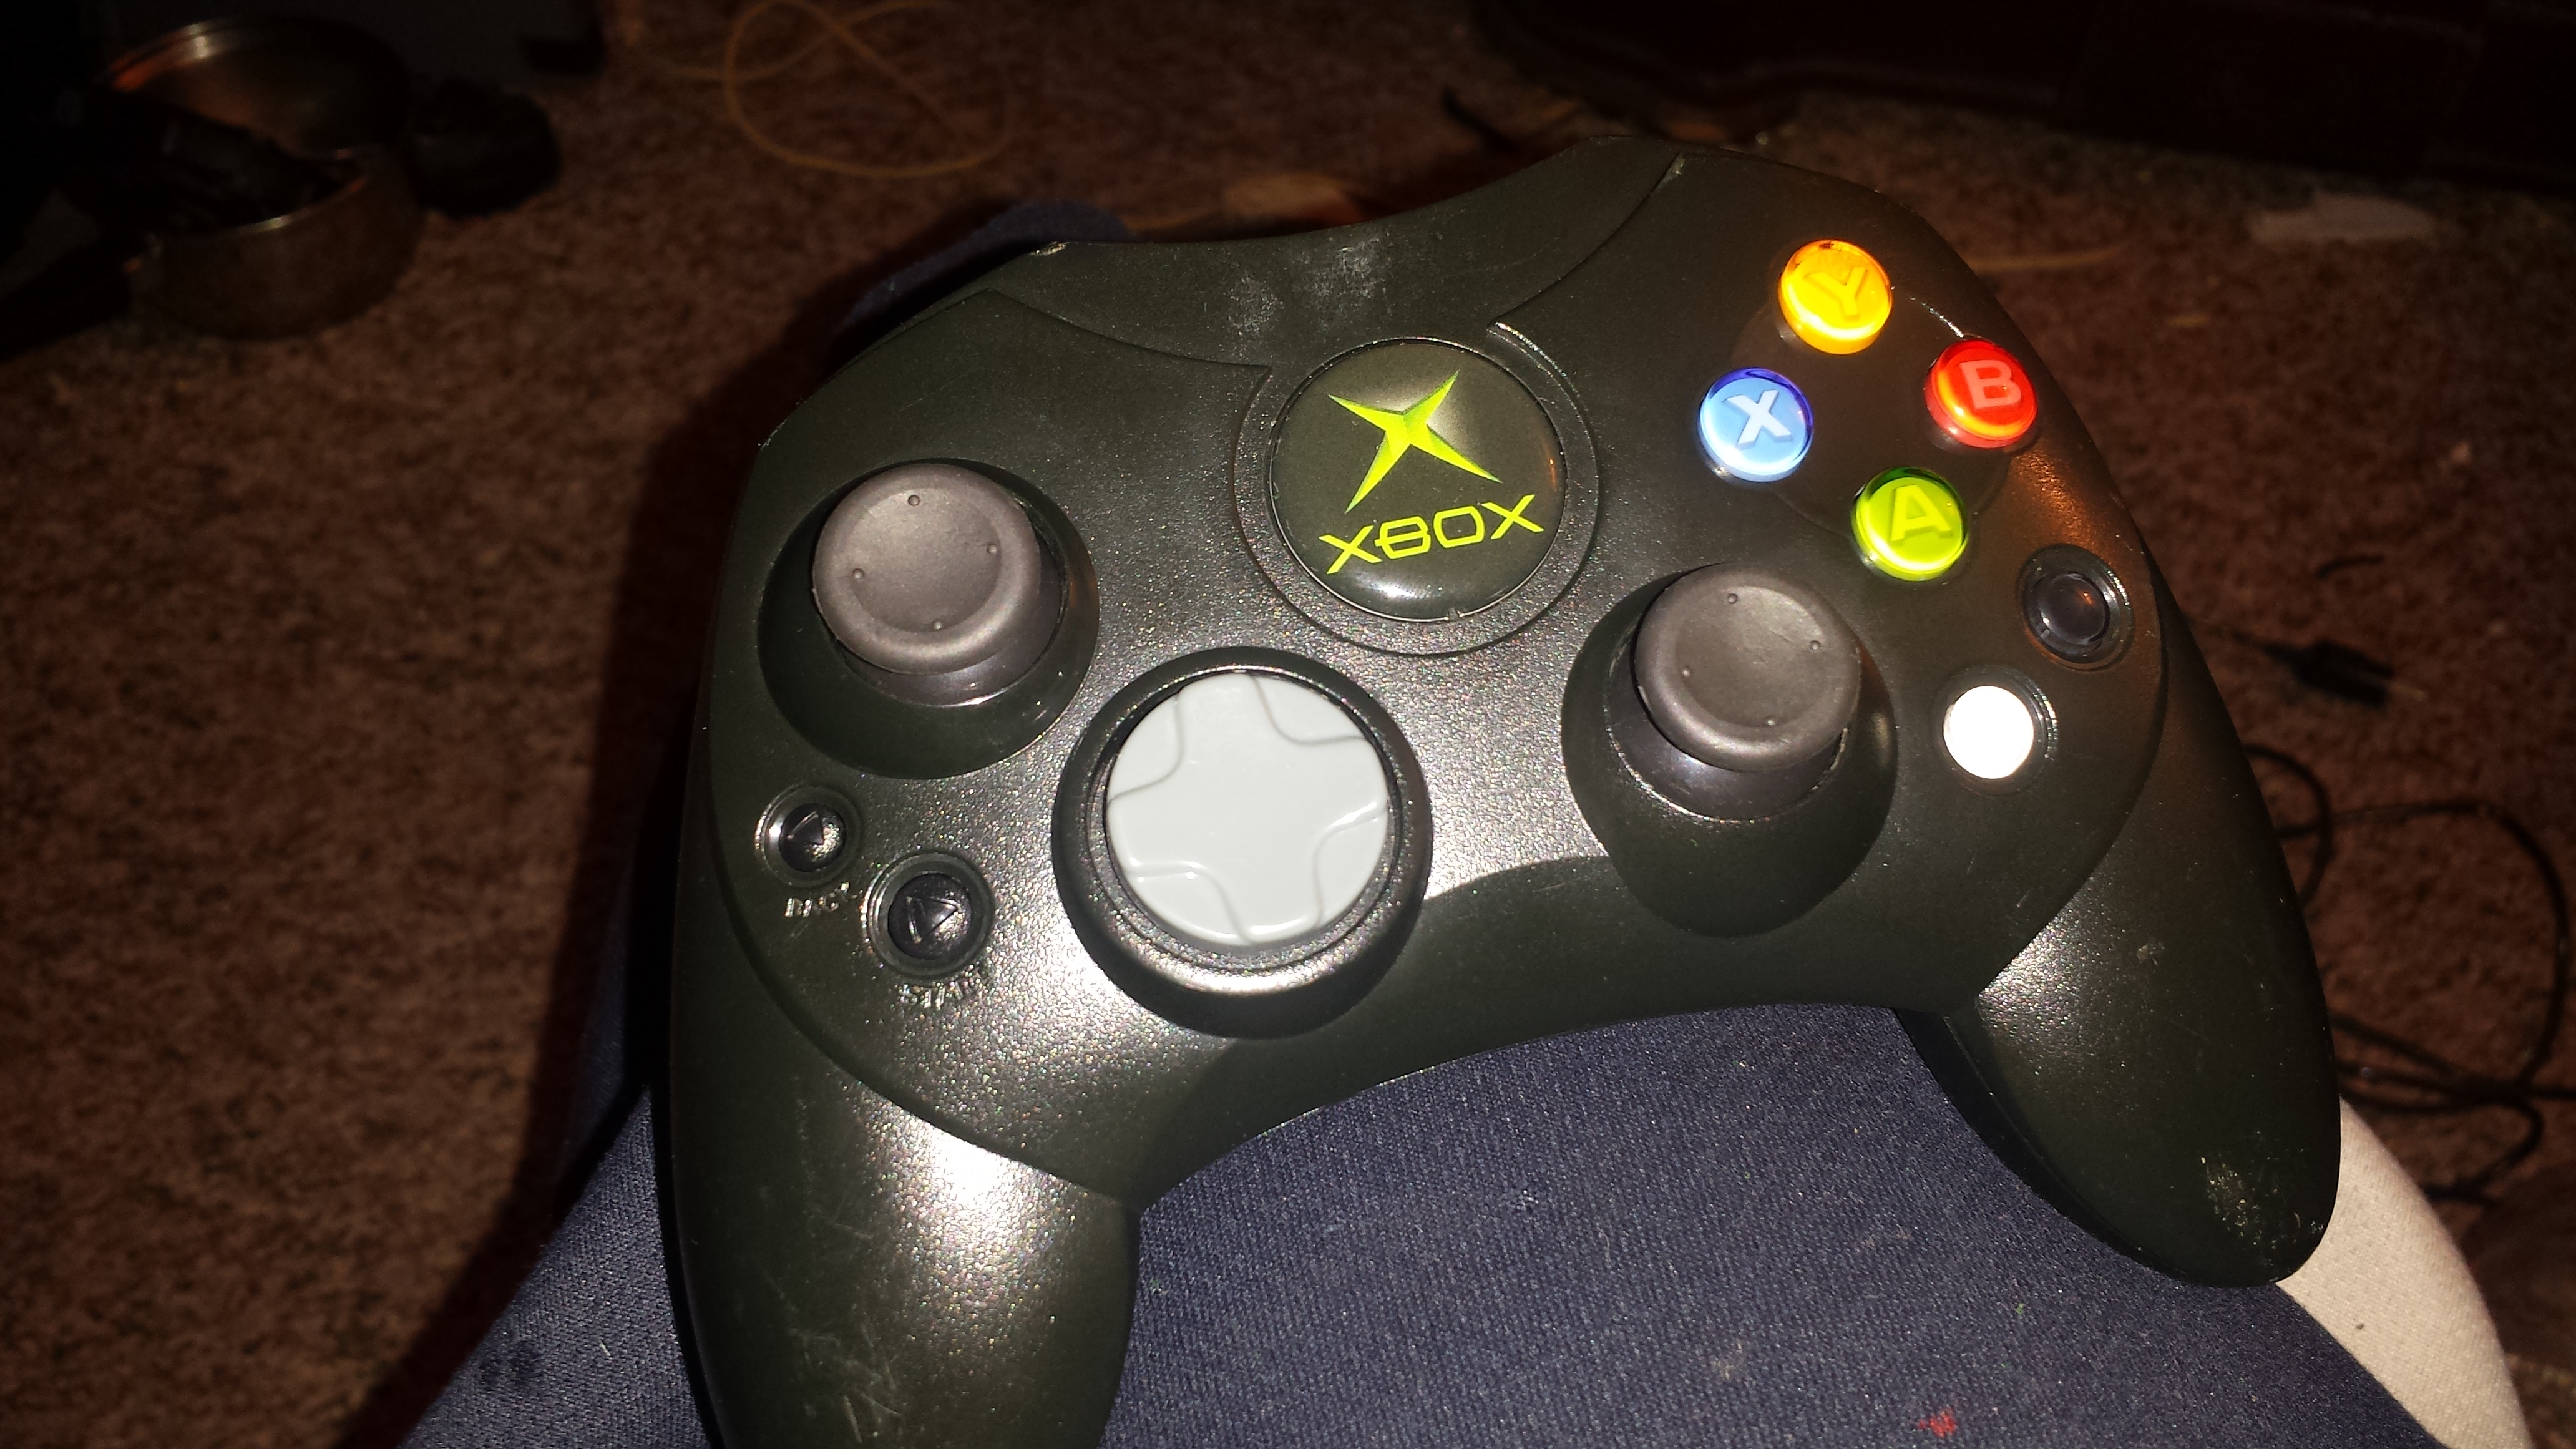
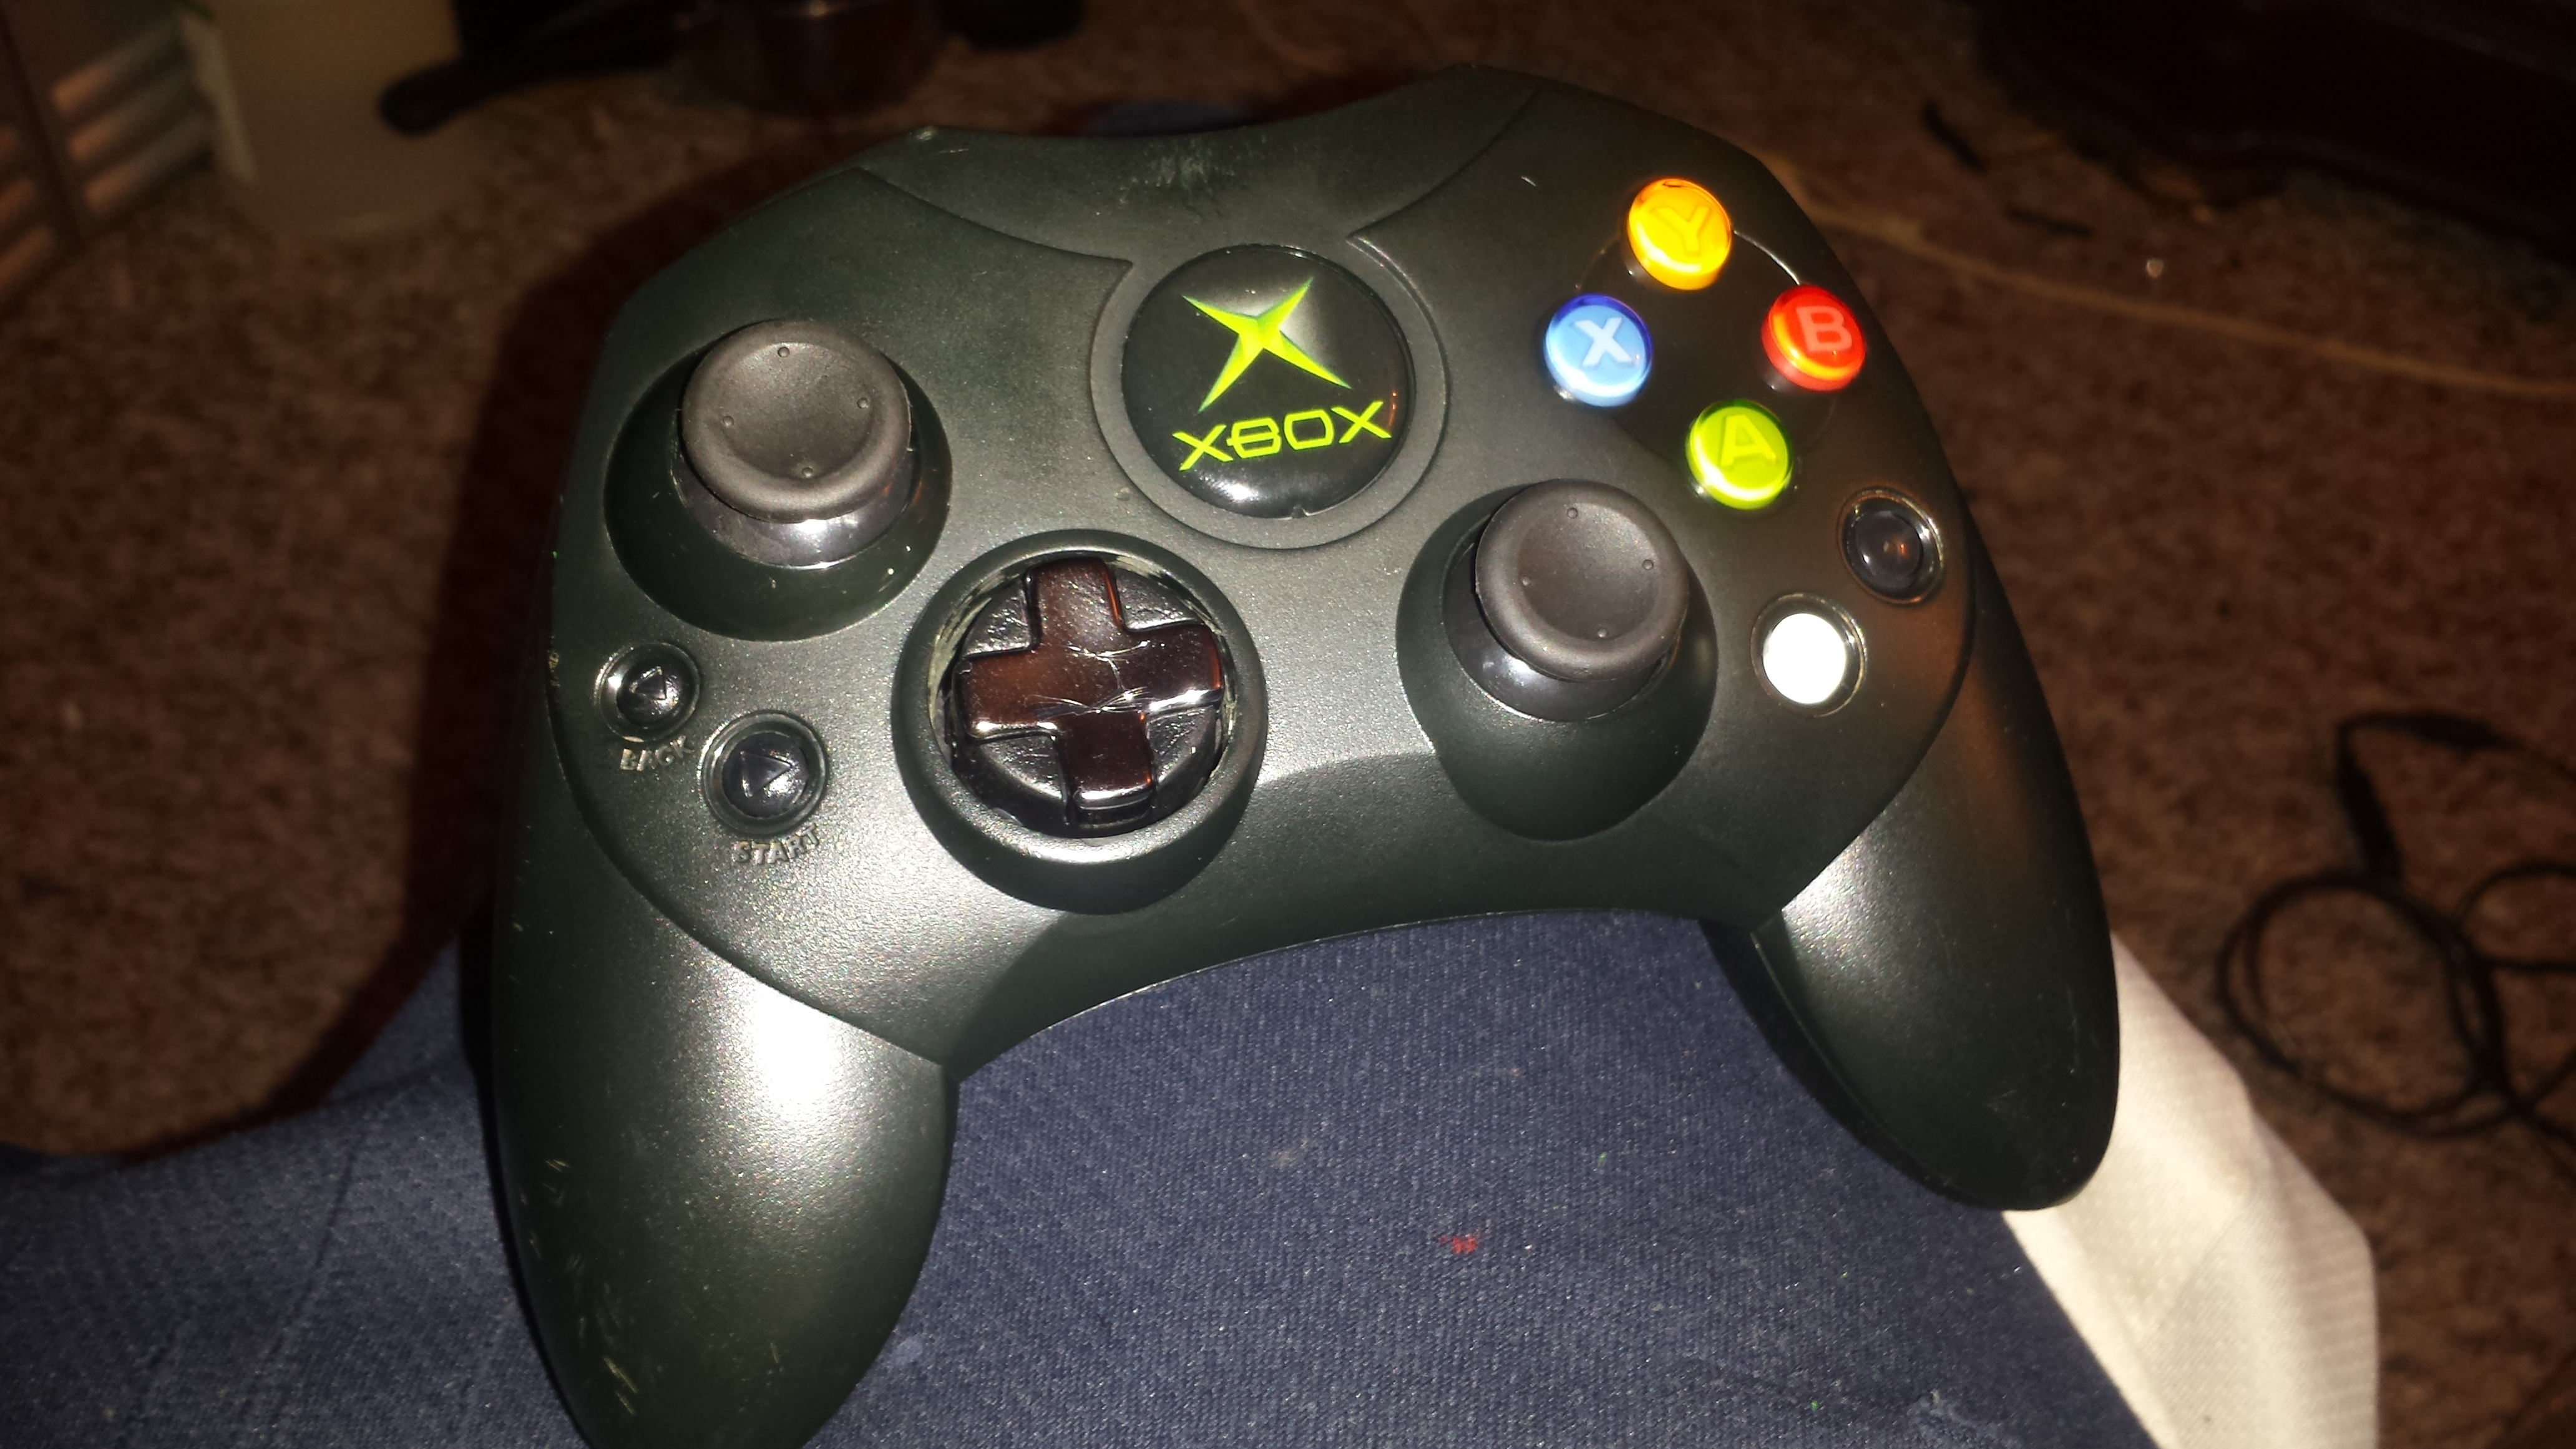
Ever wanted to add a new D-pad to your controller? Probably not. But im still gonna show you how.
Both methods are on an S-Controller. I haven't tested on a Duke or any other controller. If you wanna try then let me know how it goes.Tools/Materials You'll need for this mod
Phillips Head screw drivermini Phillips head screw driver
Regular D-pad from an xbox 360 Controller
or
A Transforming D-pad from a 360 Controller (Depending on which mod you wanna do)
Needle Nose pliers or Wire cutters(For method 1)
Dremel/Rotory tool
Sanding Barrel and cutting disc for your Dremel.
and 10-15 minutes of your time.
PART A: Disassembly
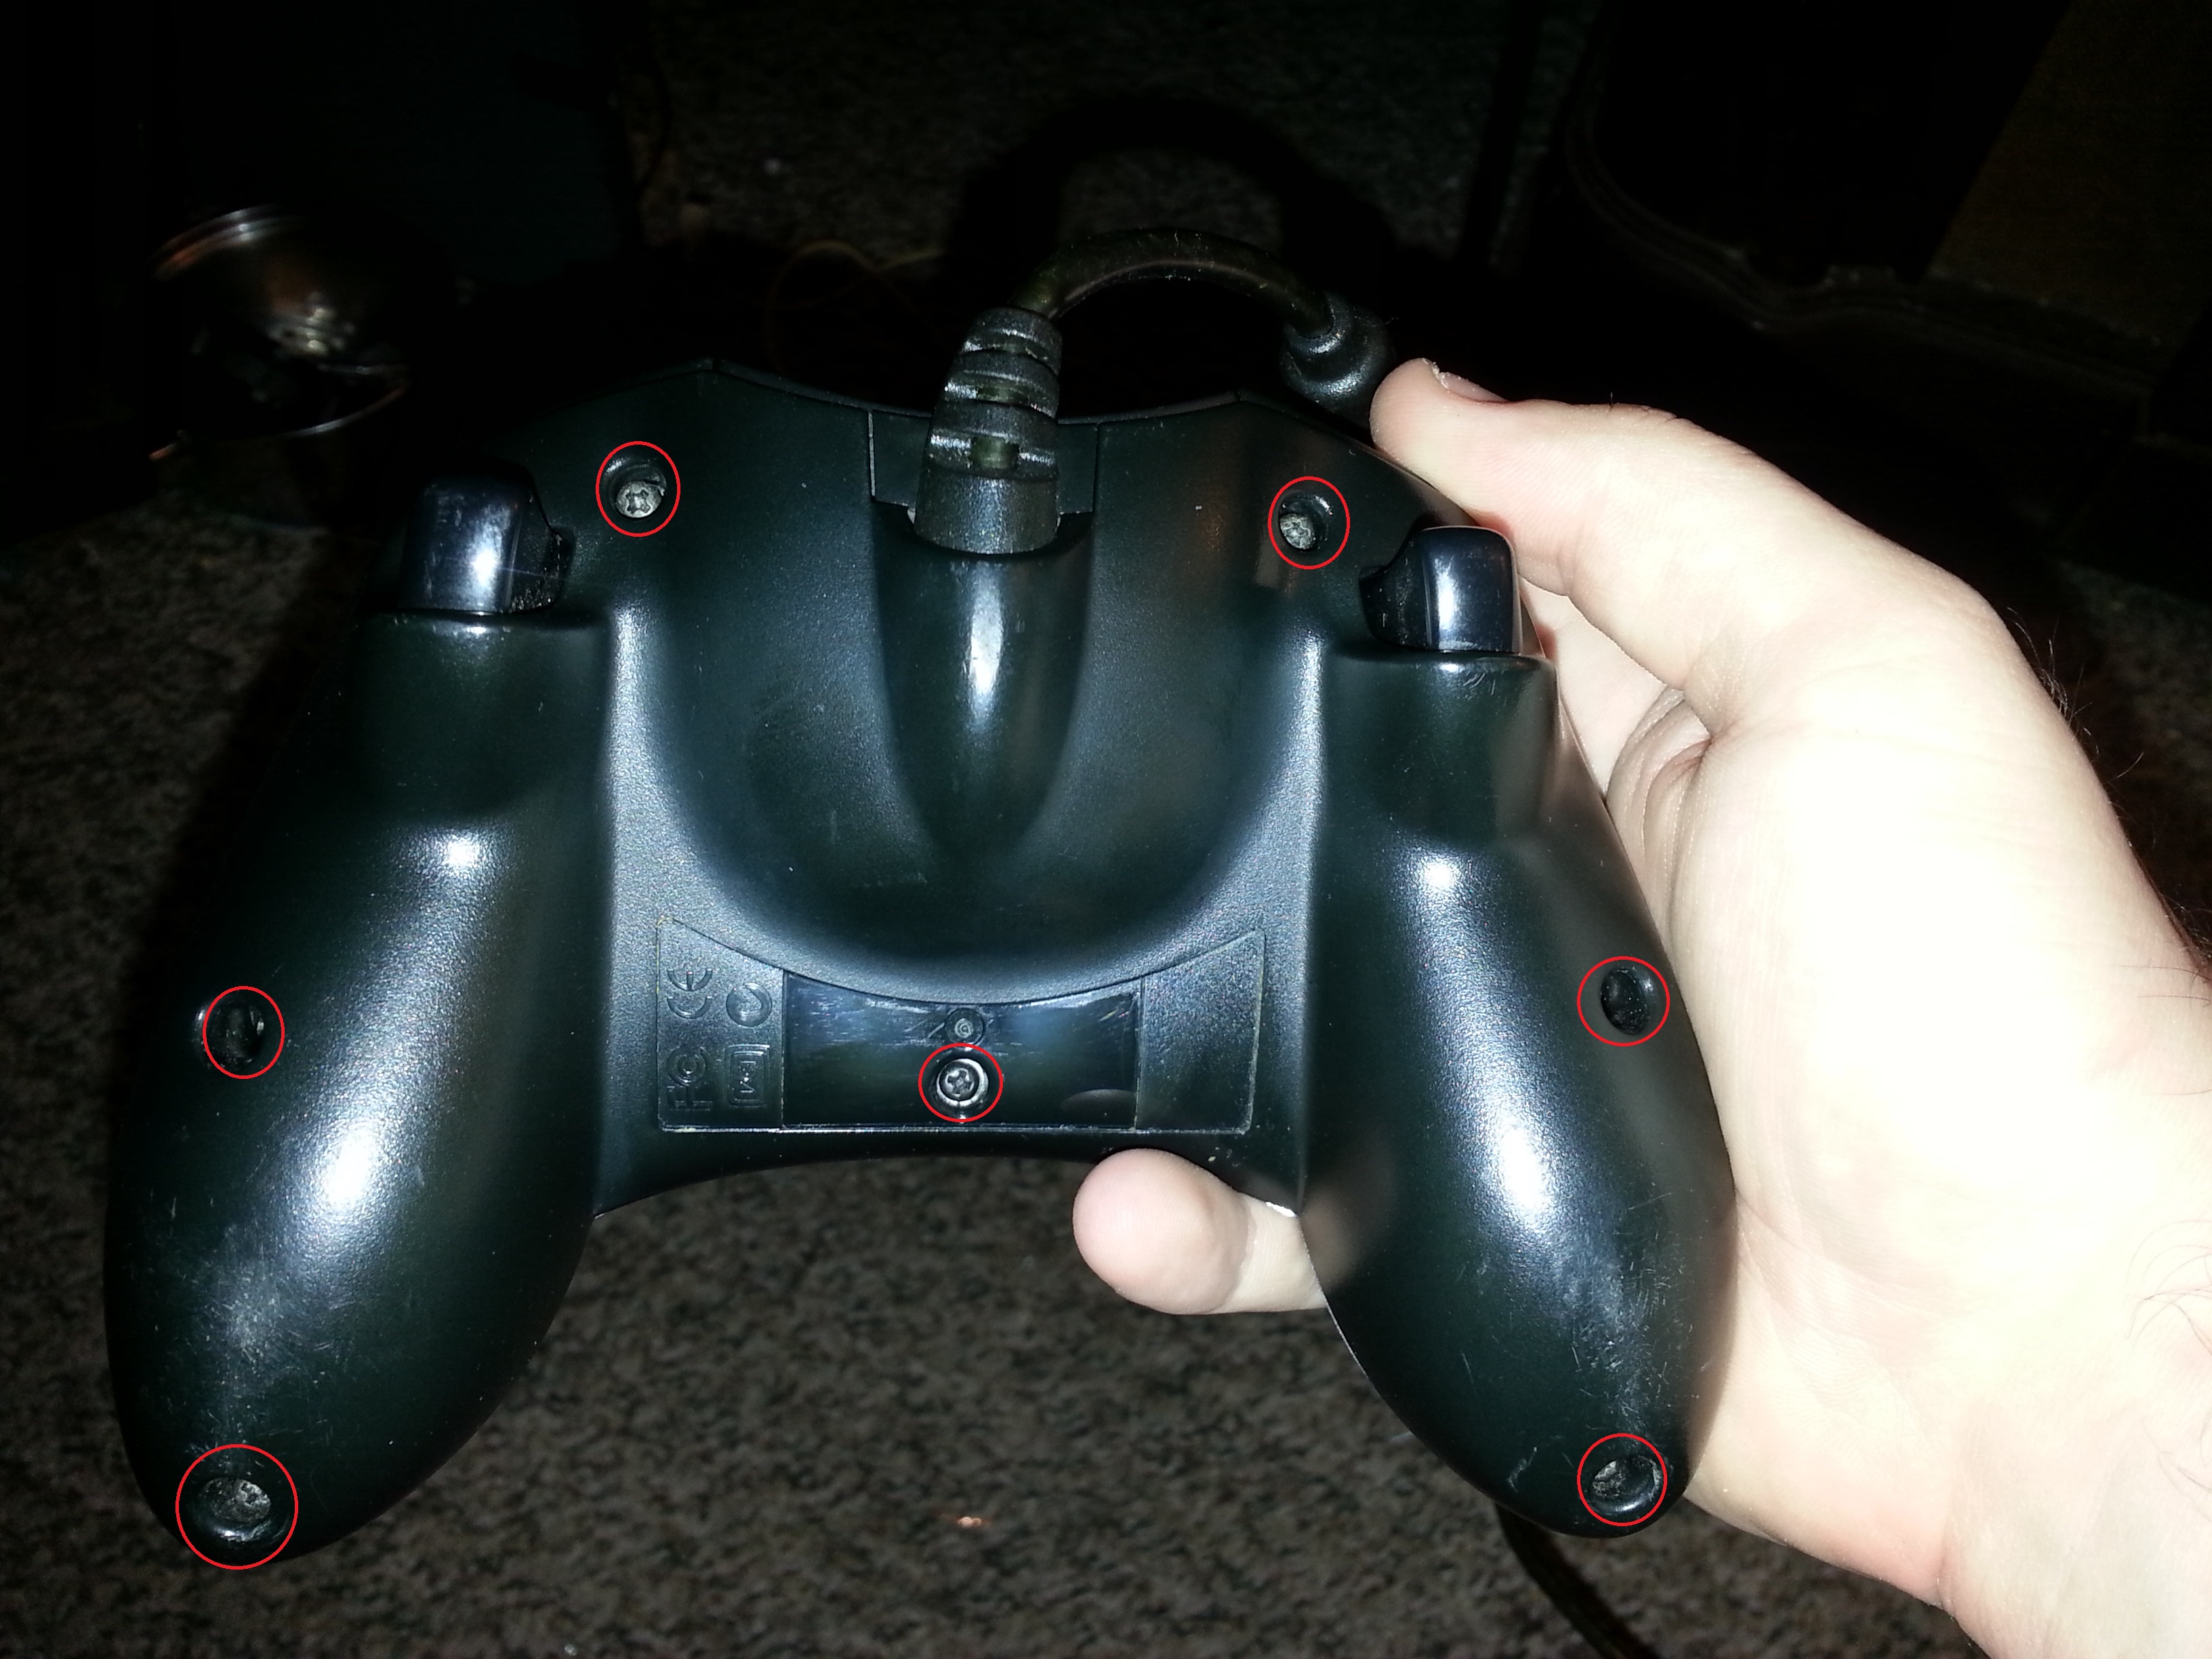
First you'll need to pull apart your controller.
there are 7 Phillips head screws on the bottom, 1 is under the barcode sticker in the center.
once removed you can pull the bottom part up and remove the internals.
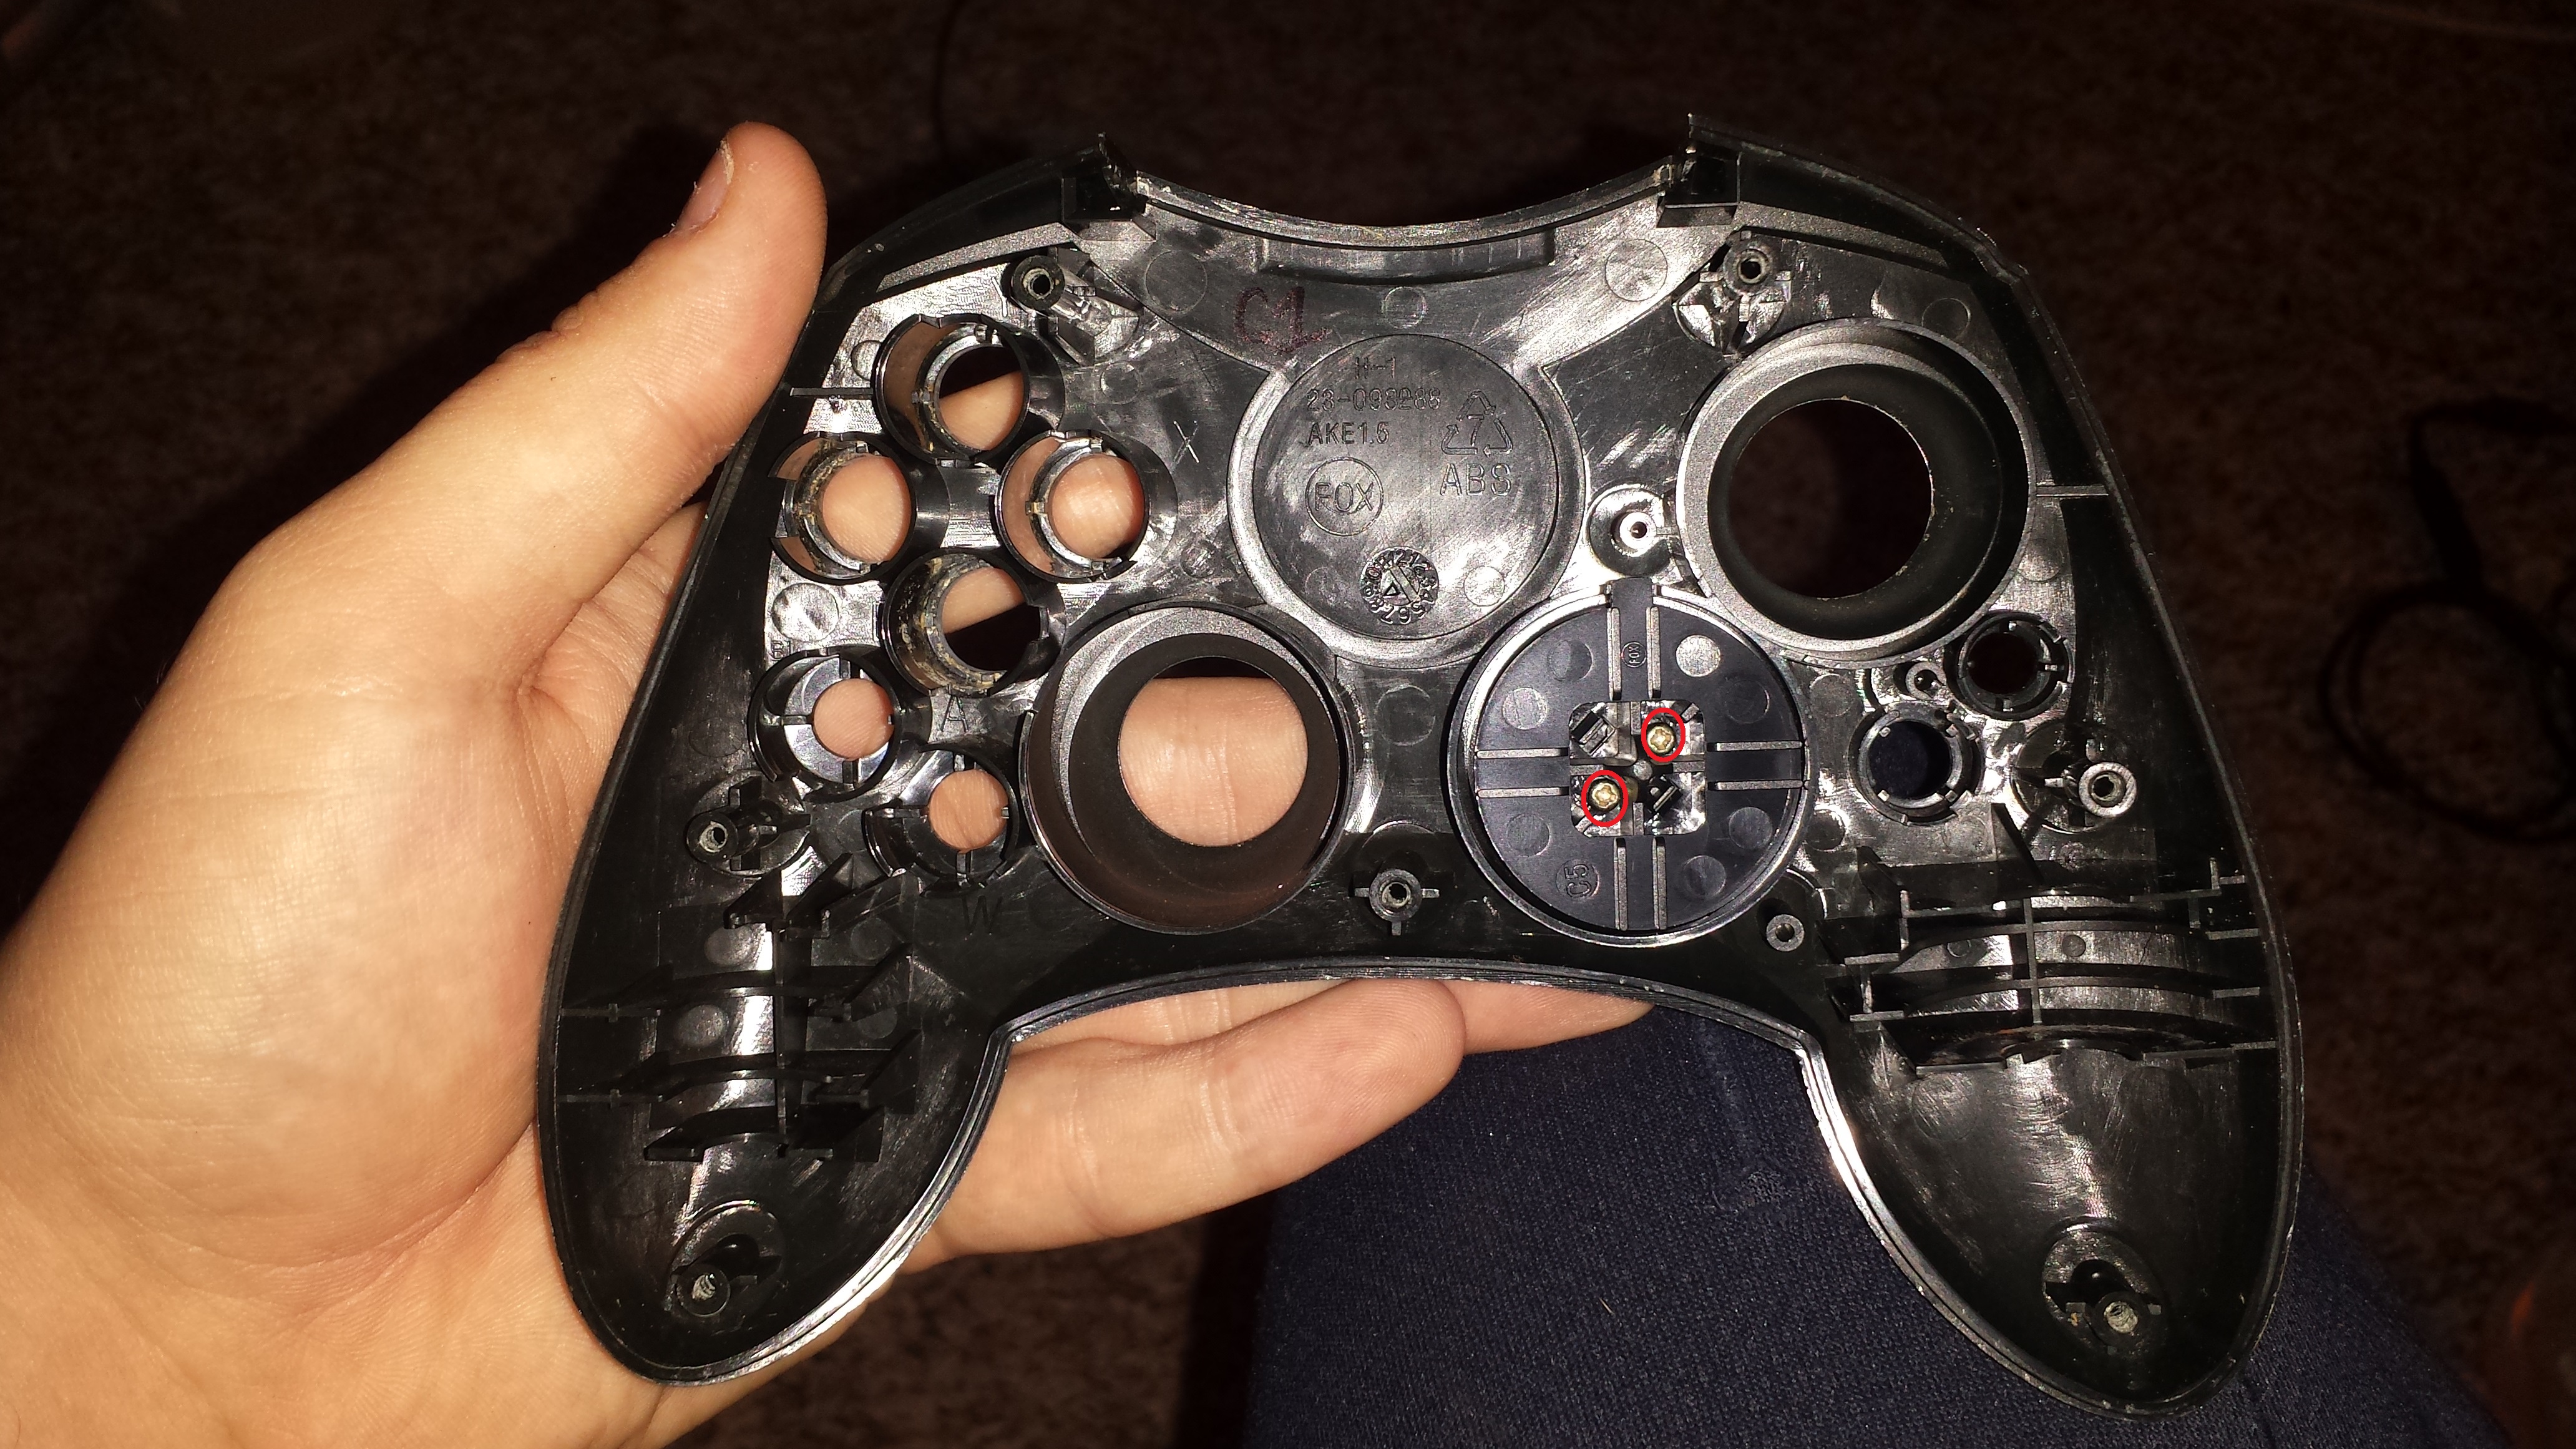
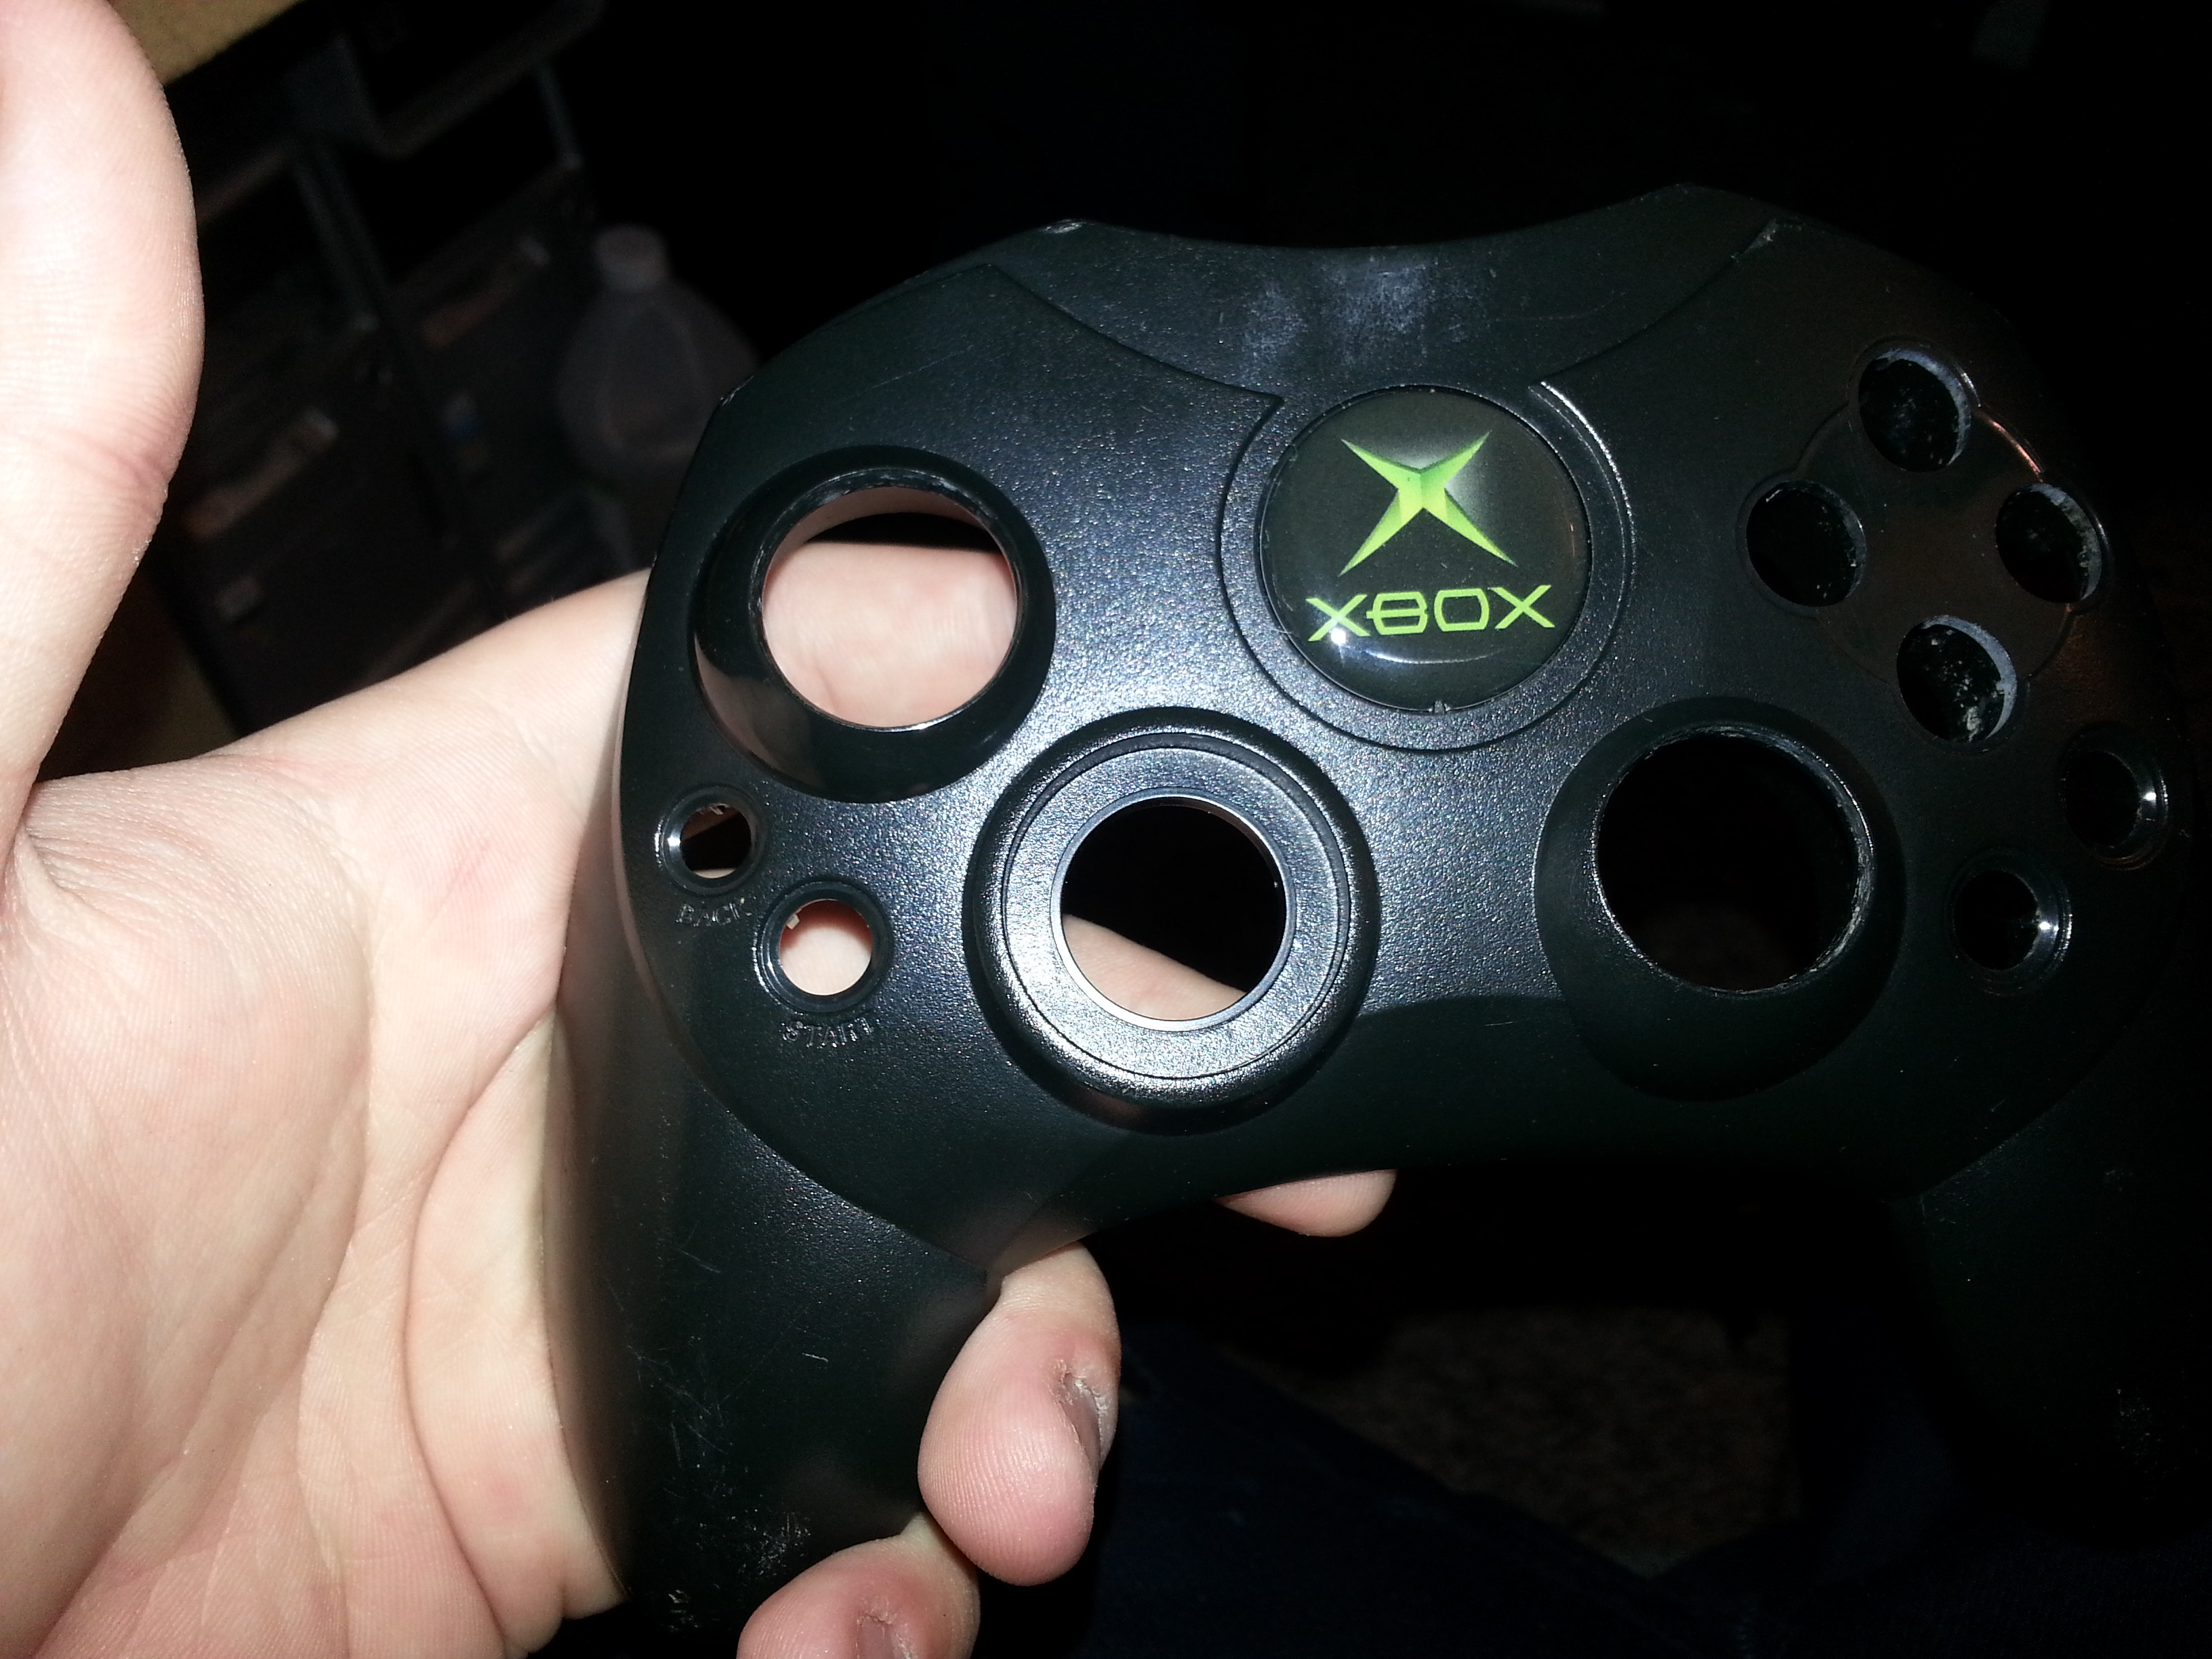
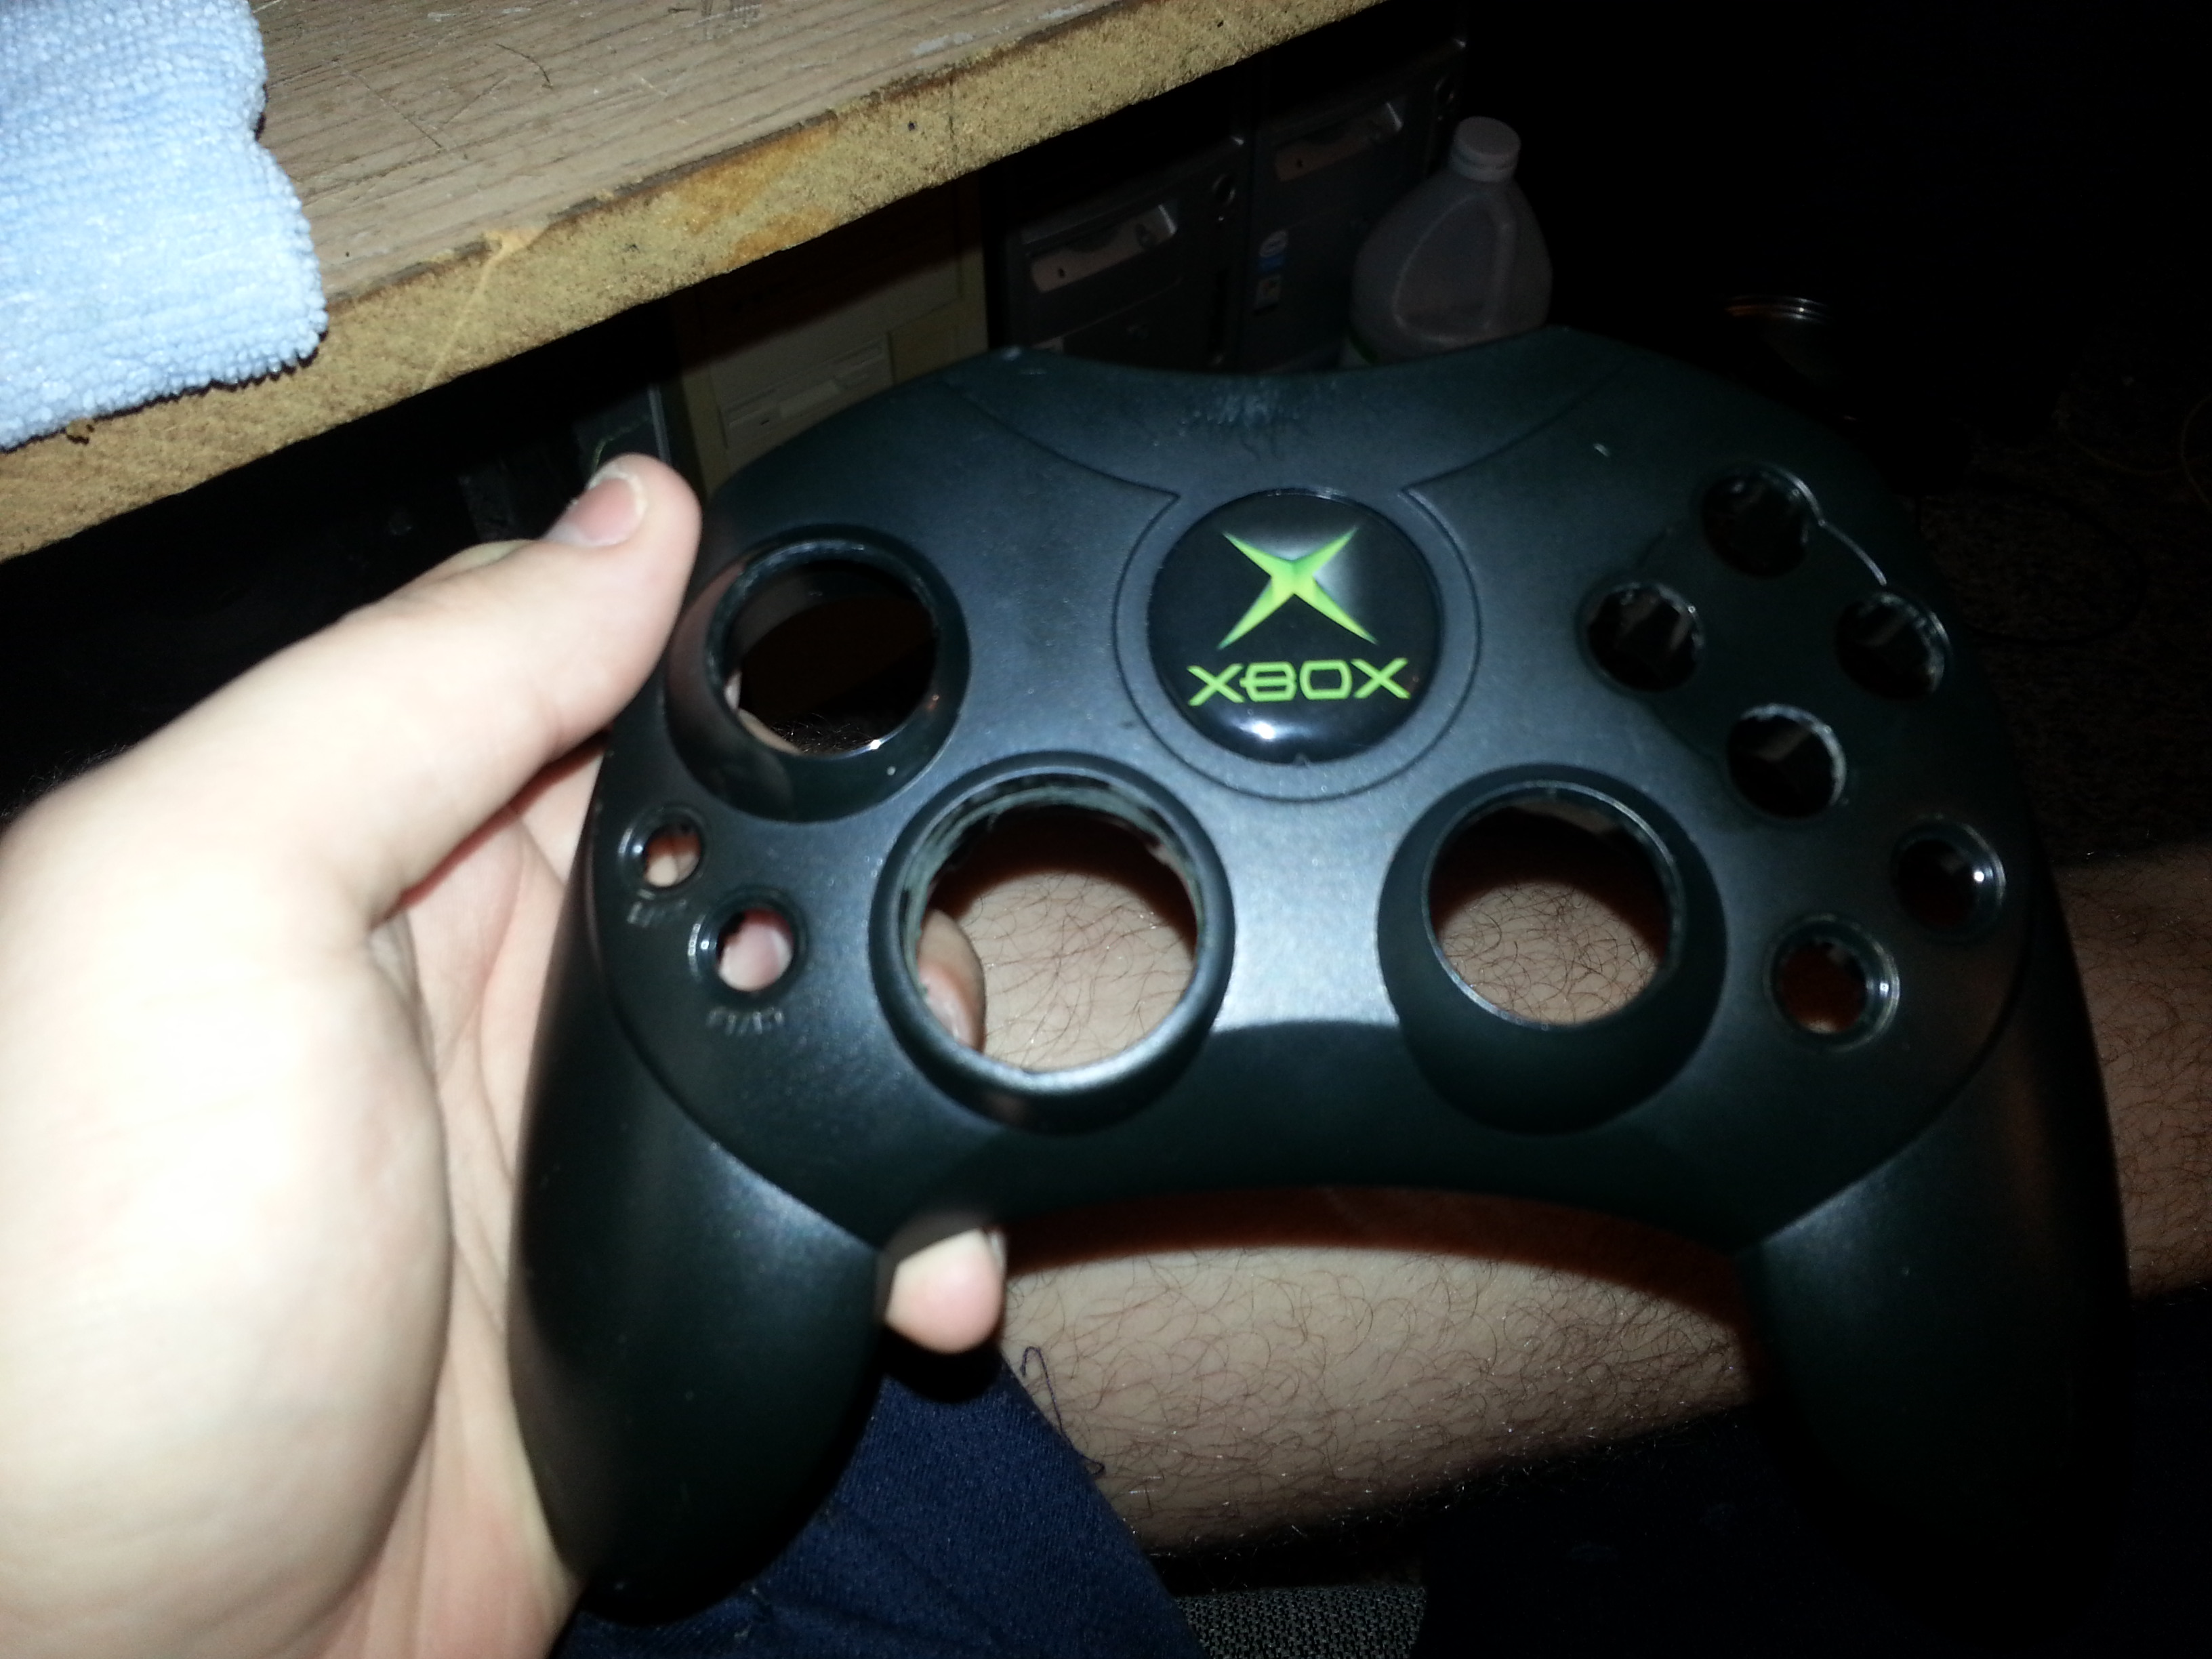
Once you have everything stripped from the top half of your shell you'll need your Mini Phillips head screw driver.
remove the 2 screws holding your original d-pad in place and pop it out.
Part B: Mod Method 1
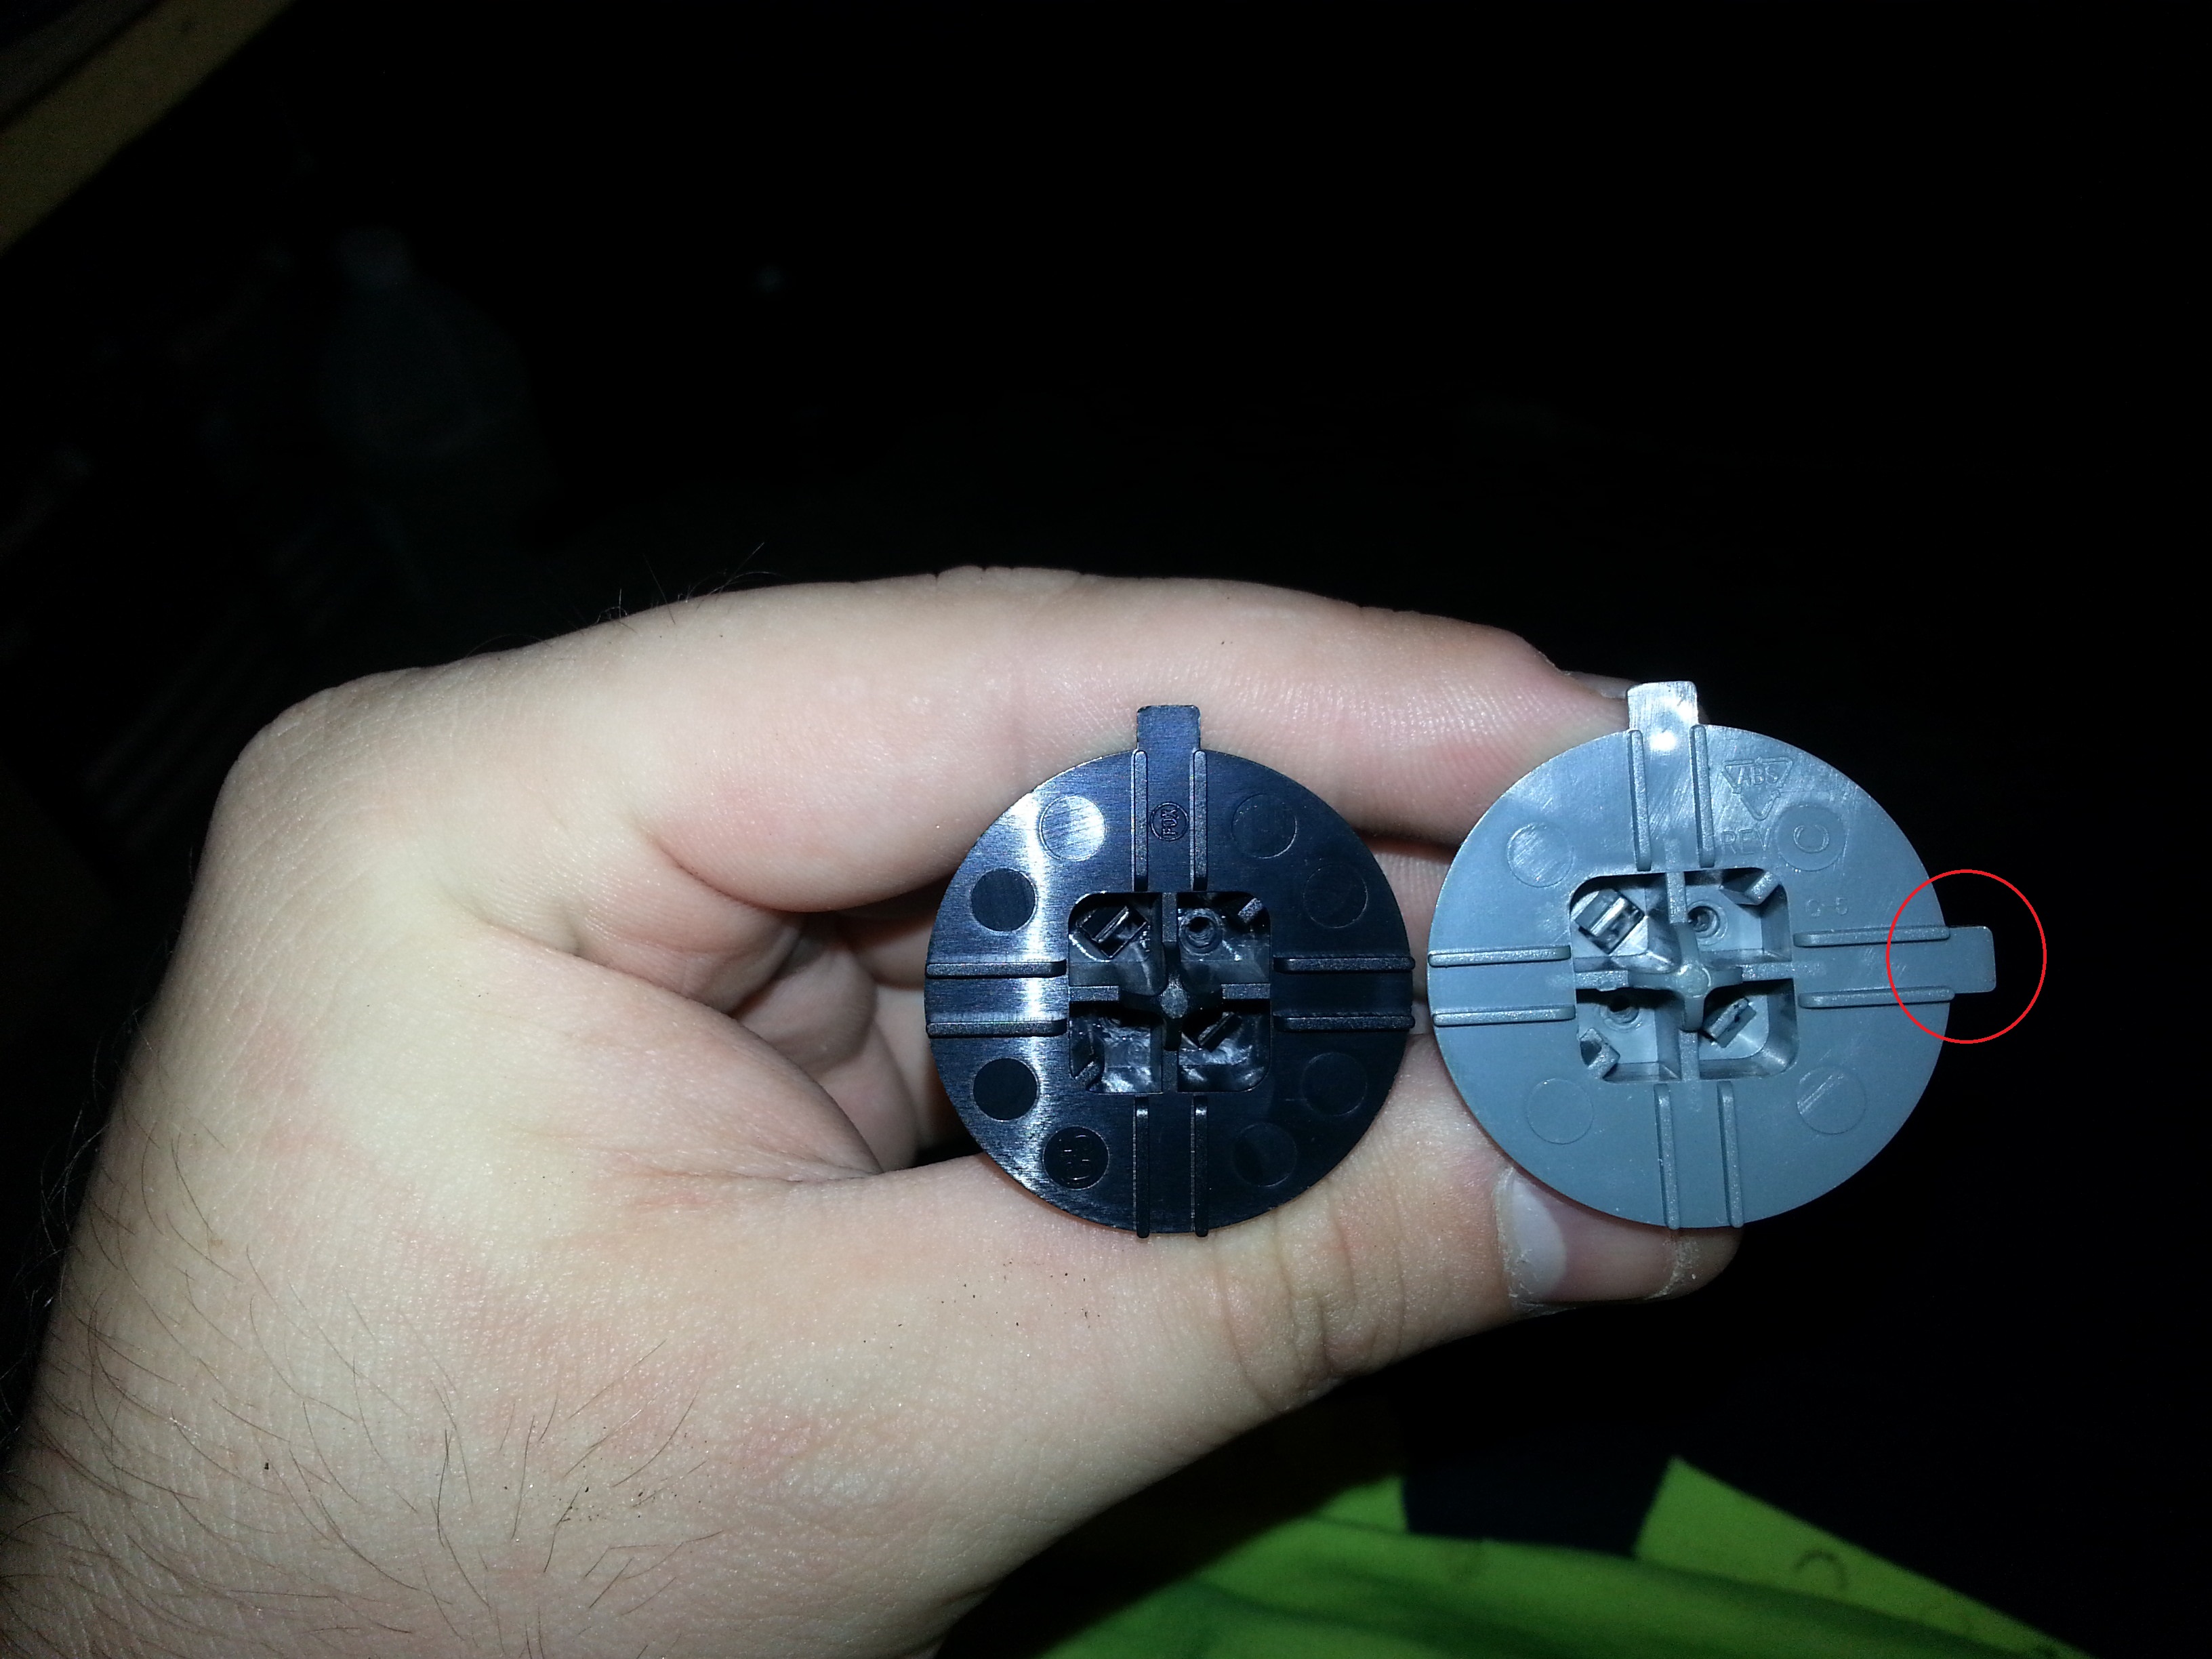
Now take your new 360 d-pad and look at it .
the one on the left is the original S D-pad. right is from the 360.
You'll want to remove the locating tab on the right side using your cutting disc. Alternatively you can snap it off with a pair of needle nose pliers or even some wire cutters.
Now pop it in and reassemble everything. Your done!!
This mod isnt really for the Original colored D-pads (Grey or Black)
But once done you can buy many different colored ones for the 360 controller.
Great if you plan on painting your controller.
Part C: Mod Method 2
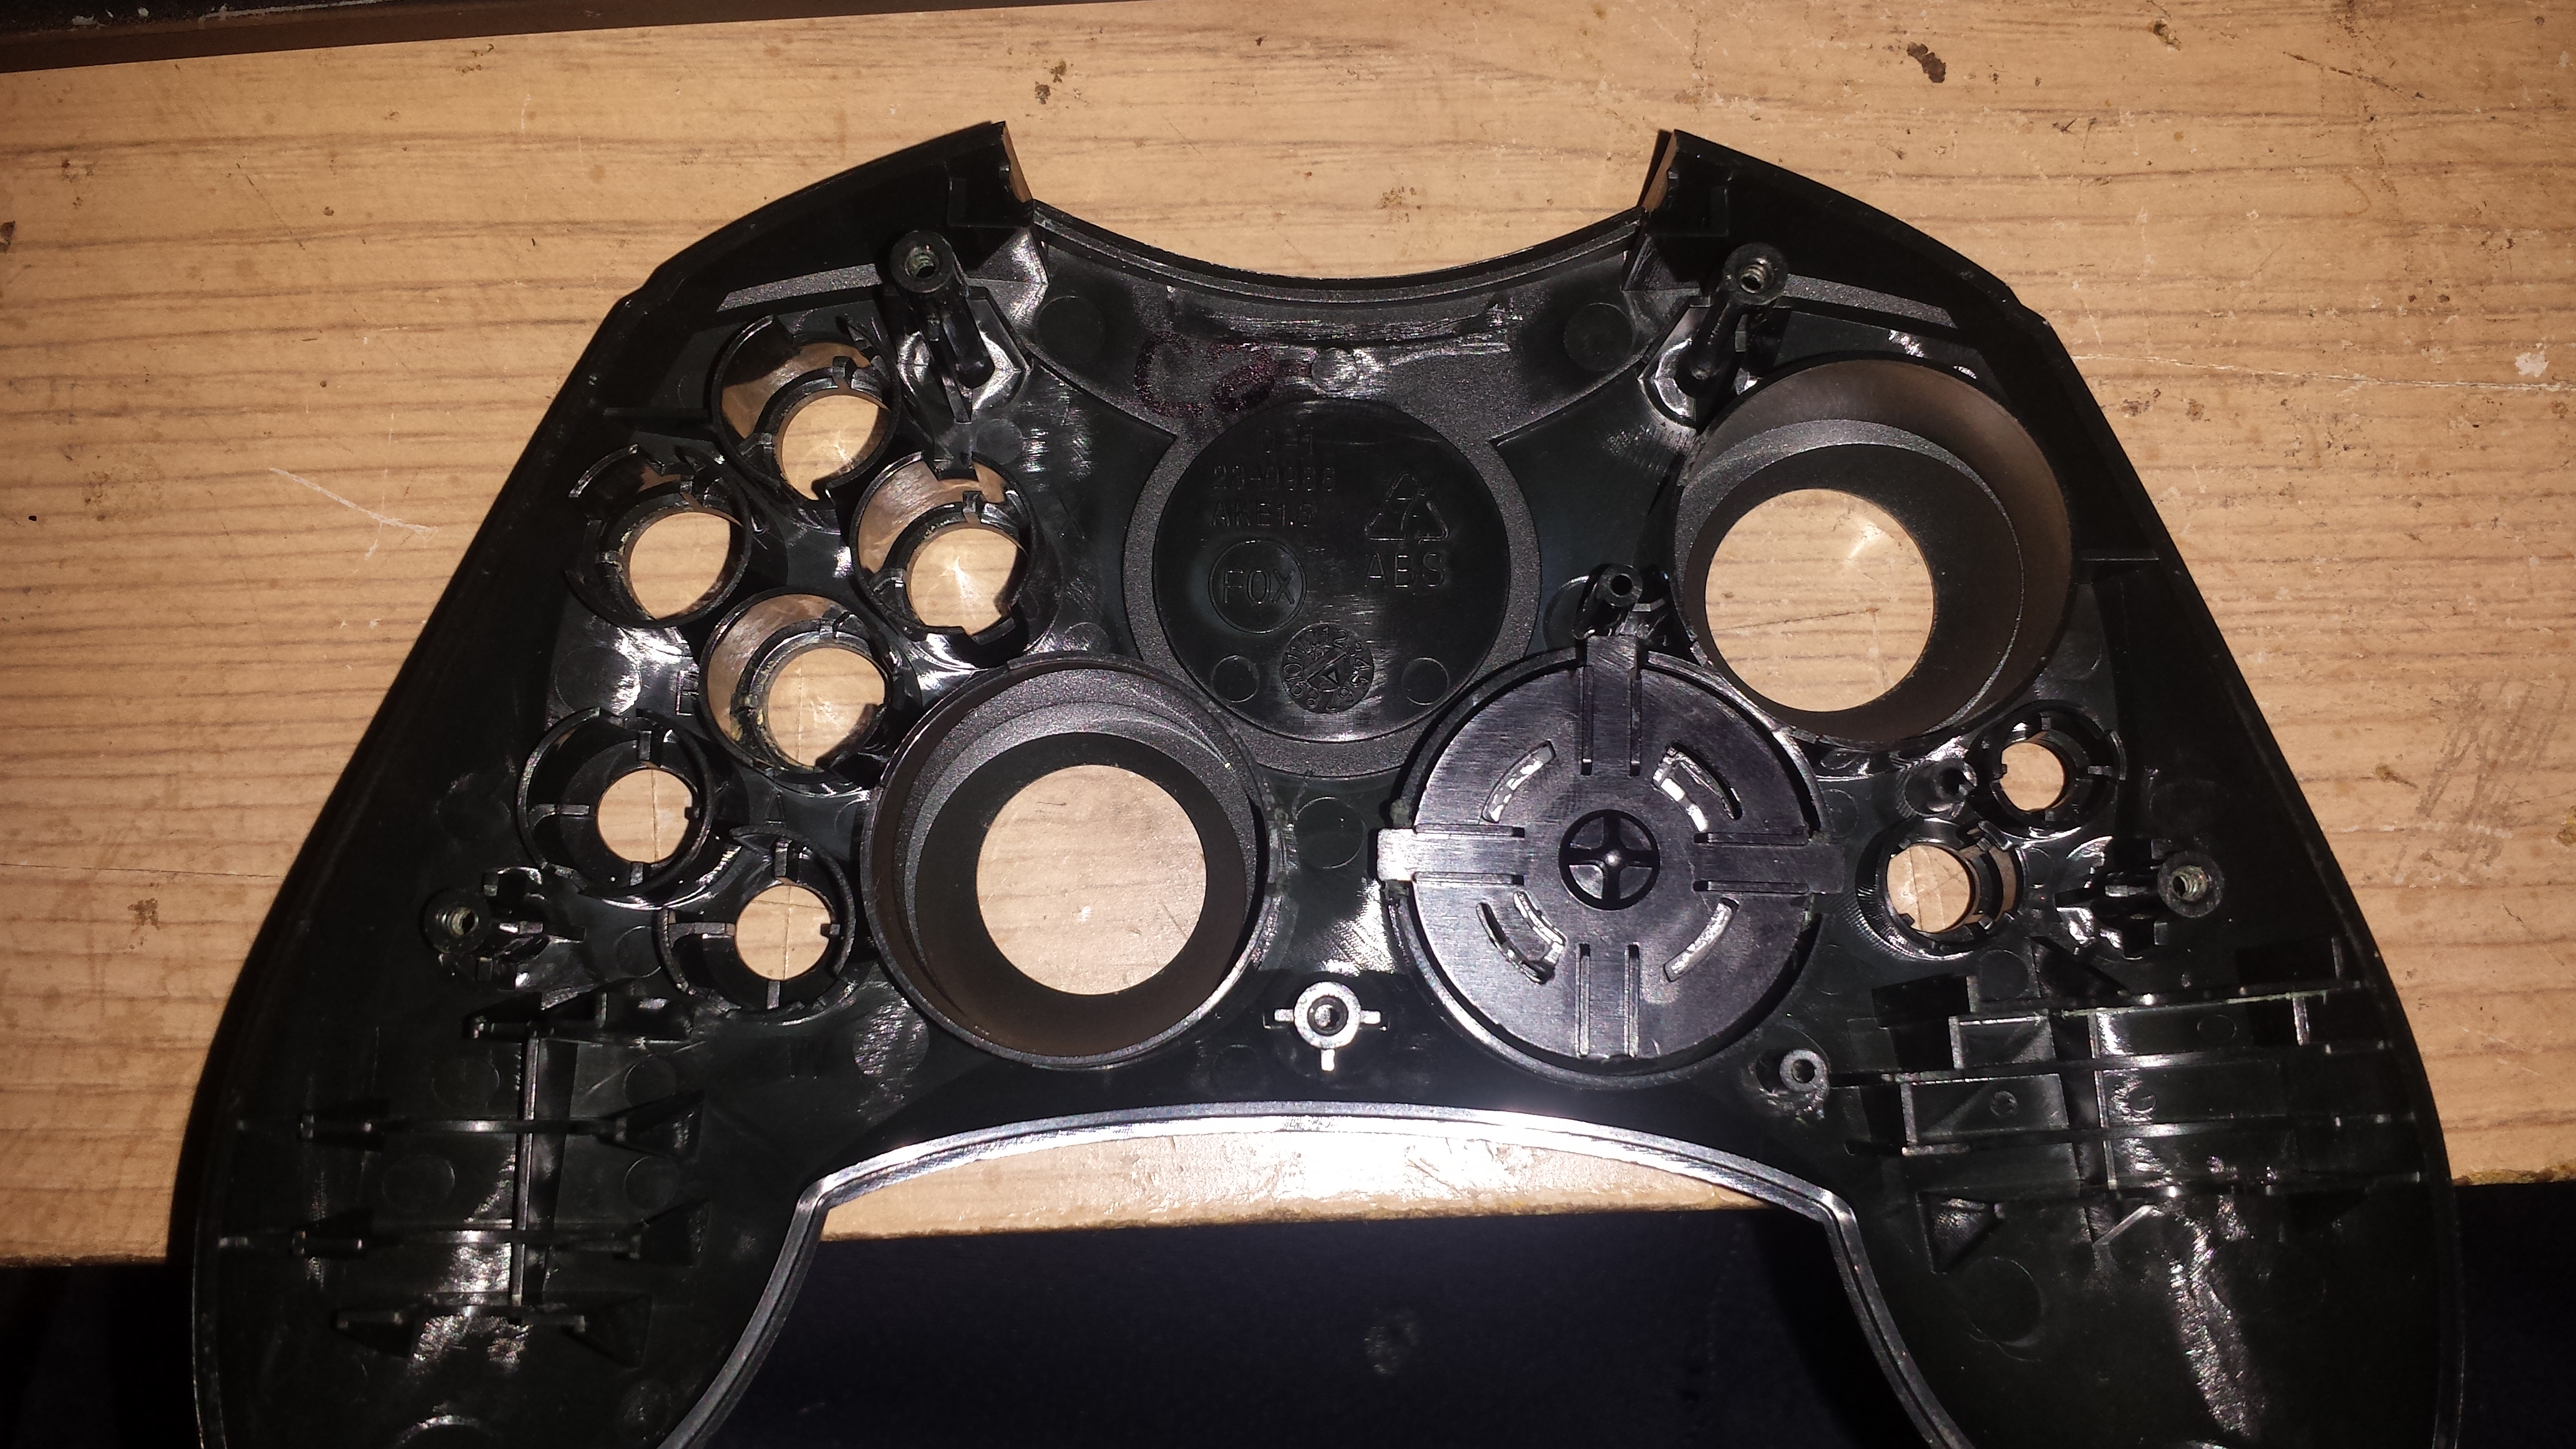
First you'll need to pull apart your controller (Refer to Part A)
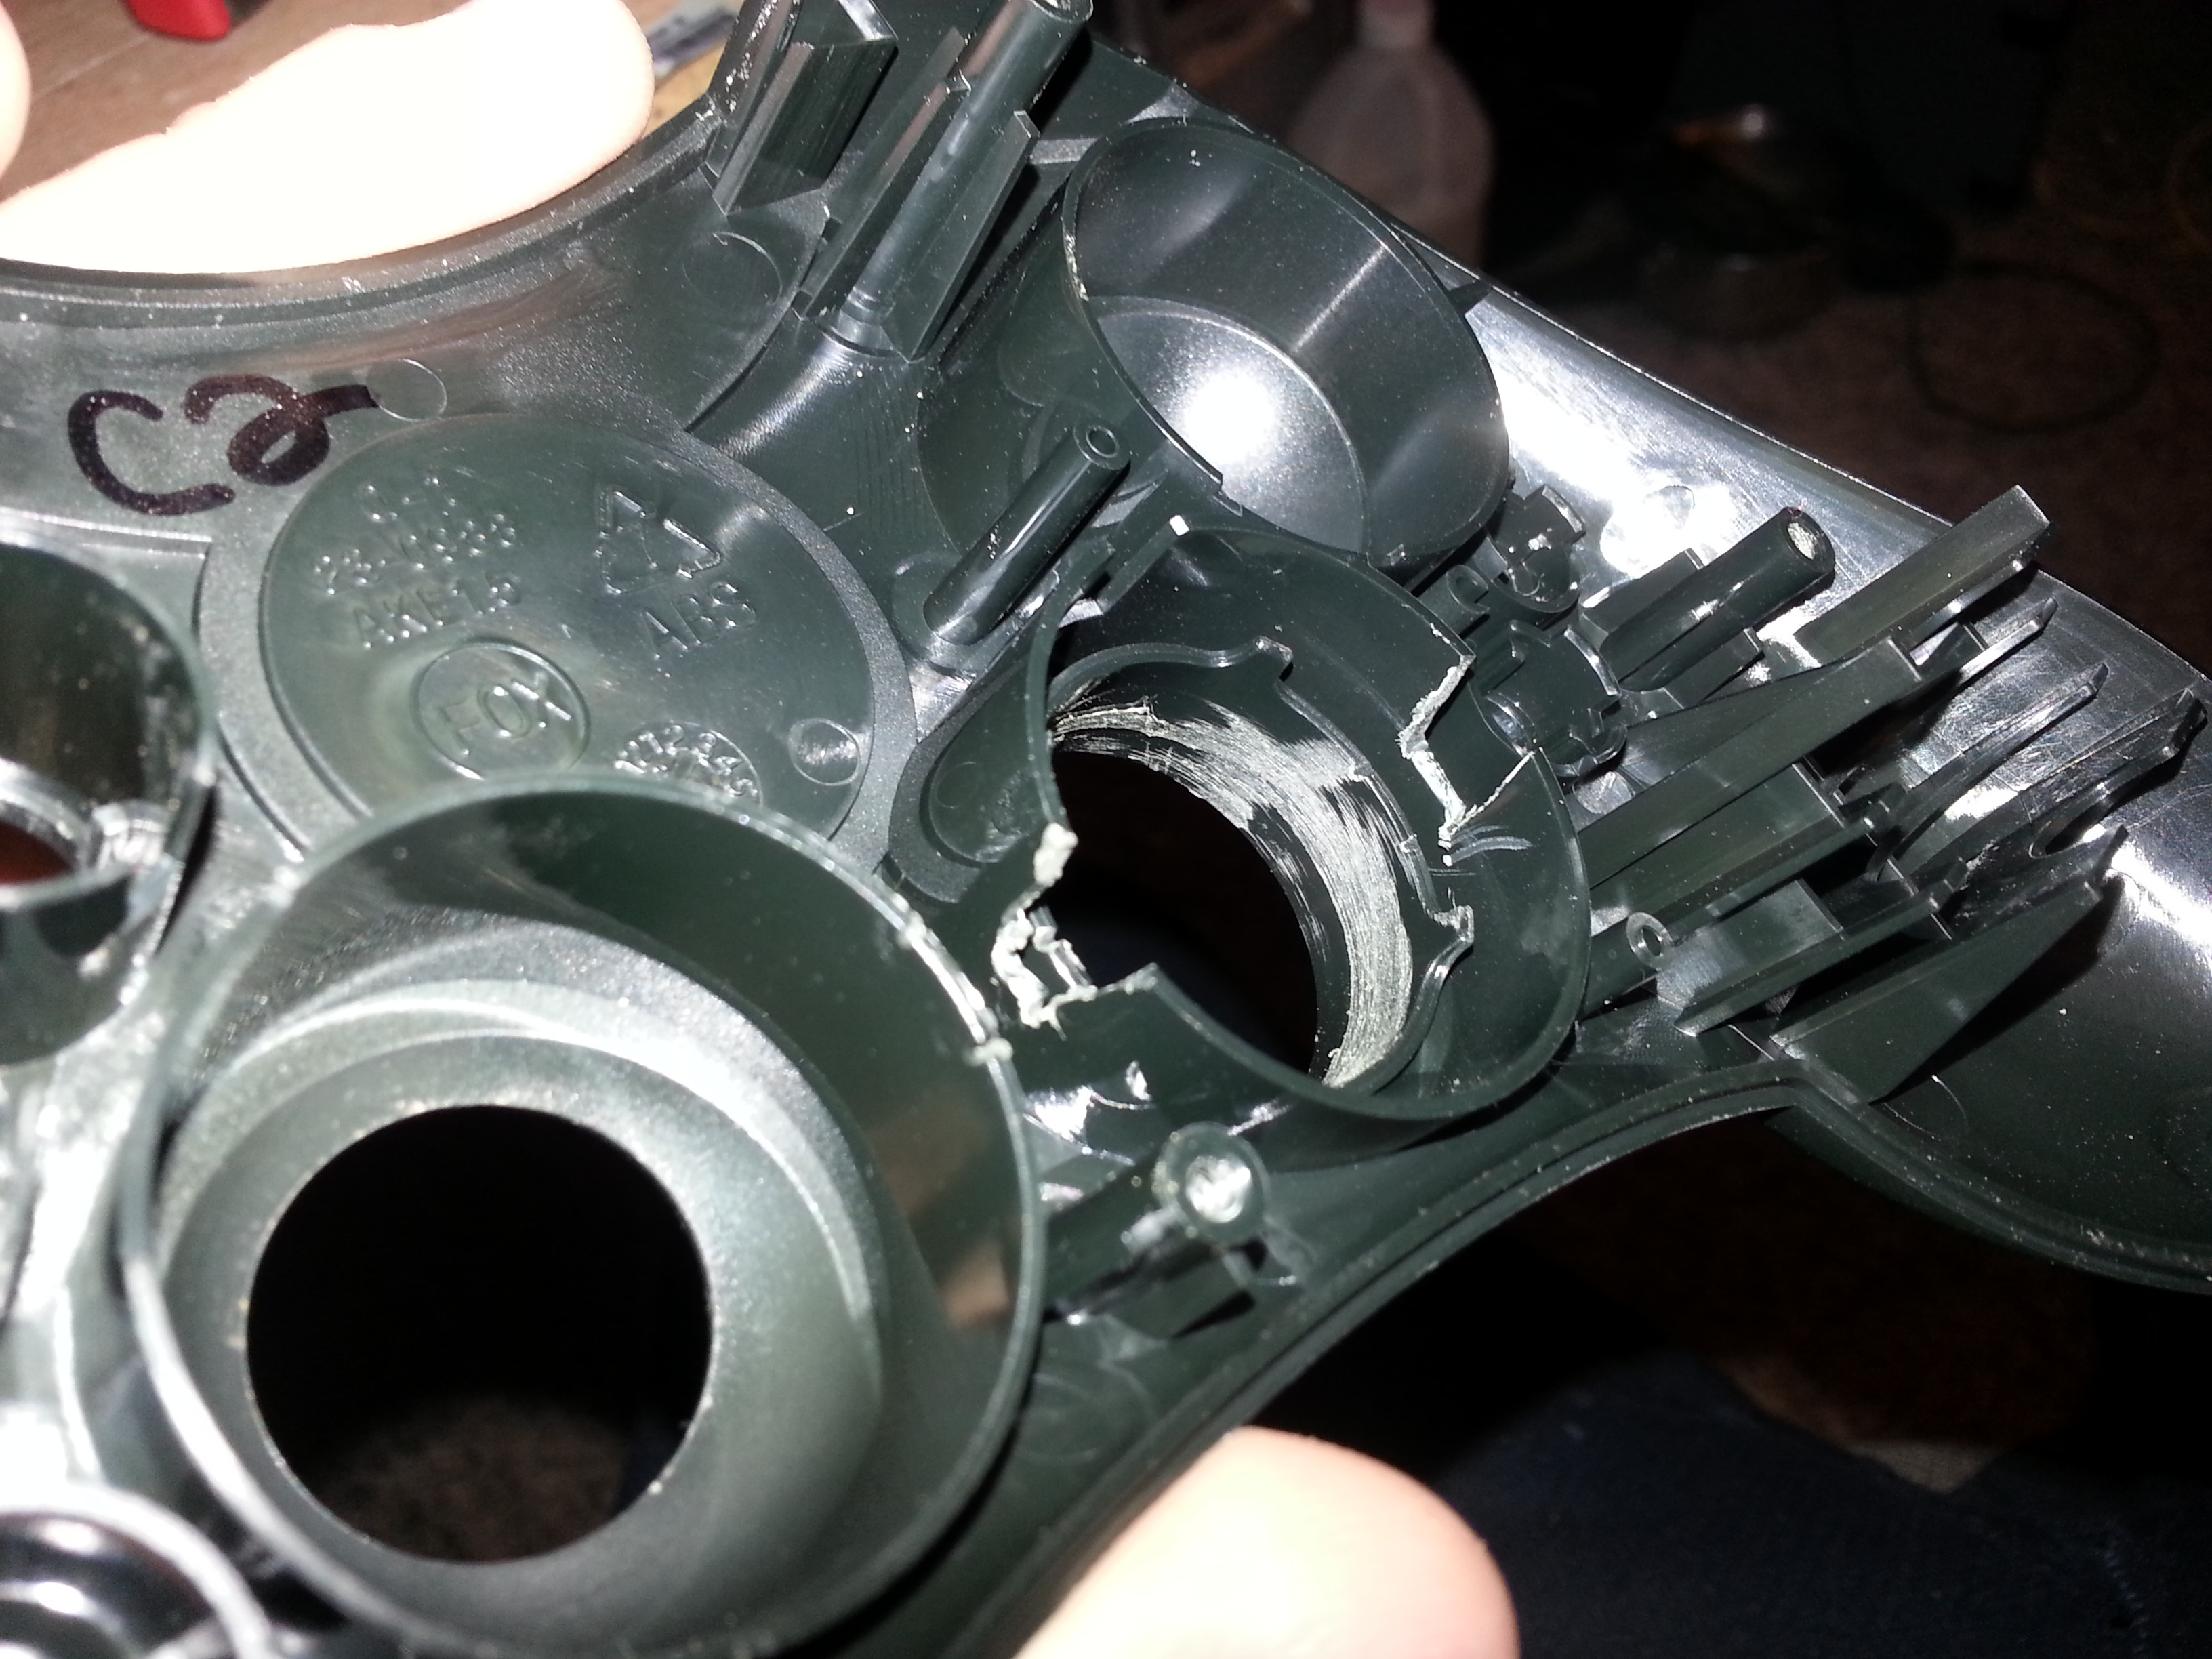
Once taken apart you'll need to take your Dremel with the sanding barrel and remove the internal part of the d-pad mounting location.
Go slow and take your time. Don't cut any deeper than whats in the picture. If you cut too deep you will ruin the controller.
all you wanna do is cut/sand it down smooth to the cylinder wall.(If that makes sense)
Now you'll need to flip your controller over, and put the new D-pad into place. You'll notice the locating pins are preventing it from going in.
You'll want to take your cutting disc and cut notches in the Controller so the D-pad can go in.
(I cut to vertical slices and then used my screw driver to snap the piece off) Not the cleanest way to do it, but it works.
Once the notches are cut you should be able to put everything back together (Using the original Rubber insert for the d-pad) and you are done!!
Enjoy your new Transforming D-Pad!
-
1
-
 1
1
-
-
2 hours ago, OGXbox Admin said:
Yeah it can if done right. Just remember, VERY slight touches of the potentiometer make HUGE adjustments. You don't need to reduce the resistance all that much to make a difference. It's harder than it seems.
Thanks man, Will give it a look and do a little research before i try it myself. i have like 3 or 4 dead Thompson drives laying around. Maybe i can bring some life back to one of them for a little while.
-
Ah. I wonder if it would help the Philips drive I have?
Sent from my SAMSUNG-SGH-I747 using Tapatalk -
Looks awesome man!! i love the look of the black jewels on the black consoles.
What grit sandpaper did you use? -
They are marked Y and B for the colors. and thats how they are plugged in. i checked and rechecked them..
And the error/s im getting are.
i have to click it 3 times. but it then says Connected.
if i click on format. then click on which format i want, This will pop up and i have to click it 31 times
(once for each block being erased)
-
They are the exact same sockets. but they are marked on each chip. and are in the right place. Thanks for the help tho! it is appreciated!
-
2 hours ago, KaosEngineer said:
As the software was designed for older versions of Windows, you might need to enable compatibility mode for an older version of the OS to run the app.
That was the first thing I did. Tried everything XP and older, Still nothing. Ill do some more research. Its possible the chip is just bad but its too soon to tell.
-
what is the use in Tweaking the pots in the drives? Does it help the laser read the disc better or something?
-
yes it does! Found most of the info i need. But now ive run into a new problem...
The X-Bit flashing software wont connect to the chip. If i run V1.0 it will connect but give errors.if I Run the V1.5 Software it will open but nothing happens when i click "Connect"
-
Thank you!!! I completely forgot about waybackmachine.
-
Just picked up a few xboxes and some extras.
Among the extras was an Xbit 1..5 chip.
Id like to test it and find out if it works. But im not finding any info on how to install it anywhere.
Does anyone have any info on the chip and maybe an install/Flashing guide? would be much appreciated, as this will be my First chip install!!
-
you should be able to boot HeXen and click on "Dashboard tools" then go to "dashboard repair tools" then click "Install Dashboards" and follow the on screen instructions.
-
When this happens to one of mine or one that I'm working on, I'll pull everything out. Then fill the hole half way with super glue or epoxy and then put the screw back in and let it dry. Once dry It should unscrew like normal. Just don't try and torque it down and it should be fine.
Sent from my SAMSUNG-SGH-I747 using Tapatalk
-
Plus what i have sittin in my closet
-
2
-
-
Hey guys, id like to see your collections! What you have or what you plan on getting. think itd be nice to see what you guys have laying around. Whats the story on it? Where you got it etc...
(Game consoles, Games, or hardware from any manufacturer, Genre or era) no PC stuff please unless it is a dev kit of some kind. Post away!!Anyone have a "Panasonic Q" or "Game Q" I think that may be the first console i buy to start my real collection.
And heres what i currently have laying around. with more coming in the future.
-
1
-
-
Could be trace rot. Have you taken it apart and removed the clock cap and inspected for corrosion?
-
11 hours ago, Self said:
Went camping out of town so haven't been active for a bit.
Anyway. I bought an assortment of small brushes from Hobby Lobby and used the smallest available. One coat of white and then I just paint over it with whatever color. Used Testor model paint. Takes a bit of practice as you have to be very gentle so the bristles don't separate, overlap the lettering, and touch the face plate. If you want something similar in size and raised to practice on, go into McDonald's and get a drink. On your way out snag a handful of small lids. The McDonald's "arches" are perfect to practice on and are free. Lolol.awesome! thanks man. will have to practice for sure. Great video BTW!
 the one on the left is the original S D-pad. right is from the 360.
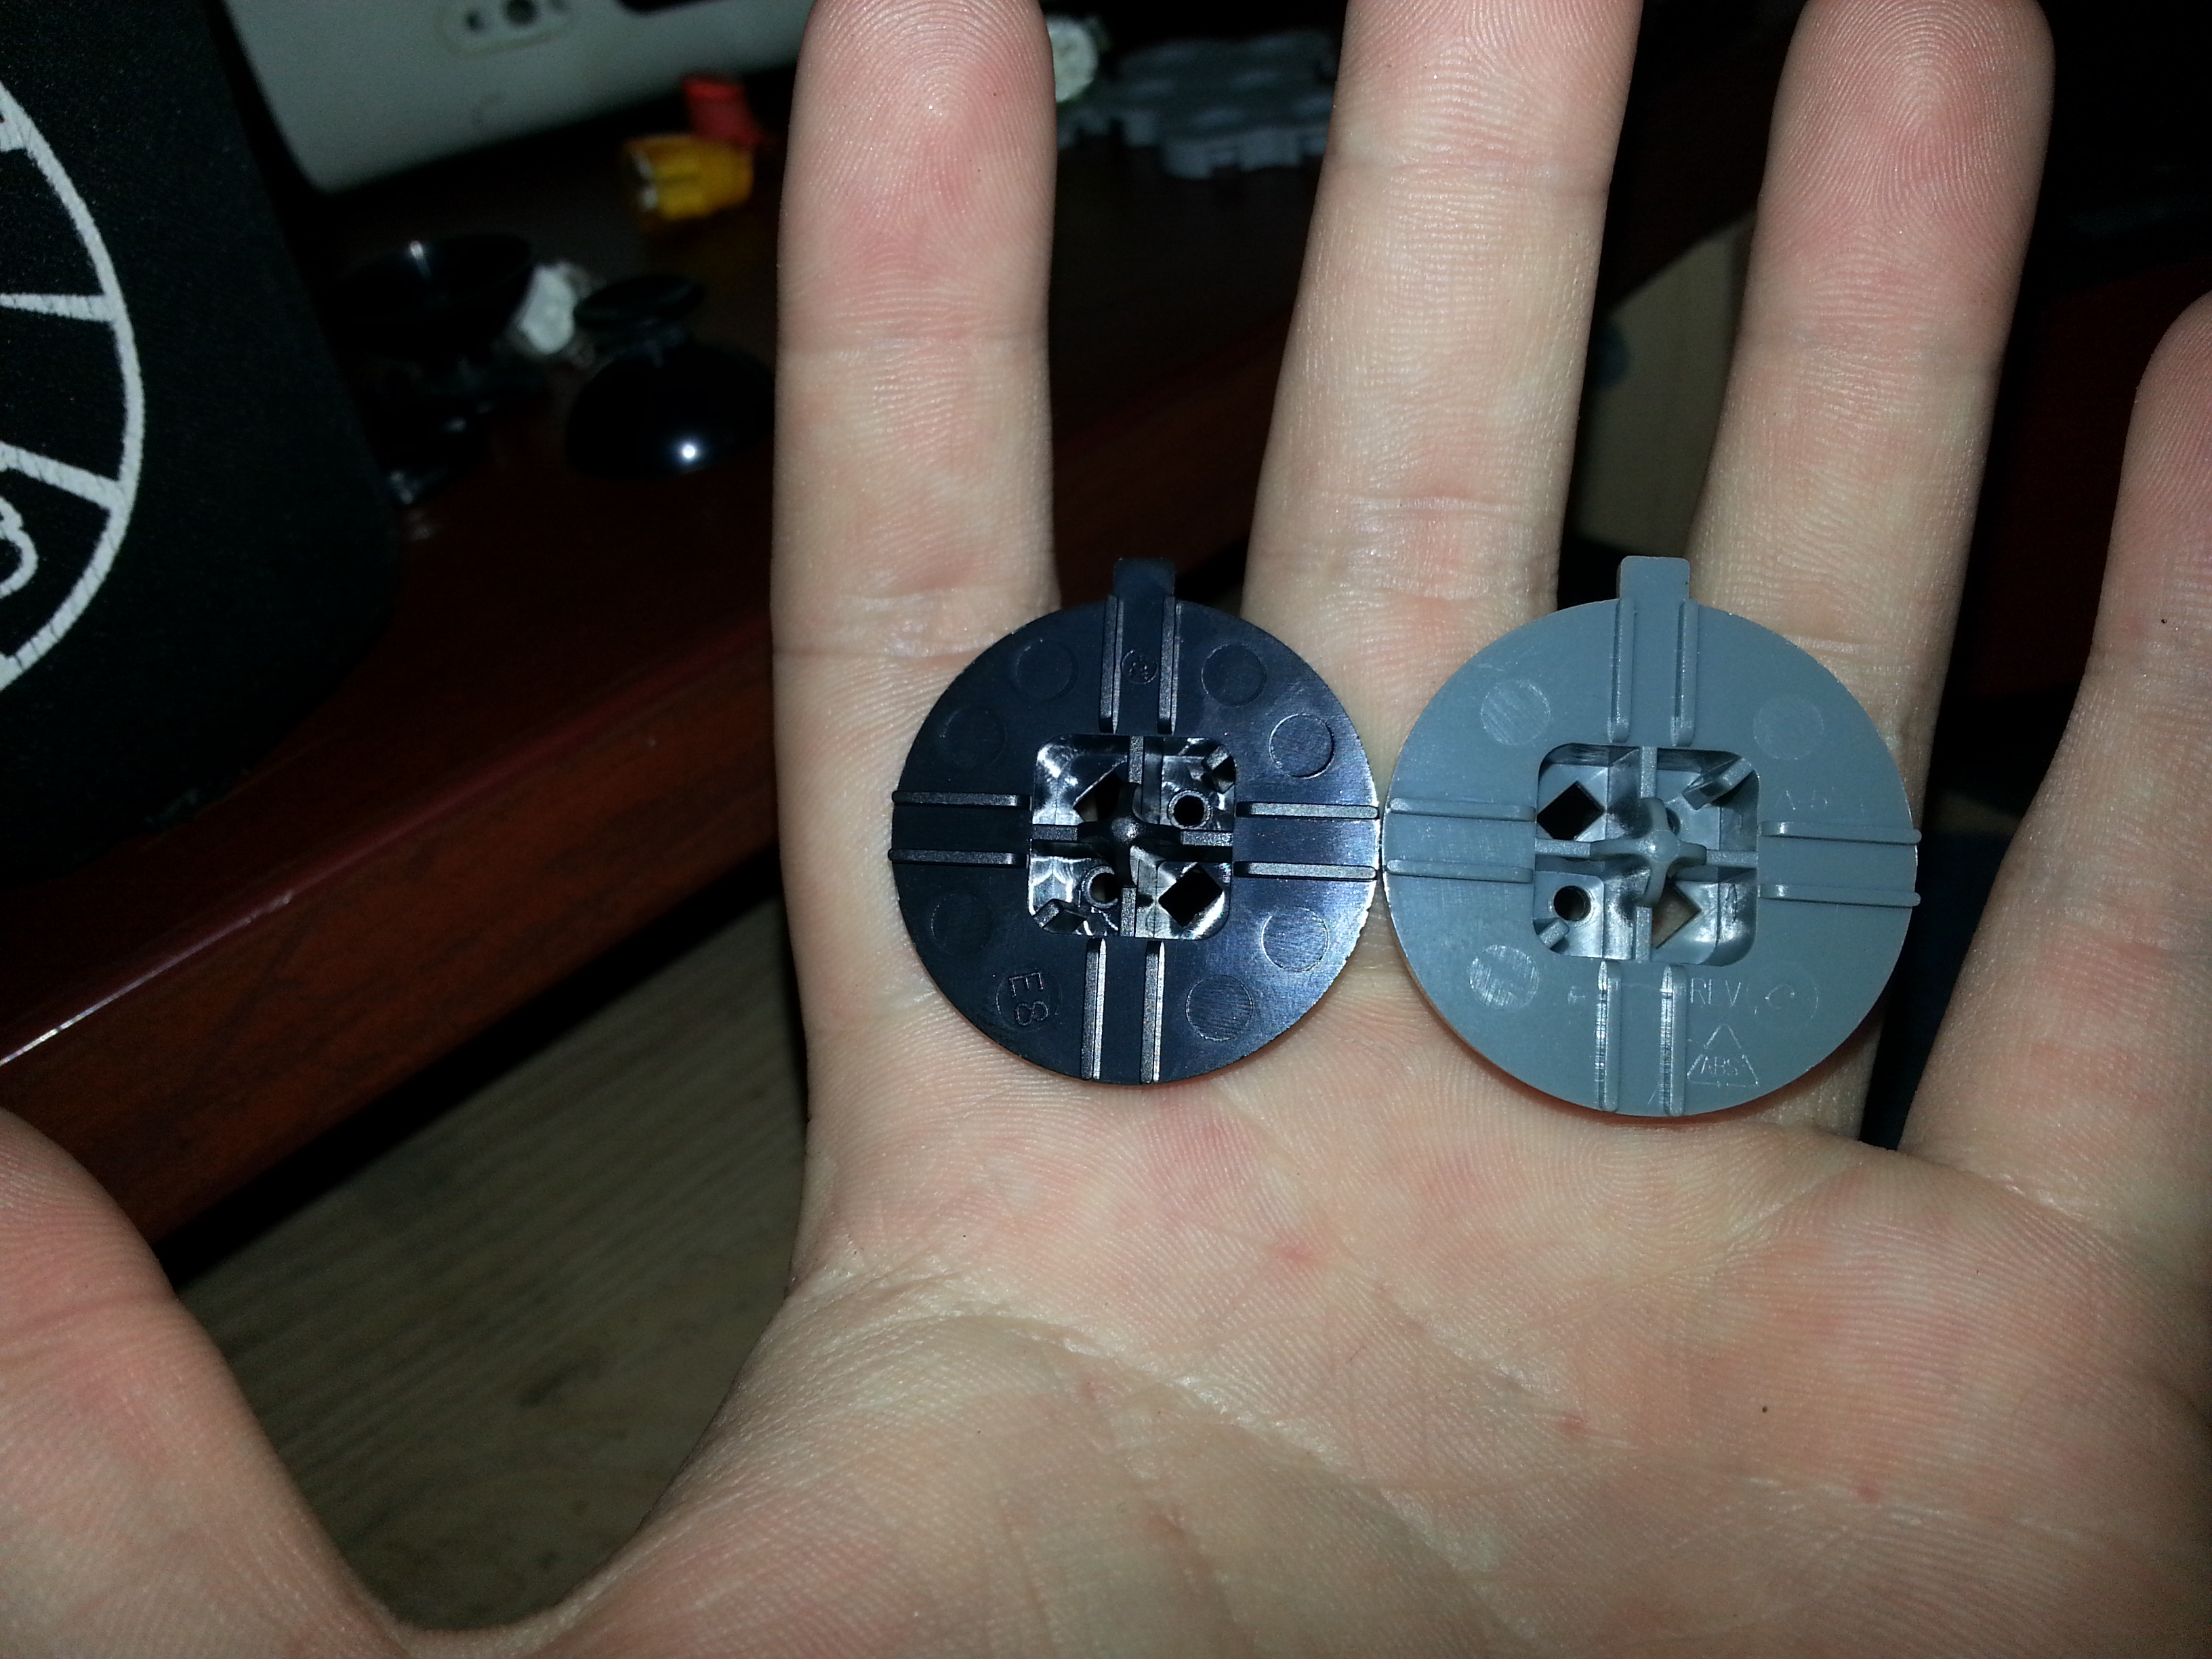


Board Life Status
Board startup date: April 23, 2017 12:45:48
Internal Wireless (Wifi) Adapter
in Hardware Mods
Posted
Sent from my SAMSUNG-SM-J327A using Tapatalk