Search the Community
Showing results for tags '128mb'.
-
Here you get a shit load of pre patched EvoX files. 144 EvoX bios'es in total. These files are for 128MB XBox'es version 1.0-1.4 and 1.6/1.6b. You get these in many different versions in many flavors like: EvoX 128MB (256kb/512kb/1024kb) (noDVD/yesDVD) EvoX 128MB 1.6 (256kb/512kb/1024kb) (noDVD/yesDVD) EvoX 128MB HDplus (256kb/512kb/1024kb) (noDVD/yesDVD) EvoX 128MB HDplus 1.6 (256kb/512kb/1024kb) (noDVD/yesDVD) EvoX 128MB XBoxHDMI (256kb/512kb/1024kb) (noDVD/yesDVD) EvoX 128MB XBoxHDMI 1.6 (256kb/512kb/1024kb) (noDVD/yesDVD) EvoX Titan 128MB UDMA2 (256kb/512kb/1024kb) (noDVD/yesDVD) EvoX Titan 128MB UDMA2 1.6 (256kb/512kb/1024kb) (noDVD/yesDVD) EvoX Titan 128MB UDMA4 (256kb/512kb/1024kb) (noDVD/yesDVD) EvoX Titan 128MB UDMA4 1.6 (256kb/512kb/1024kb) (noDVD/yesDVD) EvoX Titan 128MB UDMA5 (256kb/512kb/1024kb) (noDVD/yesDVD) EvoX Titan 128MB UDMA5 1.6 (256kb/512kb/1024kb) (noDVD/yesDVD) EvoX Titan 128MB HDPlus UDMA2 (256kb/512kb/1024kb) (noDVD/yesDVD) EvoX Titan 128MB HDPlus UDMA2 1.6 (256kb/512kb/1024kb) (noDVD/yesDVD) EvoX Titan 128MB HDPlus UDMA4 (256kb/512kb/1024kb) (noDVD/yesDVD) EvoX Titan 128MB HDPlus UDMA4 1.6 (256kb/512kb/1024kb) (noDVD/yesDVD) EvoX Titan 128MB HDPlus UDMA5 (256kb/512kb/1024kb) (noDVD/yesDVD) EvoX Titan 128MB HDPlus UDMA5 1.6 (256kb/512kb/1024kb) (noDVD/yesDVD) EvoX Titan 128MB XBoxHDMI UDMA2 (256kb/512kb/1024kb) (noDVD/yesDVD) EvoX Titan 128MB XBoxHDMI UDMA2 1.6 (256kb/512kb/1024kb) (noDVD/yesDVD) EvoX Titan 128MB XBoxHDMI UDMA4 (256kb/512kb/1024kb) (noDVD/yesDVD) EvoX Titan 128MB XBoxHDMI UDMA4 1.6 (256kb/512kb/1024kb) (noDVD/yesDVD) EvoX Titan 128MB XBoxHDMI UDMA5 (256kb/512kb/1024kb) (noDVD/yesDVD) EvoX Titan 128MB XBoxHDMI UDMA5 1.6 (256kb/512kb/1024kb) (noDVD/yesDVD) ******************************************************************************* Some infos about the patches I used: Titan Patch Version: 1.1.0 MakeMHz XBoxHDMI Patch Version: 1.4.3 MakeMHz HDplus Patch Version: 1.0.2 MakeMHz EvoX 128MB Ram Patch Version: 1.0.0* *Could also be v1.0.1 how ever, it's the latest m8plus_true_128MB_fixed.ips. ******************************************************************************* All these bios'es are sorted* and ready to use with XBlastOS or any other flasher which requires that the bios is named bios.bin which has to be in C:\bios (C:\bios\bios.bin). Note: YD = yesDVD and ND = noDVD*. (*Yes you can still boot/cold boot any DVD you like with it!) All these files are also packed as bios.rar files using winrar 3.0. So you could unpack these with UnleashX etc.. (Only of interest if you go to use these of an installer). That lead me to one thing. If you are one of the last ones who creates installer, feel free to use these files on your disc. ******************************************************************************* Credits and a HUGE thanks for the patches fly out to: MakeMHz and Gaasedelen. And also a HUGE thanks to Donnie-Burger for testing. ******************************************************************************* And don't forget to suppport the Devs! Buy'em some coffee because nothing works without coffee! Visit : https://github.com/gaasedelen/titan https://github.com/MakeMHz ******************************************************************************* Download Folders: Mega : https://mega.nz/folder/JFlR2Q5C#lxK9TfF_sgGxl2gPI4uqIw 1fichier : https://1fichier.com/dir/cdrhapgD ******************************************************************************* PEACE! EDIT: How to update your ram on a XBox 1.6/1.6b :
-
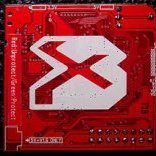
Intro Since the beginning of time (2004) it was known that the 1.6 was missing the unpopulated footprints for the extra 4 RAM chips and this made the upgrade impossible. I was thinking recently that if all the signals for the extra RAM chips are still available on the board, we can add RAM to the 1.6 by just connecting all the necessary signals. After the tutorial segment I'll go into why this mod works. I'll also post a video on YouTube at some point. Be warned: this is more difficult that a 1.0 - 1.5 RAM upgrade Tutorial Required items Everything mentioned in the 1.0 - 1.5 RAM upgrade tutorial: https://consolemods.org/wiki/Xbox:RAM_Upgrade 4x 90mm long mod-wire. I used enamelled wire from a transformer. ~8 hours spare time Step 1: flash the modified XBlast OS BIOS XBlast OS (as a BIOS) is super helpful in doing this install correctly. It will boot with any number of extra RAM chips and includes a test for the additional RAM. XBlast OS will not show the 128MB test option on a v1.6 Xbox, so I've gone ahead and rebuilt it from source with that check removed. xblast_os_v0.60.bin Alternative Download Link: https://mega.nz/file/eeAwTZKQ#aaFcbACj3htA6cEtKwoiy1L7uK93o4YwUSqkGBEsUz8 If you don't trust my build, this is the line of code that needs removing: At this point, I suggest booting it up and running the test. The test is under Settings > Tools > 128MB RAM test Step 2: Remove the motherboard from the Xbox Step 3: Place the new RAM chip on top of an existing chip You'll want to solder down the corner pins first to get a good mechanical bond and so that you can adjust the alignment. I do this by pushing down pins 30 and 31 and soldering them down to the chip below. Then I check the alignment of the rest of the pins. If it's bad, then the chip can be nudged into position while reflowing the two pins. Then solder the two pins opposite. Step 4: Push down the rest of the pins Except pin 28! That is the chip select pin and it is unique for each RAM chip. Leave this pin floating in the air and don't solder it yet. Pin 30 is marked on the PCB. The pins come in a kind of ‾‾\__ shape. When you push them down, the whole pin will rotate around this end -> ‾‾\__ . I like to also push down the tail ‾‾\__ <- of the pin to get more contact with the chip below. Step 5: Start soldering all the pins Very little extra solder is required. Use lots of flux. I like the tacky flux that usually comes in syringes. I also like the drag-soldering method. If there's any excess solder, you will get shorts between pins and this extra solder can be wicked away. The new pins won't naturally touch the pins below even after pushing them down. Step 6: Check for shorts and missing connections For the first pass, I like to go in with a microscope and nudge each pin (of the new chip) with a cold soldering iron tip. If the pin moves easily, it is not soldered. Also check for shorts at the same time. If you have the patience (and want it to work first try without frying your Xbox), check for shorts and continuity with a multimeter. I skipped this the first time and got bitten! Best to clean the pins and pads with IPA before checking with the multimeter. Step 7: Add the chip-select wire First, figure out which bank you are adding: Then, find the chip-select solder point: Bank 1 CS is left of the label for C4P10 Bank 2 CS is between the labels for C4R12 and C4R13 Bank 3 CS is left and above the label for C4P21 Bank 4 CS is between and above the labels C4R1 and C3R1 For banks 2 and 3, the chip-select wire can go through the hole to the left of the GPU. For bank 2, 90mm may be too short, so check the wire length and cut it as short as possible. I removed the GPU heatsink to access this hole. At this point, it should look something like this: Step 8: Reassemble and test in XBlast For a quick test, I don't bother with adding the fan, GPU heatsink, HDD, or DVD drive. The test in XBlast should look like what I first posted on reddit: If the Xbox reboots twice and FRAGs, check the bios selection (if you have one available). A normal BIOS will not accept between 1 and 3 extra RAM chips. If the Xbox reboots three of four times (and it's faster than a normal FRAG sequence) check for shorts. This happened to me. Step 9: Repeat for the other 3 chips The first one is the hardest. Step 10: Reflash with your favourite BIOS Some 1.6 BIOSs won't support 128MB. The X3 BIOS works just fine and it's the only one I tested so far. xblast_os_v0.60.bin
- 93 replies
-
- 19
-

-

-
Lost all my consoles when my basement flooded, anyone have a console with 128mb ram & a makemhz hdmi kit installed they are willing to part ways with? Thanks!
-
Hello, I have bought chips for this mod. I want to ask if after putting the chips 1 by 1 it is possible to test if it is soldered well or do they all have to be soldered?
-
I installed the Origins based image and upgraded to 128MB of RAM. Also added an SPDIF port for digital audio. If you would like it, please make an offer. Thanks guys
-
128MB, Cerbios, 2tb drive based on the origins image with a few extra things. I would like 300.
-
Hi friends! as title says I get error 16 every time I boot with Cerbios , and i get that error with m8+ too when i turn on Xbox with eject tray ,everything were fine before I decided to give 128mb ram upgrade a shot on my 1.6 OGxbox , I have deleted and formatted all the partitions and installed everything from scratch still i am getting that error , I dont know that if it is hardware related or not please help me I am out of patience by trial and error
-
The microscope is a total game changer. It's nice to be using brand new, unused RAM chips instead of having to question the chips I'm using. I think I'm confident enough now to perform this mod on all the boxes that now pass through my possession. Need to sell them though... Hopefully Facebook Marketplace can help me there!
- 12 replies
-
- 3
-
-
- 2nd
- successful
- (and 3 more)
-
Holy shit. This was quite the process and really tested my patients. First off I installed all 4 chips at once since I didn't think Xblast could be flashed to the tsop or that it wasn't a good idea. I know better for next time. Took me about 2 hours to get all the chips installed and I thought my soldering looked really good. No bridges, but all this xbox would do is frag. After fucking with it for about 4 hours I decided I had enough and put it away thinking the box was dead. This morning I decided to have another go at it, went back over my soldering and once again thought it looked really good but the damn machine still wouldn't boot. Now, I'm really frustrated. I take out the solder braid and start wicking off the solder in attempt to remove the chips. I notice that a couple of pins are slightly bent and might be touching other pads. I proceed to straighten them out, partially lifting a pad in the process. Once I get all of that done, I'm thinking there is no way this thing is going to start now. Well it surprised the shit out of me, it booted and all 4 ram chips passed. Maybe today is the day I should go buy a lottery ticket cause I feel pretty damn lucky this actually worked. If I do it again I'll be putting xblast on the tsop.
- 43 replies
-
- 1
-
-
- adventures
- with
- (and 3 more)
-
One down! 3 to go...
-
So I done a ram upgrade which resulted in a freeze, red/orange then frag (wasn’t able to test 1 by 1), removing all 4 chips didn’t fix the issue. Attempting it again with another board, first chip was a success with xblast, second chip was installed by the cpu, xblast then froze when checking that chip and now that console is fragging, again removing that one chip doesn’t fix the issue. Are the boards dead or is there things I can try?
-
Is there a bios patch to support 128mb ram for the m8 plus bios? I have a launch xboxhdmi kit from makemhz that I'm going to install tomorrow.
-
Just playing around with CoinOps and was looking to see if I could tell any performance improvements with the additional RAM. So far I'm really not sure. I did notice however, that Advanced Settings seems to allow you to increase the memory available for it to call upon. Anyone know if this would do anything or if coinops just uses whatever memory is available by default? Edit: Reading into it a bit further, it seems you have to patch the .xbes WITHIN CoinOps to be 128mb compatible so idk really.
-
 Hi, Long story short i brought a v1.1 Board and PSU- TSOP with x2_5035 BIOS i was told from the seller, Then brought a Stock faulty xbox (Trace rot), installed new board and PSU into the faulty xbox, Kept he stock HDD and DVD Drive from the faulty Xbox...... Anyway powers up (No Flubber) say's EXECUTER2 CONFIG LIVE LOADING..... and stays on that screen, Eject button FRAG's Is it looking for somthing from the HDD? I did try Hexen and various other Installer DVD's that work on my other consoles. Faulty DVD drive? Im a total TSOP noob and would appreciate some advice please, Theres a video i upped to my Dropbox so you can see what im talking about. Thanks all. https://www.dropbox.com/s/d4t4sh6u1k9zvp0/PXL_20221128_181143241.mp4?dl=0
 -
 photo 01 photo 02 photo 03 photo 04 photo 05 provides more power and memory for: - removing slowdowns in emulators - hex patches for 720p output resolution - improved dashboard performance on 720p resolution - improved Linux performance 2TB HDD storage: - new unit installed Xerc2: - makes your Xbox turn ON and OFF from a remote (some TV remotes or Xbox DVD remote) - IR receiver was installed on the left bottom side of the front panel (requires some tweaks to work with your remote) OGX360: - lets you connect wireless Xbox 360 controllers to Xbox Original - installed internally (can be turned ON and OFF by clicking the button on left bottom side of the front panel) - 2 channels soldered and programmed (controller port 1 and 2) - OGX360 USB is located on the back of the console Others: - has 2 options, one for stock Xbox speed, and another one for 1067mhz this way you can play stock Xbox games without troubles and glitches, and also play Emulators in fullspeed - painted blue (automotive paint then clear coat) Listing contains: 1 x Xbox console (with 1ghz CPU, 128mb RAM, 2TB HDD, XERC2 and OGX360) 1 x Wireless Xbox 360 controller 1 x Wireless Xbox 360 receiver for PC 1 x Power Cord (USA or European depending on your location, same for Power Supply, if you are from USA it will be 110v, if from Europe - 220v) 1 x Xbox2HDMI
 -
See here... The guy claims to have "stacked" the ram chips but is yet to supply any photo proof. He said this "You're damn right. I just finished all 4 chips and the X3 bios detects it and all is good :)" so seems to have succeeded. If so this is a world first , yeah??
-
 Hi folks, first time listener, first time caller. I recently inherited a 1.1 console and am going through the motions of getting it rounded out and looking pretty. I went ahead and did the Rocky softmod, and today I successfully converted it over to a 2TB 2.5" WD drive. No issues. I have the MakeMHZ XboxHD+ kit coming tomorrow along with modchip, so I figured I'd go ahead and get this 128MB upgrade knocked out. I'm not a novice solder head by any means, I do a lot of work with my station on a fairly regular basis. I installed all four RAM chips and went to test, got the crappy flashing lights and forced a boot into dash anyway. 2 of the RAM chips didn't pass. No big deal, powered the console off and went back to work. Once I was satisfied with my handiwork (reflowing, checking for bridging, etc) I put everything back together. Now I get no flubber startup, no audio, nothing. The light on the XBOX is solid green and shows no errors. I can't FTP into the XBOX either. Drive eject works fine, the NIC light is flashing in the back when cabled. I've tried the llamma coma tech as well (both sides) and that doesn't seem to force boot the system either. What should I do here?
 -
Hey guys, I've got a 1.2 that I spent the weekend revitalizing with all new fresh capacitors and upgrading the RAM to 128mb. Everything went well. I had Xblast reading all 128mb, and everything was working a treat. That is until I went to pull it apart for final disassembly to clean the case and everything up before putting all back together for the last time. I first removed the SATA/IDE adapter from the HDD, leaving the molex connector in place and holding it by the cables and moved the HDD tray out of the way. It was then, that I somehow managed to let the SATA/IDE adapter dangle enough for it to brush the PSU right along side the big 470uF 250v capacitor without realizing it. And in my excited haste, I had not yet disconnected the power cord from the Xbox... As soon as I saw the bright flash and pop that was the SATA adapter getting completely obliterated, my heart immediately sank. The adapter, of course, is thoroughly destroyed. The logic IC and one of the voltage regulators quite literally exploded. At that point, I knew I'd be extremely lucky if it was the only casualty. On the Xbox itself, it blew the T3.15A on the PSU. I had some spare 3 amp glass slow-blow fuses, so I rigged one up until I get the proper cylindrical fuse to replace it later this week. Surprisingly enough, the PSU still works fine, albeit with a slight discolored battle scar on side of the big capacitor... However the motherboard is a different story. It now 3 boot/FRAGs both with or without the X2.3b lite I've had installed for years present. Thinking I had fried it, not feeling too optimistic about fixing it, I harvested the newly installed RAM, and original RAM but subsequently reinstalled the original, after changing my mind on giving up so quickly. Anyway, I've tried all the troubleshooting methods I could with what tools I have at my disposal, which is not much. All the PSU voltages are good. I've swapped PSUs with another, just in case. One observation I made is that the MCPX X3 gets really hot very quickly, so I'm sort of thinking it's shorted and therefore also toast, and that's what's causing it to FRAG. In any case, I figured, maybe I'd share my story for your entertainment, and maybe even see if any of you had any suggestions on what else I might try to test before I go on the hunt for a replacement board and continue scavenging useful parts from this one.
-
 Hey all, I've just got back into playing my original xbox and I've got XMBC4GAMERS set up on a new 2tb HDD. Can anyone advise on patching xbe game files using Linux so that i can take advantage of 128mb of RAM?
 -
I would like to use my Xbox as an Arcade emulation machine but found that certain games don't run at full speed (e.g Outrunners plays at 40fps most of the time, Outzone has lots of slowdown when there's any paralax or lots happening on screen, etc). I was wondering if an Xbox with the 128mb RAM upgrade would help with these performance problems?
-
I recently took a non-functional 1.0 board with 128mb of ram to a shop and asked that they move the extra ram to another working 1.0 board. Upon getting the unit back I'm noticing some unique behavior and most importantly that it won't boot. I do have an Xblast Lite chip connected, D0 goes from the point on the back to the correct location on the chip. The chip is installed with a header. When I boot with the chip connected, I get a reboot twice and then the Flashing Red and Green. When I disconnect the chip from the headers I get two reboots and a Red and Orange light. Anything I should have the installer checking out specifically with the above in mind? It looks like they had some pad lifting issues.
-
Hi Everyone! I'm in the market for a 1.0 motherboard that has had the extra ram up to 128mb chips added, has had all the caps replaced, the clock cap removed, the TSOP write points restored, and CPU thermal paste replaced. Essentially a nicely restored 128mb 1.0 motherboard that won't give me any trouble for! Optionally it would be nice to have the LPC pin headers installed in the case recovery is needed. I know there is a lot of time in that request between the caps and the ram, so please name your price. I'm in the US.
-
I lost my N64 freak 1.4ghz Xbox in a fire last year when our house burned down and am sad to see he no longer makes them. If anyone has one I'm willing to buy. I'm in the USA. Name your price. Thanks, Jake
-
 Greetings from Japan, wonderful people of this wonderful forum! I have been a long time lurker and and even longer time dreamer (to have a OG Xbox). As you might know here in Japan Original Xboxes are rare and come pretty expensive (50 to 120usd depending on the conditions). Anyway I recently bit the bullet and for 4500jpy(40usd) got my hands on a semitransparent black limited edition with controllers HD converters and original cables, all in very good conditions (externally). DVD is finicky but after few shots works. MB should be a 1.0 according to serial number. The seal is still intact which makes me believe nobody has been in there. I got a copy of splinter cell, ordered usb port and ide-to-sata interface, ide cables. I am studying now right usb stick while I was looking my chances for a softmod and maybe an HDD upgrade (I have many laying around). I read discussions in which members say "chip or death" but I am noob with solder - I fix almost everything all the time so I do not know if it is a bit of a complex, Japanese humility or just I am still a noob for real. Let's just say I am not confident enough to try TSOP or modchips on this beauty while just remove the clock capacitor is something I would feel totally ok doing. Looking around for component I stumbled upon this seller online that offers what stated in the title: a modded xbox 128mb ram, 2tb, fanless heatsink, softmodded for 200usd. I mean just the components are about 150usd. The guy clearly loves xbox. The fan-less heat-sink and the lack of a modchip are the only two things that really make me go like "nani?" especially the heat sink so I decided to ask here... I know that later models did not have one but is it safe? also how it is the price? should I just drop it and buy this one or should I softmod it by myself? In case can I swap the "shell" with the one I have or depends on the MB series? Thank you for reading this huge thing. edit: also can you suggest me a reliable and noob friendly step by step guide to softmod?
 -
I have a 1.0 with 128mb installed that is TSOP'd that without any of my own intervention started to frag (green light off, green light off, red green flashing). The only even prior was transferring games overnight via FTP. I'm not sure if something overheated or what but the xbox had frozen during the transfer and upon rebooting is when the frag started. I'd love some advice on how best to troubleshoot the issue. I installed a xblast lite to see if it was a TSOP issue and the outcome is still the same. Any ideas on what I should try next? I'm not noticing any caps that look out of sorts.
.thumb.jpg.926686e935310eae9234f93588b0e1f4.jpg)


Board Life Status
Board startup date: April 23, 2017 12:45:48