Search the Community
Showing results for tags 'hdmi'.
-
Hello, So i revived my V1.0 PAL Xbox (TSOP modded with evox m8 bios) and ordered an HDMI adapter on ebay, hoping to get better resolution in the menues and games that support it. i bought this: https://www.ebay.com/itm/Link-Cable-for-Original-Xbox-System-No-Mod-Required-HDMI-Converter-Line-HDMI-Q/254235287449 Ive used the hexen dvd to activate the 480p,720p and 1080i in the MS dashboard. but when i start the system my projector freaks out and states that it first recieves a 480i signal, then a 640x200 120hz(!) signal. Any clue to what this could be? i'm running through a onkyo tx-nr626 av reciever and a optoma 200hd projector. the onkyo just denies passing the 640x200 signal trough. if i connect the projector directly to the hdmi adapter i get a very strange image(probably just the 640x200 data overlapped) I can change to the normal composite cable without any issues in 480i trough the reciever and projector with 1080p upscaling.
-
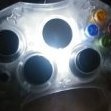
Since I had taken these pics to show N64Freak to troubleshoot my DIY install of his internal HDMI mod, I figured I could also post them here. This is my 1.6 XBOX motherboard. Since it runs my arcade pedestal, I only needed the board itself. It is on wood and plastic spacers off the wooden base I created. Standard AladdinXT modchip. For a much quieter, and at least as cool if not cooler, machine I replaced the heatsinks with these GPU coolers. Works after a few hours of play and no temperature issues. Here is the Toslink optical port mounted (still having some issues getting sound out of it for some reason) And here is another view of the HDMI install. My advice for anyone else doing this install is to use good solder, good flux, and a HOT iron. And double check every connection with a multimeter, as from some of the install steps, there is no turning back to fix.
-
Hey guys, I’m new here, and was inquiring how to purchase the N64 freak external HDMI cable? If someone can guide me in the right direction, I would really appreciate it. Thank you
-
 Took me 2 days to get all the wiring right. for the wii2hdmi for og xbox modd ... using a wii2hdmi device ordered off eBay you can also find an Alibaba and other places like this. Very inexpensive around 5 Canadian dollars. You're also going to need some sort of a donor Xbox RCA wires or component wires in order to pull this off. There is 11 connections total five of which are ground I do not suggest not adding all the ground cuz could cause interference. Had pretty good luck I made to both of them are crystal clear with no interference. I tested on version 1.0 as well as version 1.4 turned out very good. I tried to look up and down online for some sort of schematic nothing appeared. There was one picture that was in Spanish but it was misleading I tried to look into it to find out who the original inventor was found the person at XB Classics a Brazilian site. After conversating with him he told me that he had better pictures but he would not share. Then I noticed a site that they has linked where they were selling these to the equivalent of 40 US dollars a piece so that is the reason the images that they uploaded are just there to confuse people. So that they cannot make it. Does not include audio left or right. And apparently La stands for 5 V? Don't ask me but that's what the guy told me makes no sense at all. I spent two days getting the wiring correct. I documented everything and put it on a YouTube video (link2come) was trying to figure out the best way to make this readily available for everybody in the world any Xbox Enthusiast should have a low cost HDMI adapter solution available to them this is where these schematics come in. Again I didn't notice any interference at all. Just a little bit in the Bios when only running 480 but there's not much you can do unless you re Flash the BIOS to force. I've noticed people in the group posting pictures not even having soldering skills and getting very good results from this method. In theory you can use this exact same adapter in order to have an internal HDMI solution. These images are water marked because these are going to be the only good images that are online and I seen the way XB classic does their water mark and it really bugs me that they did that so I wanted to make sure that everyone knows where it came from. That being said I'm Mister James Reid really helped me out with this he volunteered his services in order to take my hard copy drawings that were on paper and make it look something presentable. Which he did and he did a great job thank you very much James I did in fact alter the images to have the watermark across them. Sorry about that but I figured since I put in the work I deserve to have my name on it. If you have any questions please do not hesitate I do not check this site every day but I do come in from time to time. Thanks again and I hope people online can use this receive money from the big corporations like pounds and hyperkin charging ridiculous amounts of money for something so cheap... I've also got a lot of questions recently about people asking if this is any better than component. It uses the component wires in order to transfer the signal into HDMI. I'm not too technical with that end but when looking up the chip number on the actual board for the Wii to HDMI adapter I did notice in there schematics and their breakdown for the actual board they did mention that the video board that does the decoding actually does video on hand splint what kind of video enhancement I have no idea. But it should be an enhancement over component if they are speaking the truth. Anyway gentleman without further delay here are the schematics. I hope this hope somebody somewhere. Thank you very much Frank
- 198 replies
-
- 8
-

-

-
- original xbox hdmi drawings diagram schematic og
- wii2hdmi
- (and 14 more)
-
I'm kinda new to this forum and was wondering if someone has managed to mod a cable to incorporate both HDMI and Optical SPDIF? I own a softmodded Xbox but would like to start improving it bit by bit, and what's first on my list is having both HDMI and Optical Audio (Coaxial would work too)
-
This HDMI mod replaces the AV port completely and offers an HDMI port instead for convenience. The Installed HDMI mod does look like this: The HDMI mod does offer 5.1 sound through the HDMI port. If you don't need 5.1 (or your TV might not support it) you can simply disable 5.1 audio and get digital stereo audio instead. For those who want to add an optical output to there Xbox the HDMI mod does offer 3 solder points to add a TOTX178 optical transmitter. To get the HDMI mod installed you first need to get the AV-port removed. To get it removed you could either use a hot-air station or a heat-gun to remove it at once. But that would put a lot of thermal stress on the board! The better and recommended alternative is to disassemble the Port and remove it one part at a time. First desolder the Metal Tab holding it in place by heating them and prying the metal tab up to pull it out. When the metal tab is removed take a sidecutter and clip off all the pins from the video port as they are what keeps the Port in place. When they are clipped off you can take the port cover off by simply pulling it upwards. Next step is to remove the remaining plastic piece and desolder the rest of the pins and clean up the area a little. Position the first Adapter exactly as show in the photo. The red arrow marks the PTH that has to be alligned centered. Once Positioned solder all the marked points down and make sure they are properly connected before continuing with the second adapter! After soldering all the necessary points insulate the 2 soler points shown in green. A piece of kapton tape works well. You should do this to be sure there's no unwanted connection occuring between the 2 adapter pcbs. Next up is the second adapter. Just position it above the first adapter using the 2 big holes to allign them and solder down the marked points. Again check continuity before continuing with the next PCB! Last PCB is the HDMI mod itself. You need to position it slightly off centered on the second PCB. The HDMI ports pins will be position it correctly. Just solder down the points that are marked with the red arrows and the install is almos done! Last up is setting the Video mode. You need to add 2 small bridges on the bottom side of the PCB. Just solder in the 2 bridges and the video mode is set correctly! If you want to use the optical out you can easily add a toslink port to the HDMI mod by simply soldering a Transmitter to the 3 marked pins.
-
I just got in a pound HDMI cable, and it runs most games just fine. I played Mech Assault and the screen is green. I tried switching back to the composite cables (RWY) and I still have a green screen on Mech Assault. I have went through with the pound and made sure all video settings matched on MS dash and UnleashX dash. Still have a green screen. The Mech Assault I was using was Platinums Hits. I loaded up the original non PH disc and I have no green screen. I would like to use my pound cable, but I have no clue how to get rid of the green screen if it comes on the original disc. Any ideas as to how to resolves the green background? -Rocky5, UnleashX, 1.6 Xbox.
-
Sorry for the terrible quality picture. So, I'm using a Hyperkin HDMI-AV cable, and the dash is scaling the centerpiece very oddly. It's still working properly, but icons for apps and games seem to face to the right significantly. Is it because the aspect ratio has changed to 16:9 and 1080i support is on? It's not causing any issues with usability, but it looks really weird. Anyone else have the same issues?
-
Hey do you guys recommend the hdmi pound cable if not what are some good ones
-
so I'm working on an internal hdmi mod among other things..... would you also want an optical and or rca output for the spdif, our just spdif over the hdmi? this is currently an external design, but I'm making it an internal currently. https://imgur.com/iJKaQjN also have another project some of you may recognize... https://imgur.com/a/fCjAnTp
-
Dear All, As most users on this forum have faced the same issue, which solution is best for better video quality, I own a so called "cheap" component cable, which in fact is not so bad as I imaged, besides having a slight ghosting on the image, when I remove the audio (left/right) rca, the issue is more or less gone, but on the flip coin no sound. So I figured out what could be to fix the issue of HD picture. 1) I thought of getting a converter from component to hdmi, namely "Portta PETRHS YPbPr Component Video and L/R RCA Audio to HDMI Converter Upscaler 720p 1080p" which converters the signals from the component cable to straight HDMI signals and hopefully the ghosting effect could be gone with this solution, given the treatment the box does to the conversion and have an upscale image. 2) Or ditching the components cable and buy this HDMI Link cable, on amazon https://www.amazon.co.uk/Original-MASCARRY-No-Mods-Required-Converter/dp/B07JHJB1Y8?SubscriptionId=AKIAJKVC5TM5C4Y6TOSQ&tag=haggle-web-en-21&linkCode=xm2&camp=2025&creative=165953&creativeASIN=B07JHJB1Y8 My system is a 1.4 revision of the Xbox, read horrible stuffs about xbox 1.4 and hdmi converters like Pound, but this one is of a different brand. What are you thoughts on this?
-
Got 10 Diy install sets for the internal HDMI mod for sale right now. Keep in mind you should be handy with a soldering iron. It's not a lot more complicated than a chip install but if you already have trouble with an xbox chip leave this mod alone for now. Price for each set is: 70€ +shipping costs. Drop me a PM if you want one! The install set does include the main HDMI mod and the install adapters for ONE motherboard revisions so you have to decide which revision mothebroard to use when ordering
- 42 replies
-
- 6
-
-
-
- internal hdmi
- hdmi
- (and 4 more)
-
Hi Guys. I received the Hyperkin HDMI cable today that I ordered a few days ago. Unfortunately it didn't perform any better than the Pound cable, in fact I think the Pound cable is better. I have five XBOXs; three v1.0s, one v1.3 and one v1.4. All of my XBOXs have the Conexant video encoder except for the v1.4 which has a Focus video encoder. Of the five systems I have, two of the v1.0s work well with the Pound cable and the Hyperkin cable, (no interference or noise in the signal). But with one of the v1.0s as well as the v1.3 and v1.4 there is noise and interference with both the Pound cable and the Hyperkin cable, although it's worse with the Hyperkin cable. Also, when I called Hyperkin today to discuss this with them and ultimately request a refund, they were quite rude. I had high hopes for this cable but was left very dissapointed. Just wanted to share this with everyone incase you were considering getting one. I wouldn't recommend it.
-
Hey guys, So @N64 freak posted his awesome PCB HDMI converter in another thread. With luck he will be able to make these available for everyone. Until such a time I am annoyed with having my DIY Component cable going into a cheap amazon converter. I figure it would be easy enough to do the "dirty version" where you gut a converter down to the PCB and solder wires to the mobo. In researching the pinout of the AV connector on the mobo i found a great post from a gent named William Quade. He did a nice write up on his blog about doing it and I thought i'd share it here in case someone else is interested. https://quade.co/2017/original-xbox-hdmi/ Note: He admits his hole for the HDMI port is terrible and I recommend anyone who's doing this mod do it properly with a panel mount HDMI or at the very least, cut the hole with a dremel. His looks like a tiny bear was trying to get into his xbox but the point of the blog post was to show where you need to solder which is the important part.
-
any one has this device and tested it with the og xbox
-
I've been asked about hot to internally install my HDMI mod into an Xbox. Well i finally found the time and did such an install properly! As i don't like soldering wires all over the place i went a different route and made it a permanent install replacing the original Video Connector. Cause who would use an old composite cable if you have an hdmi out right? Audio is provided through the HDMI signal of course and it supports 5.1. And with the 3D printed plate to cover the rest off the opening it looks perfect in my eyes. And the best part it does almost not need any modification to the Case! Well except trimming a tiny bit off the DVD caddy so it doesn't touch the PCB. The PCB itself does fit into any revision console and is relatively easy to install. Any thoughts about the install?
- 71 replies
-
- 14
-
-
-
Since there is no clear tutorial on the web I will submit it! I have made a few plugs from wii2hdmi converters. These converters are plenty and cheap, they do not upscale, unless you buy more expensive wii2hdmi plugs with a hole on the top. To follow this tutorial you need a few items: (aftermarket preferred) av cable Wii2hdmi converter Thin wire A few tools: Soldering iron, preferred regulated station. Sharp knife Cutting tools for metal (angle grinder is fast) Electrical wire stripper/cutter A pocket knife or small screwdriver. I used a chinese av cable, the long and short soldering connections are opposite to original! Just follow the pictures and you will be on hdmi in no-time. Reminder, the wii2hdmi boards are very sensitive to static electricity, i have busted a few. Cut of the connector. Cut in the sides to release easily. remove plug and open up. cut the metal on the black line. bend the pins open as far as possible, this will sturdy up the connector. remove the hot glue, on original cables it is a piece of tape. desolder the wires. place the mode selector connections, use the shortes wire you can, unshielded is o.k.open up the wii2hdmi and snap off the connector. clean all the contacts make the first connection, it will sturdy fings up, the lid has the exact size you need. with 2 cables installed, you do not need the spacer anymore. make sure all the cables are as short as possible and don't short out each other! add a piece of insulation tape at both sides. It is wise to test it at this stage, later on it will be a pain in the a**. measure and cut the hole for the metal, it should slide in without to much hussle. cut the top metal piece at the black line. slide the metal piece in as far as possible. This will hold the internals in place! solder it at the top and the sides. Your plug will not fall apart if you remove it from the xbox this way. insert the completed converter, push it through as far as possible and solder a wire to the top and bottom, against the plastic, this will keep the internals in place and removes stress on the converter. time to test! 720x480@60i, the boot screen, some tv units have problems displaying this throigh hdmi! we have reached 1920x1080@60i, maximum resolution of xbmc, although I advice to use 720. If you miss the options for higher resolution, make sure the system is set to NTSC, in pal it is unavailable. Use enigma video switcher. I will start to sell these adapters in a short while for €45,- due to the work it takes. I have given all the connection types another color and the pin numbers are not the official ones! Any questions? Be free to ask.
-
So finally got the case for the HDMI cable finished! The cable itself does work good and is finally in the last steps off testing. Decided to add the OGX logo to the case to make it look even better. So a little more detail about the hardware now! It is basically a Component to HDMI converter that does reencode the Component signal to a HDMI signal. The Xbox will recognize the cable as a component cable and it is plug and play without the need for an extra psu or anything. The HDMI signal does provide stereo audio and there is an optical out on the pcb for digital audio. Can print the case in different colors once the cables are for sale! Before a lot off people ask about them now they will be for sale in around 4 weeks and i will post the add here in the Forums. Will offer them as finished cable and as an internal install kit without the cable and avip plug for those who want to do an internal install on there Xbox. So keep checking the forums not just facebook And without further talking that's how the final product looks like:


.thumb.png.9f1172f8f3c96f292594247a50c4c1f3.png)


Board Life Status
Board startup date: April 23, 2017 12:45:48