Search the Community
Showing results for tags 'development'.
Found 16 results
-
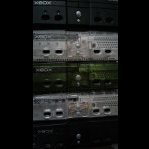
As there might be a couple people out there who want to own an Xbox Alpha Development kit but don’t want to spend the Cash they cost I thought I just write up a guide how to build one yourself with off the shelf parts! This is not the first guide about this topic out there but hopefully the most detailed and helpfull! I’m going to do this as a picture supported step-by-step guide so it should be easy to follow for anybody. Let’s start with the parts used in the Alpha2 Console: -Intel VC820 Desktop Board -128MB RD Ram (Kingston KVR800X 18-8/128) -733Mhz Slot 1 CPU (Part number SL3XN) -250Watt ATX PSU (ATNG Model: PS-250S) -20GB IDE HDD (Fujitsu MPF3204AT) -3,5” FDD (Sony MPF920-C) -DVD Drive (Hitachi GD-7000) -64MB Geforce3 (180-P0050-0000-A05) -Network Card (Intel Pro/100) -Soundcard (Wolfson Micronics WM9707_AMR_EV1_Rev2) -USB Card (Xircom Portgear PGPCI2 ) Now on to the parts you need to buy for a basic bootable setup: -Intel VC820 Desktop Board (CC820 should also work!) -128MB RD Ram -733Mhz Slot1 CPU -Any ATX PSU 250Watt or more -IDE HDD 20GB or bigger -Any DVD Drive that reads self-burned CD-r -64mb Geforce 3 NV20 Video Card ->more details a bit later! -Intel Pro/100 Network Card That’s the minimum that is needed to get the alpha to boot the recovery CD. If you want to be able to do anything except looking at the Recovery Screen you need some more parts: -2 Port USB Card that uses an Opti Firelink 82C861 Chipset -Xbox Controller to USB Adapter +Xbox Controller -Wolfson Micronics Soundcard (or the recreated Version) -Any Case to install it all to. (The original case for the alphas is the GlobalWin YCC-802) That’s how my stack off parts for the alpha looks like: Once you have all the parts together let’s start by putting it together! Guess I don’t have to cover how to install the CPU, Ram, Video Card, PSU, Network card, Audio Card and the Drives. The end result should look like this. It’s not important in which pci port the usb and lan card are installed. BUT it is important that the lan card is installed as the Alpha won’t boot otherwise!!! When it’s all put together turn it on and check that it properly posts and there are no errors or whatever before continuing! Now on to burning a recovery CD! (Thanks to Borman for releasing the May2001 Alpha2 recovery! All credit goes to him for the release!) You can find the files in the download section and can simply download them. Here's a direct link to the files on an external Server: Alpha Recoveries and VGA Bios Once downloaded just use ImgBurn (or any other iso burning software) to write the May2001 recovery to a cd-r disc. Pop that disc into the DVD drive off your alpha and you should see the Xbox animation and should be greated by this recovery Screen afterwards: Now (if you haven’t done it earlier) plug in the Controller using the matching adapter and Press any button to start the recovery. The progress bar should show how far the progress is. It shouldn’t take any longer than 5 Minutes to finish and you will see this screen. Then remove the recovery disc from the drive and reboot. You should then be greeted by the following screen where you can set a name for your alpha console. Congratulations your Alpha Development kit is now fully working and ready to be used! Soundcard: I recreated the Soundcard to build a completely working alpha kit for myself as the original Alpha soundcards are as rare as the original alphas. If you need one for your build just drop me a message and I can build a couple more! Graphics Card: The video card is an important part of this build so here’s a little extra information about that part. The Card needs to be an NV20 Core Card with 64mb. 32MB cards might also work but we want to be as close as possible so buy a 64mb card to not get into trouble! I successfully tested 2 card from 2 different vendors: -Medion MS-8838 Geforce3 200ti -MVGA-NVG3T2A 64MB Many other NV20 core cards should work and I gladly extend that list if you used another card on your build! J Flashing the engineering Bios is NOT needed it is only a cosmeticall detail you might enjoy. The motherboard does also not need to be on a special Bios version or anything. Troubleshooting: You Get a blinking black cursor and no Xbox boot animation? ->You might have forgotten to install the Lan card, got a wrong one or your Nvidia Card is not supported! Your DVD-drive doesn’t spin up and you end up with an intel Network card boot/bios Screen? ->Something might have gone wrong with the CD you burned or your drive can’t read the cd-r! Could also be a problem with the boot order! Check that in the Bios the dvd drive should be the first boot device! If you have any questions about the build or anything just drop me a PM!
- 62 replies
-
- 10
-

-
-
Just wanted to see if anyone could help, I have got the devkit up and running on my xbox recently and have been messing around with making something. In general information is fairly hard to find but ive got one or two sites that have got me started. From the application i have created, i can see that i can only access my own folder, it comes up as the D drive. Im guessing that this is done intentionally so as you cant access other folders etc, but how can i access other folders in the filesystem? In the case of the Dashboards, they obviously have access to the full system.. im just wondering how i could do this? If i was to make a Dashboard for example, i would want to be able to list the filesystem and open files etc.. Just hoping someone can help me Out
-
Selling my Raptor PCI Card. This card goes in a computer and connects to a development kit Xbox to facilitate the DVD emulation feature that dev kits support. For more info on what this card is, see here: https://xboxdevwiki.net/DVD_Emulator I bought the card brand new a few months ago. I installed it into my PC and planned on trying to use it with my dev kit, but sold the dev kit before I got to using it. It's in perfect condition. Price: $120 shipped to lower 48 states in the U.S. (if located elsewhere, pm me for shipping rates) Contact me here (reply or PM) or email me directly at my username at gmail dot com. Payment via PayPal (preferred). Shipping via USPS or FedEx. Will be shipped in anti-static bag. Photos -> Full-size: https://i.imgur.com/Do8VKl2.jpg Full-size: https://i.imgur.com/dRQo5N0.jpg More photos available upon request.
-
I'm currently looking into what BIOS images people prefer to use and which ones are more 'universal' than others.. Why? I want to make sure I hold the best compatibility for BIOSes built with Easy-Build.. Currently it uses the 2bl.img and remainder.img from iND BIOS 5001 (Which I use currently) I need to know what Bios Revision, size of ROM and MCPX version if you know it
-
 https://www.ebay.com/i/393018031503?ul_noapp=true
 -
This might interest those that want to turn their retail/debug Xbox into a fully-functioning development kit without having to spend $500+ on one. It works on any version 1.0 through 1.2 motherboard and can be great for troubleshooting crashes of all kinds without requiring the use of XDK software. I'm selling pre-made units for $30 plus shipping and would also like to get a feel for how many might want one in Europe so I can bulk-ship to a distributor to help save some on shipping costs as it's usually around $15 USD to ship from the US otherwise. Everything is fully open-source if you'd like to build/sell them yourself as well. Any questions, feel free to ask. https://github.com/XboxDev/serial-usb-adapter
-
Hey guys, So I have a project where I was able to come in possession of what im assuming to be a original Xbox test kit motherboard. The reason I say this is because it is an xbox motherboard with an MCPX X2 as appose to the X3 and yet it only has 64mb of ram soldered to it. It also looks like one of the previous owners tried to run Hexen and flash a retail bios on it since the solder points have been connected. Since (I'm assuming) it has a retail bios loaded on it it wont boot due to the lack of hidden boot sector in the X2. Ive finally fixed some OpenXeniums ive been working on so I have access to a couple modchips that can fit 1mb bioses in them. I am wondering, with the lack of 128mb of ram on the board, does anyone know if the development bioses will still boot to a screen showing something at least like the startup animation? I would like to see if the board is at least still functional with a proper bios and not completely nuked since it is currently in a state of FRAG that I hope is due to a retail BIOS being flashed on there. Thanks
-
 I recently acquired a Development Kit (DVT4) and decided to take some high-quality photos of the daughter boards from this console. They're pretty rare and obscure and I wanted to take some good photos for preservation's sake. I'm going to get a Raptor PCI card soon, so I'll add photos of that too later. More info- These boards were in development kits and consisted of two parts: DVD emulation board. When paired with a Raptor XDK PCI card installed into a computer, it allows a developer to master a game disc before sending a final copy to Microsoft for review, and later into production. This allowed them to test loading scenarios and figure out where certain files for the game should be physically located on a disc in order to reduce load times. When loading a level for a game, for example, all the files needed for that level could be grouped together on the disc to reduce the amount of skipping around the laser needed to do, which decreases load times. There is also a USB port on this card. While it uses a USB connector, it's actually a JVS port. This was used for hooking up arcade sticks and special components built for Sega Chihiro arcade cabinets, which is based on the Xbox's motherboard. Serial debugging port This allows a developer to get debugging information from the Xbox to see how their code is behaving on real hardware. When writing software, it's useful to see technical info about when and how a bug happens in order to fix it. This board connects to a PC's serial port to read diagnostic info from the console in real time. More info: https://xboxdevwiki.net/Development_Kits Photos taken with a Canon 5D Mark iii, touched up in Lightroom. Link to photo album (includes high-res copies of the photos below): https://imgur.com/a/YRb11os
- 1 reply
-
- 3
-
-
- xbox
- development
- (and 4 more)
-
I recently acquired my first debug kit, and unfortunately wasn't able to salvage the hard drive and had to swap in a new one. I'd like to recreate some of the original debug kit experience and also get a better idea of the kinds of apps you might actually find on a debug kit. I know there's plenty of betas for games that were in development, but I'm more interested in applications similar to the dolphin test and a few others I've seen in youtube videos floating around where there's demo apps made to show developers examples of what the console can do. Is there a repo of this sort of stuff somewhere?
-
 https://www.ebay.com/itm/Prototype-Xbox-Development-Kit-With-Extras/143246533634?hash=item215a28a402:g:KHQAAOSw9kxcx5ms Prototype Xbox Development Kit XDK "DVT4"Console works, is in great condition especially given rarity and age, DVD drive functions and reads disc's.Never opened all asset tags intact. "Note: not all DVT4 units have the prototype tags just the early run models, which this unit is."
 -
Cool video about xbox development, i wonder what your thoughts are, and has anyone got more of this content to share? I'm curious about what PC ports exist and what may have been possible Just read through RandySlims post here, he has a good list of games... nice to run into 'digthatbox' again... its outside of my oxbox TUNNELVISION so i guess i forgot about it
-
Current development of the XBMC4Gamers can be found by following the source link. Source Download Readme Some Background Info: Ok so this started out as a project for my kids, I wanted to give them a dashboard for just loading games and to allow them to have there own saves, as they were fighting over saves and also to not allow them access to anything they should be accessing. Yeah so you can have profiles that have there own save directory on the Xbox, you have a load of views, synopsis support and a crap load of other features that you can see if you check the change log. All done via XBMC source edits, custom skins and python scripts. Youtube Video Game Posters, banners, fanart, icons, thumbs and tbn files all ready for your Xbox. This is a copy of my Game Posters _resources Directory. It consists of banners for all my games as well as thumbs, icons, posters and fanart where available. It's been setup to work with Origins (as well as the default.xml synopsis format that maybe getting added back in) so compatibility with other skins is paramount in my eyes. Game Resource pack
-
- 6
-

-
-
- development
- current
- (and 1 more)
-
Current development of the XBMC-Emustation can be found by following the source link. Source Download Readme Some Background Info: Ok so this started out as a pet project, basically I wanted the look and feel of Retropie on the Xbox. So I used XBMC as the means to do so. Now the XBMC source has been modified to fit my needs for this project and incorporates a few of the changes I made for XBMC4Gamers, like the full screen splash, faster games menu loading, synopsis script support in the context menu and a load of more changes. I also created a few python script to do all the crappy tasks of creating ,cut files for your roms that XBMC loads for emulators or any xbe for that matter but these are used to pass commands to emulators that support this feature. ( most do ) Now I also added layout support for each emulator, there are 3 variations: default ( layout.xml) Synopsis ( synopsis_layout.xml ) Thumb ( thumb_layout.xml ) I will go into more depth about these files in its own thread. I also have included a few emulators ready out of the box so you are up and running as fast as possible. I also make the folder layouts as simple as I could and also matched them to retropie, so porting themes should be easier, as the folders will match up.
-
Current development of the XBMC-Emustation can be found by following the source link. Source Download Install Instructions After extraction, please use the chimp folder located in the E Partition folder. Some Background Info: Basically I wanted to make this simpler to use as I was sick of helping folk that unlocked there HDD and it kind went on from there. It now has faster cloning, simpler interface and more features than any other chimp out there, so this should make cloning HDD’s easier. Oh yeah you can Fix Error16 with this version if you have the eeprom.bin from your arsed Xbox. ( if you null all your HDD keys then you don’t ) You place your eeprom.bin on the Y partition ( all lowercase ) and launch Chimp Loader, you can now use that eeprom to lock the slave HDD.
-
- 3
-
-
-
- current
- development
- (and 2 more)
-
Current development of the Xbox Softmodding Tool can be found by following this link. Some Background Info: The reason I started the project was to stop my kids from breaking there Xbox. As you know kids get into everything and all it would take is for one of them to hit Xbox live in a game and bam, I need to fix the softmod. So I setout to make a softmod that was simple to install and secure or as secure as I could make it, and the 2014 Softmodding Tool Kit was born. Fast forward 2 years and I picked it up again as life was a bit crappy so needed something to drown it out, this is when the 2016 Softmodding Tool Kit was created, I took with I done with the 2014 version and built upon it to make it even more simple and safer for the end user. But to cut the story short, I never finished it or it wasn’t how I wanted it to be, so I rebranded it and fixed it up and made a few ( hevely modified Configmagic source ) apps to do processes and a crap load more. Let’s just say it’s the most advanced softmod installer to date, and probably for the foreseeable future.


Board Life Status
Board startup date: April 23, 2017 12:45:48